week 3
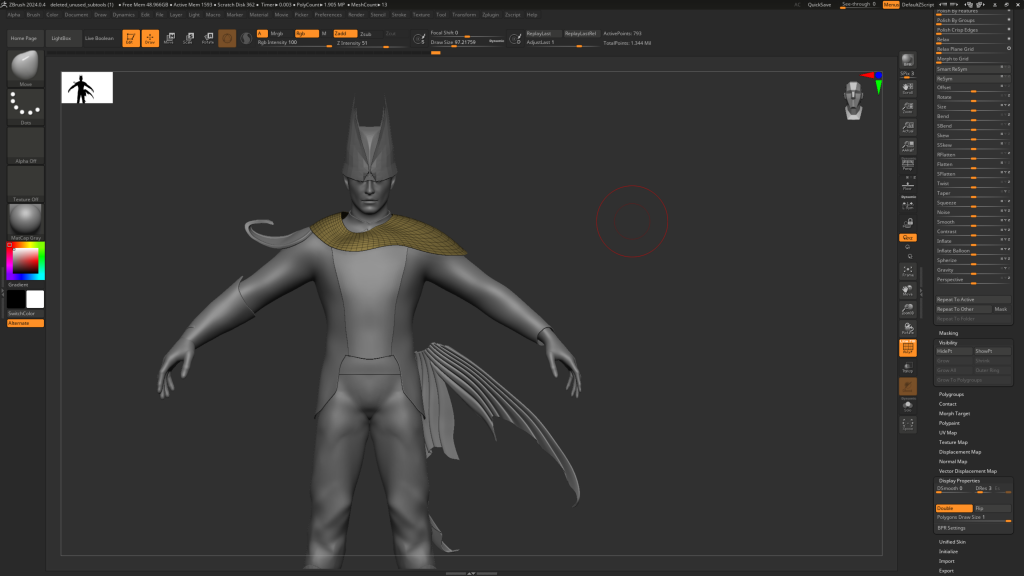
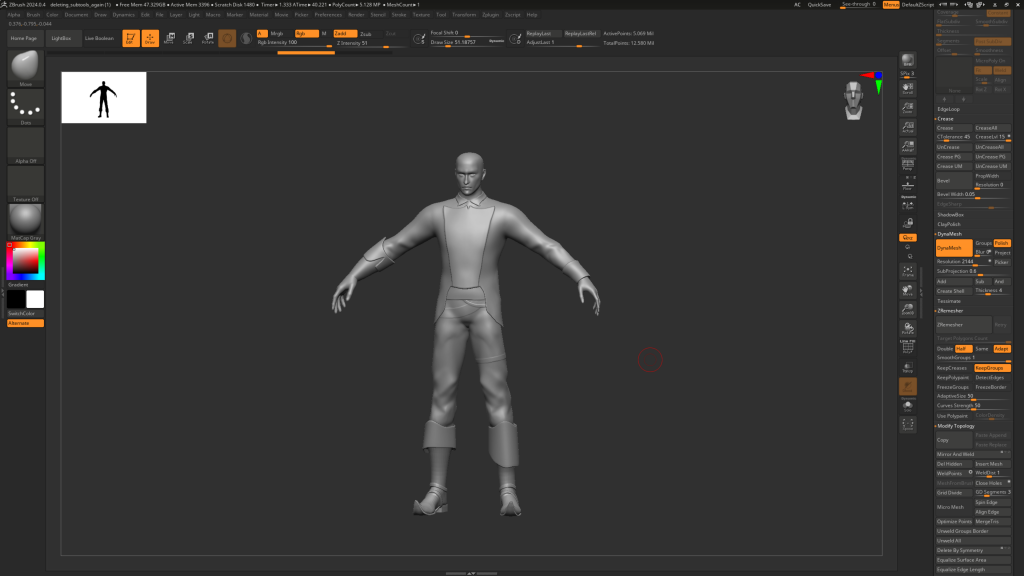
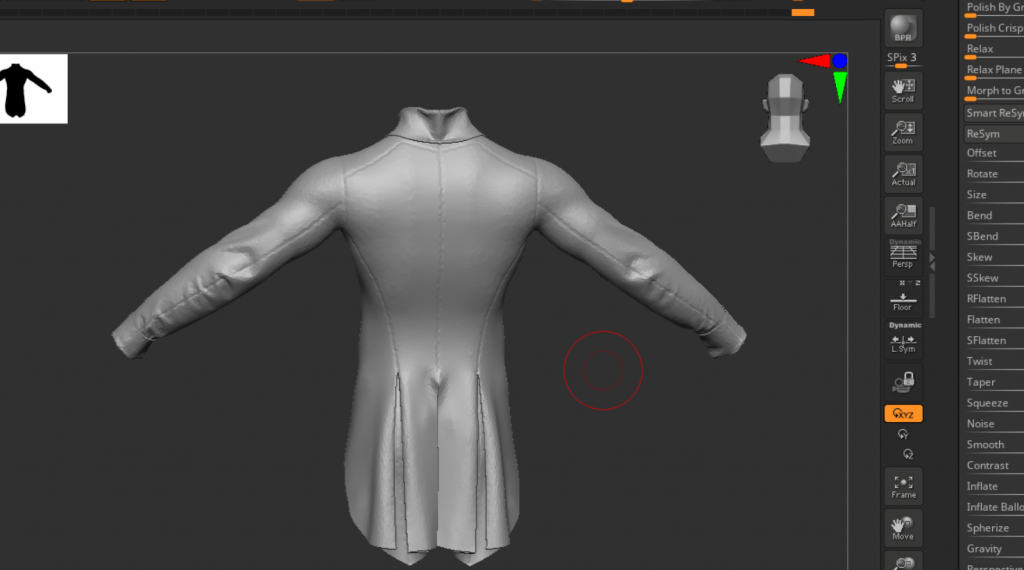
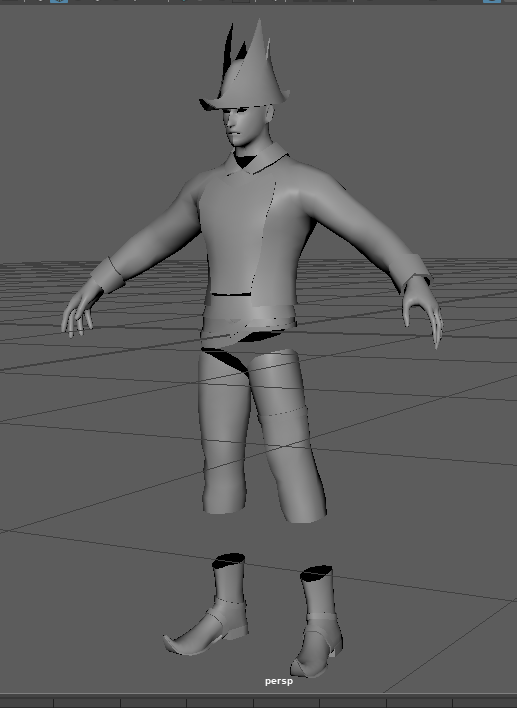
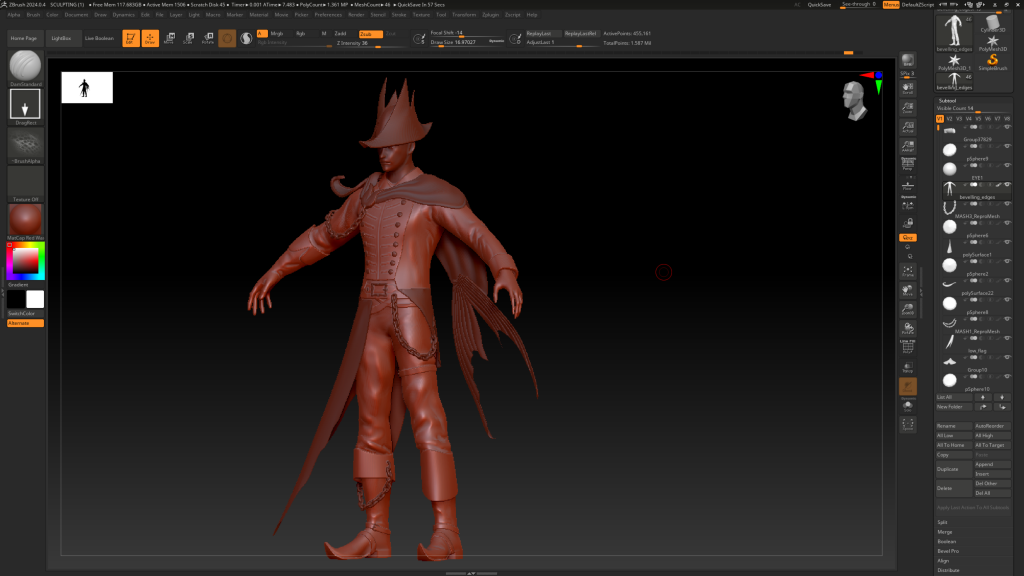
as a base for the body i used the Zbrush male base mesh and used the move brush to adjust the proportions.
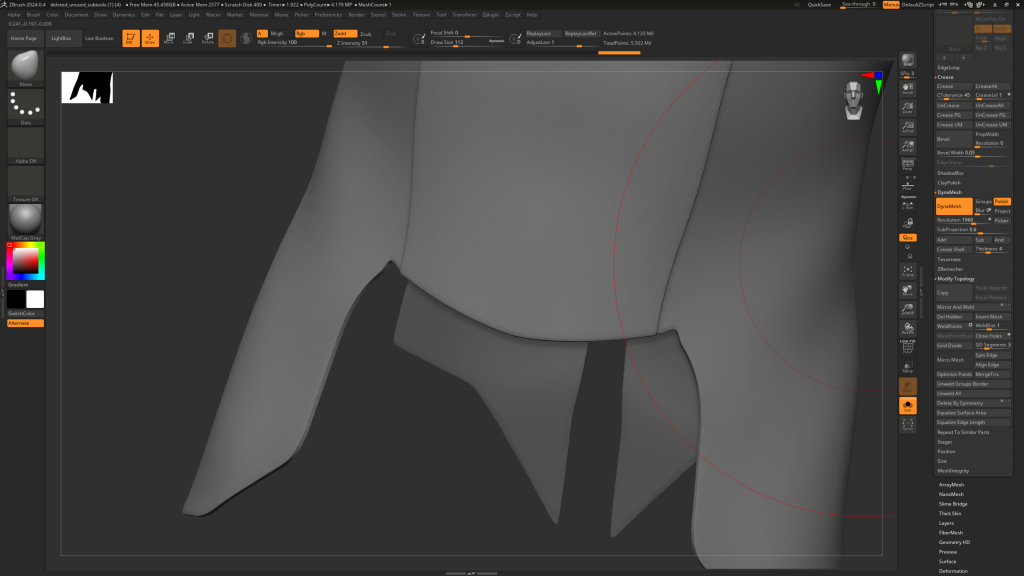
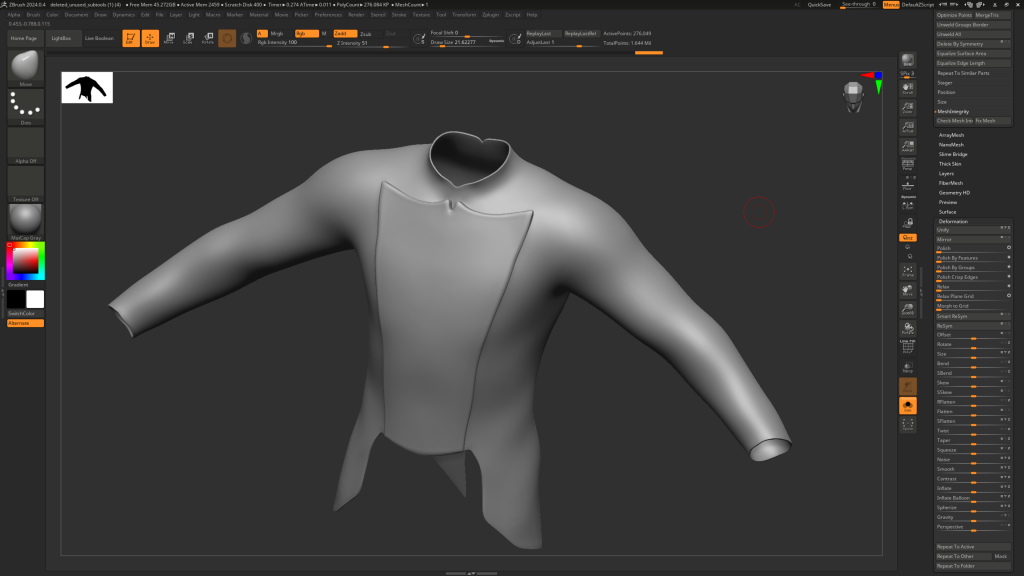
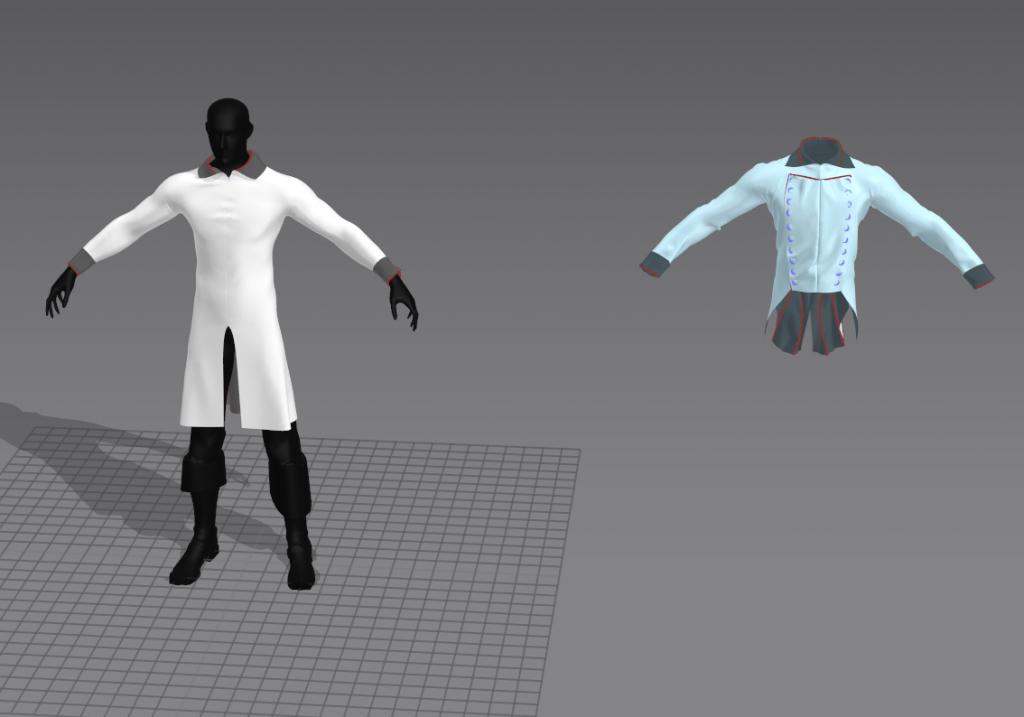
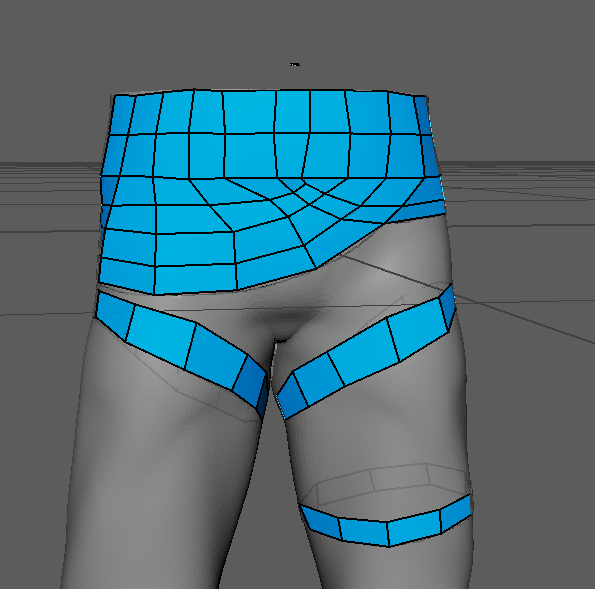
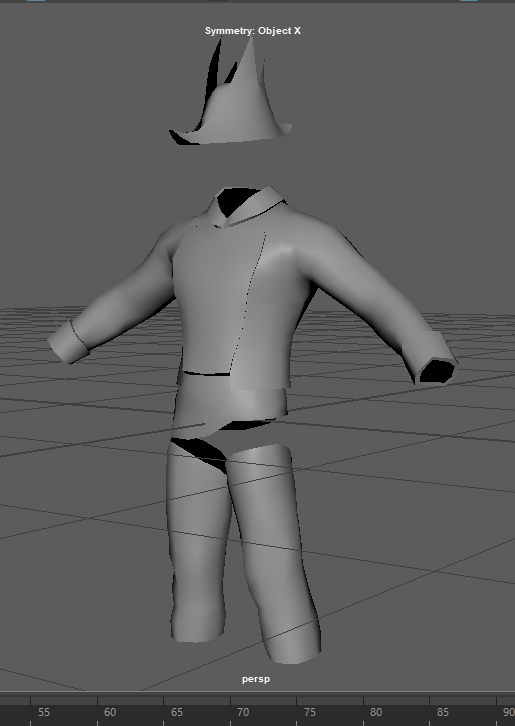
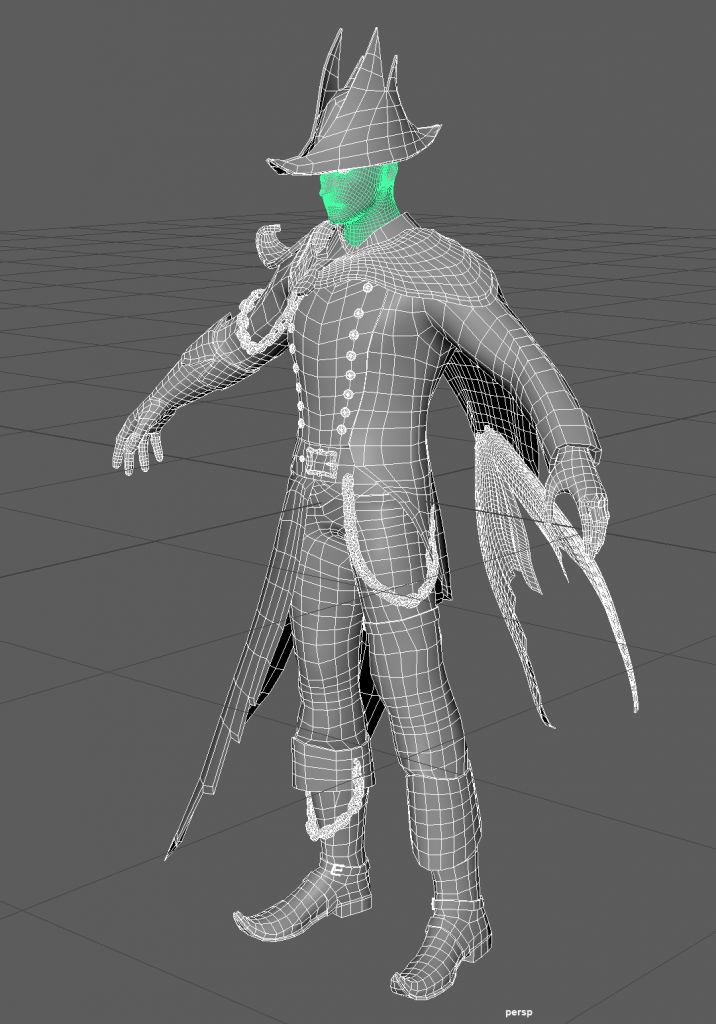
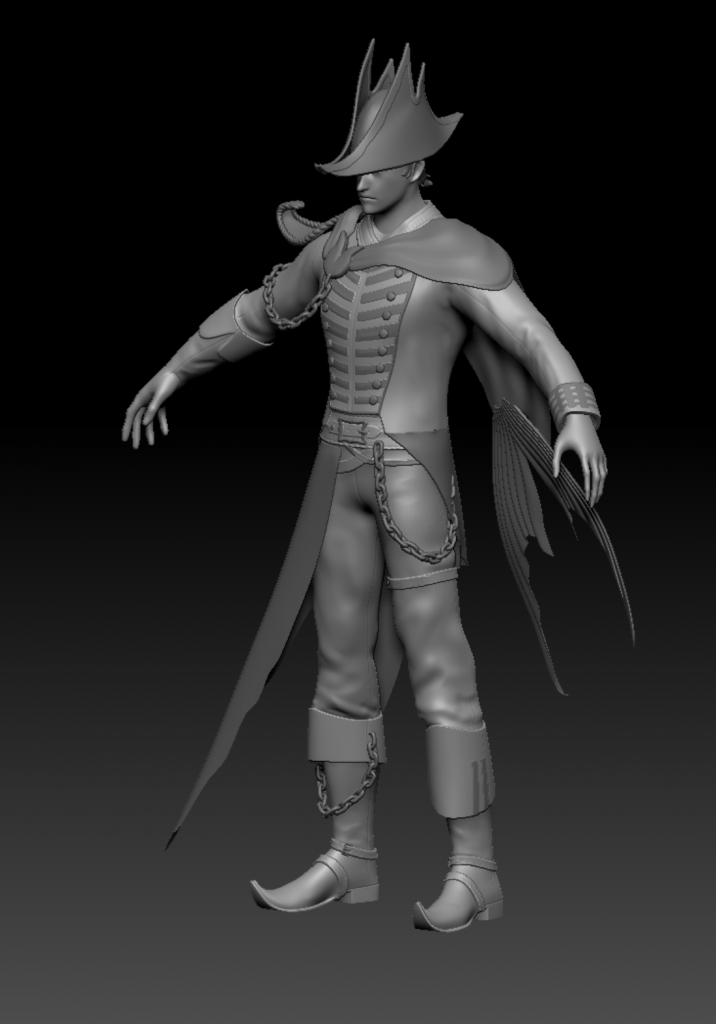
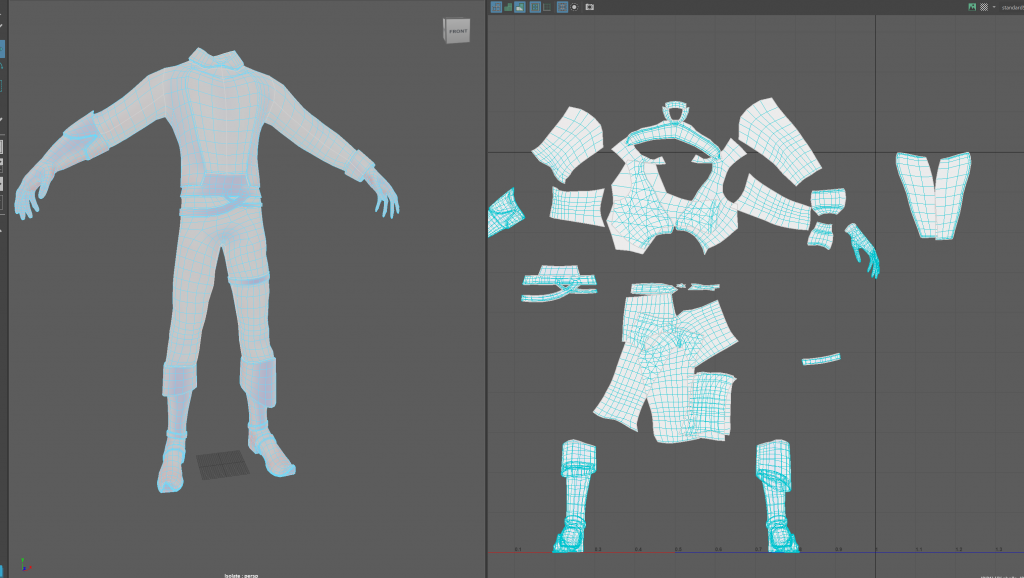
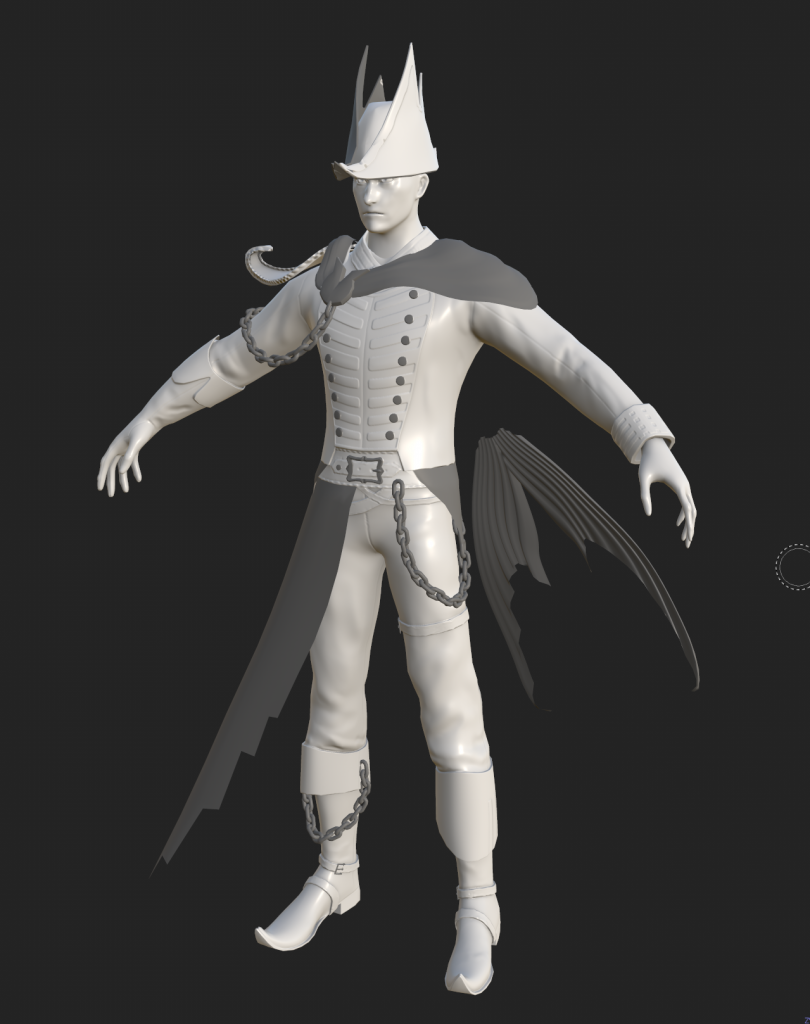
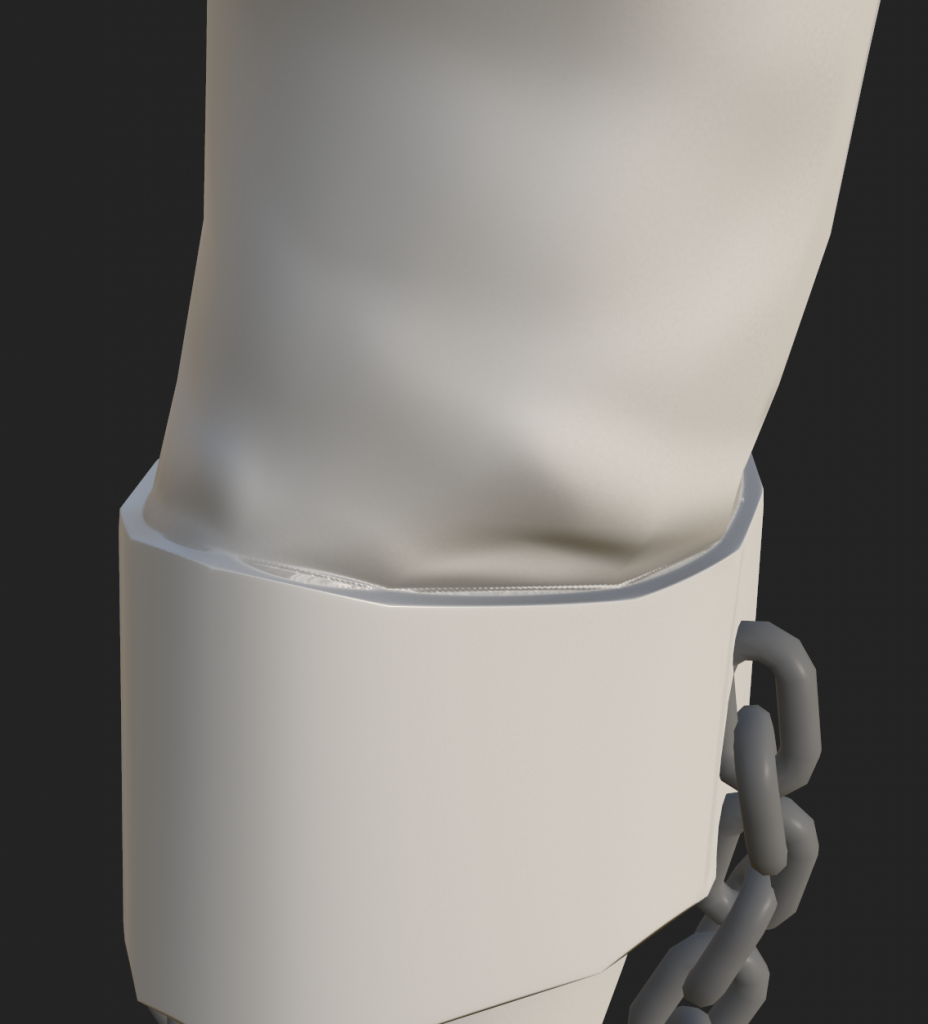
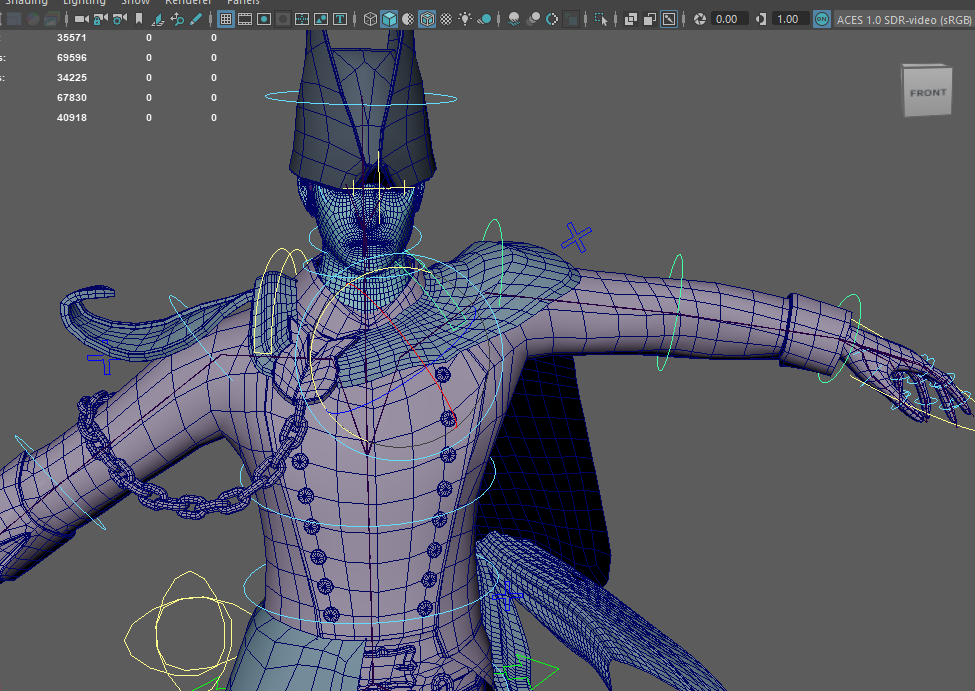
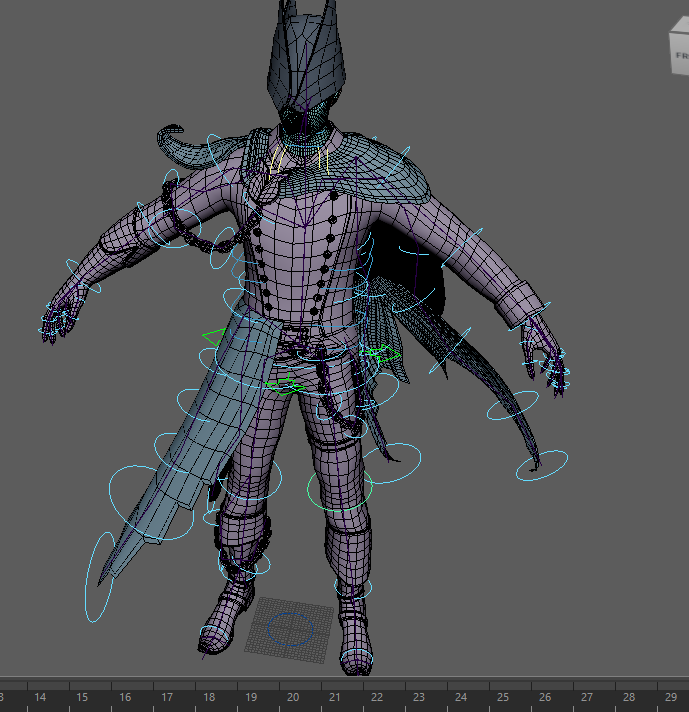
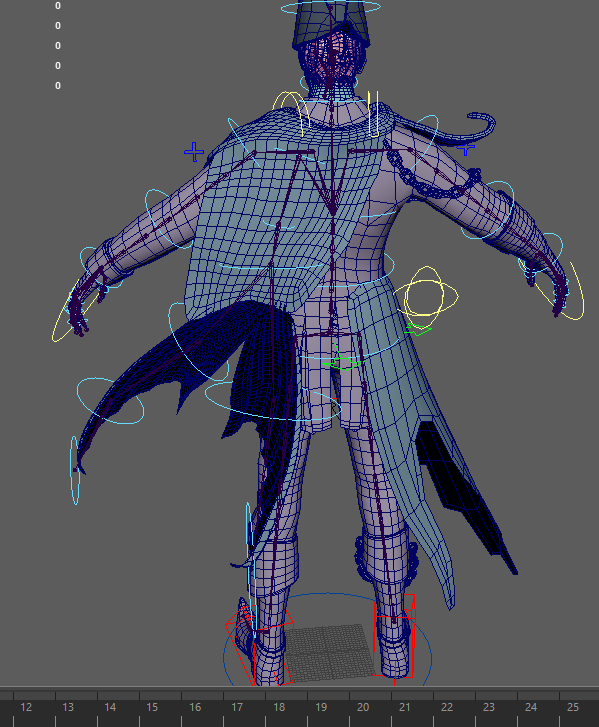
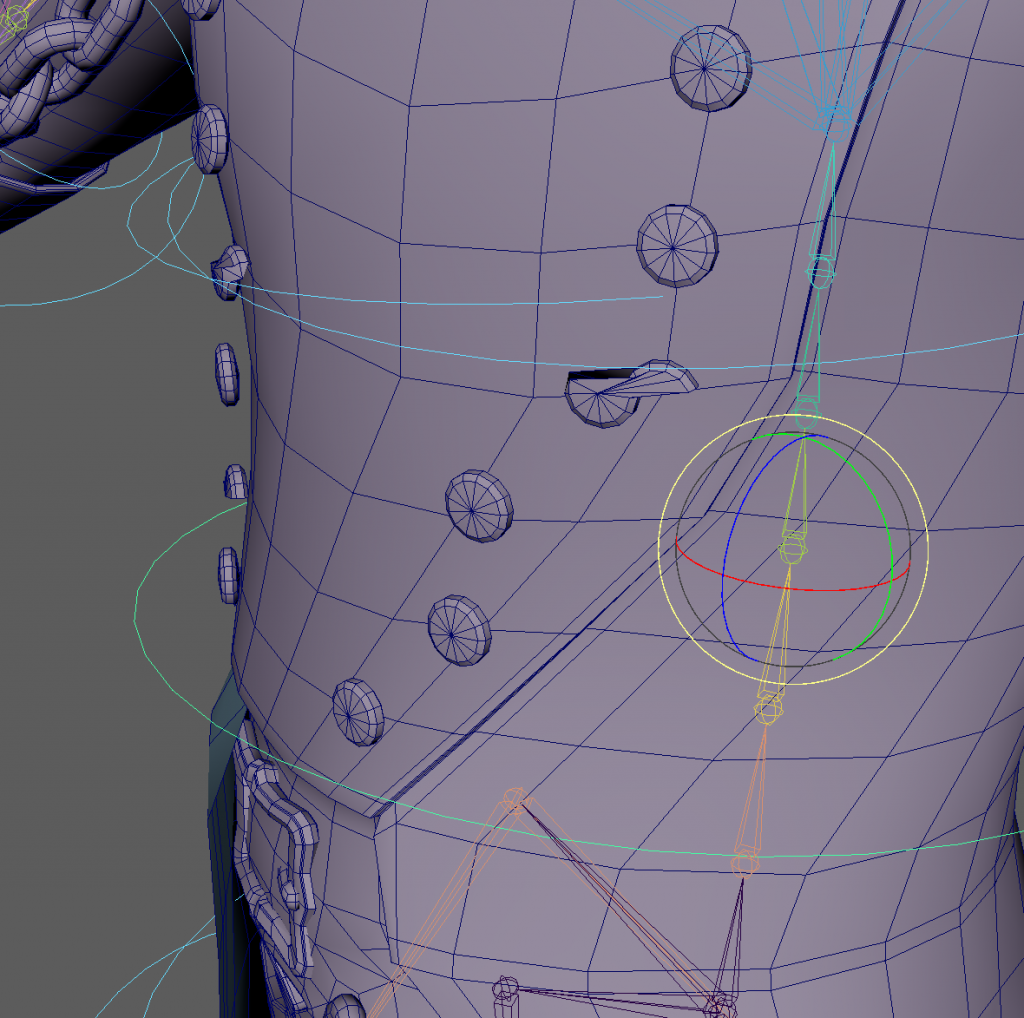
the base mesh will consist of the body, jacket, sleeves, gloves, boots, and trousers all in the same mesh. the jacket will be cut off before the trailing element which will be a separate object and the shoulder pad and belts and chains will be separate objects. the buttons will also be separate objects to avoid distortion during weight painting.
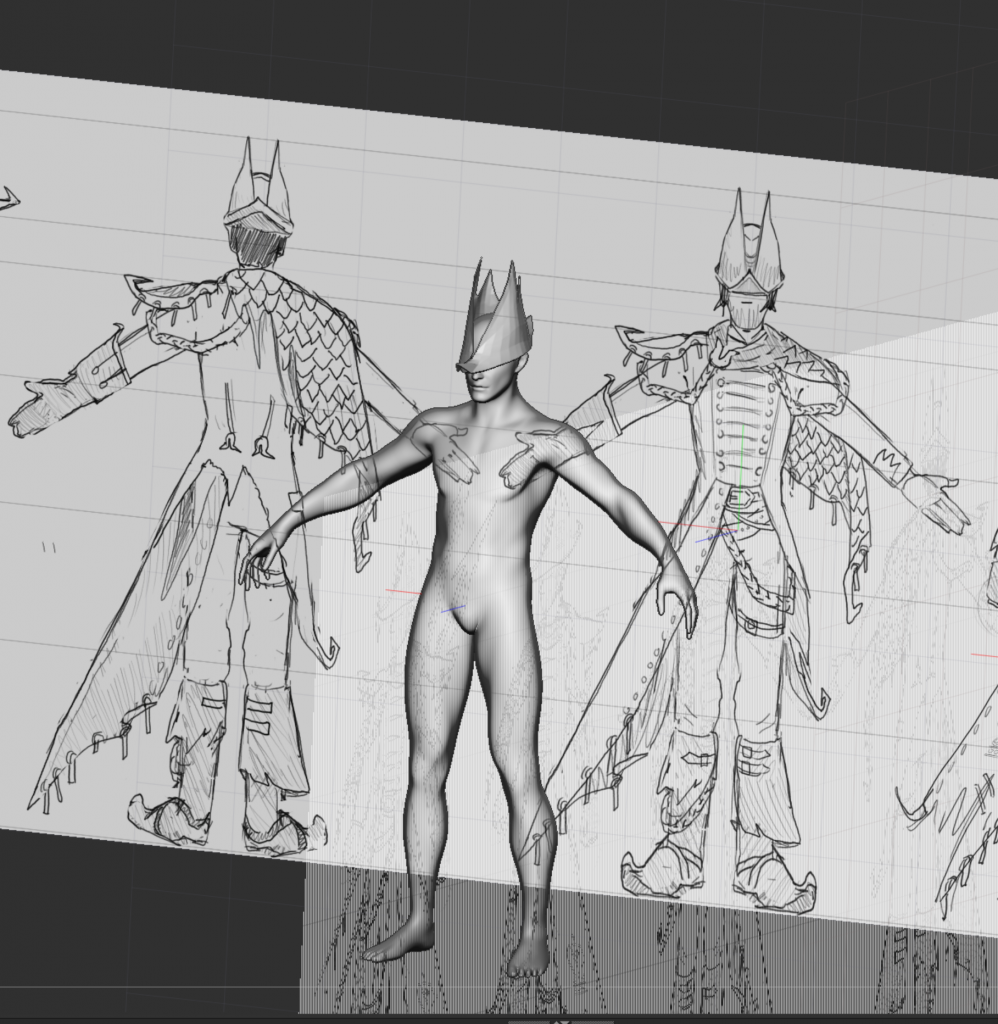
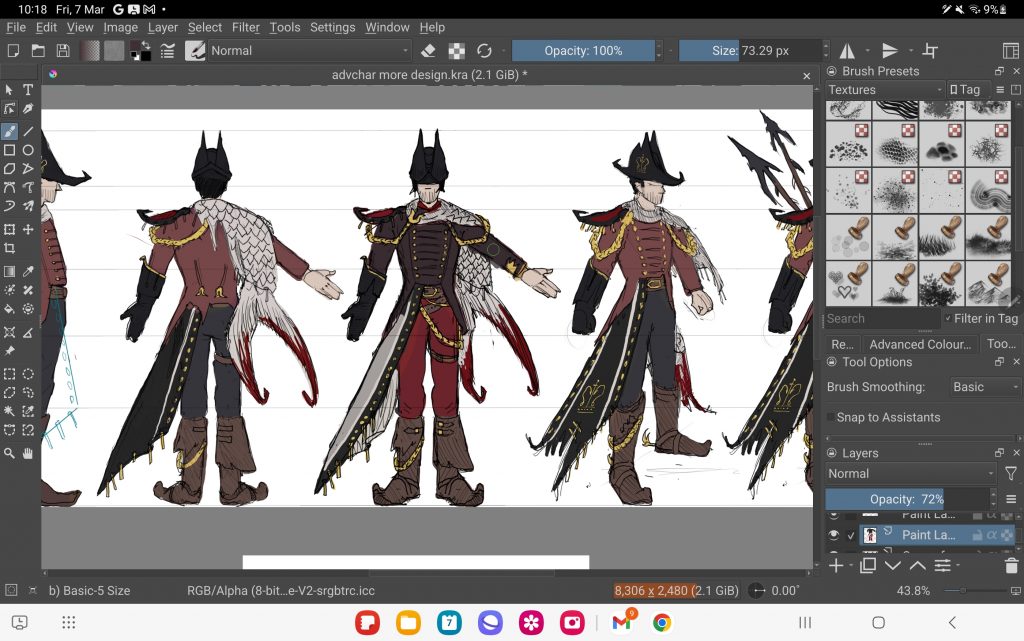
i have decided to sculpt the base shapes now, and then take screenshots of the orthographic views so i can draw over them with the different cape and corrected proportions. i also need to draw a version of my character without the cloak or flag or tailcoat as this will make the watertight base mesh.
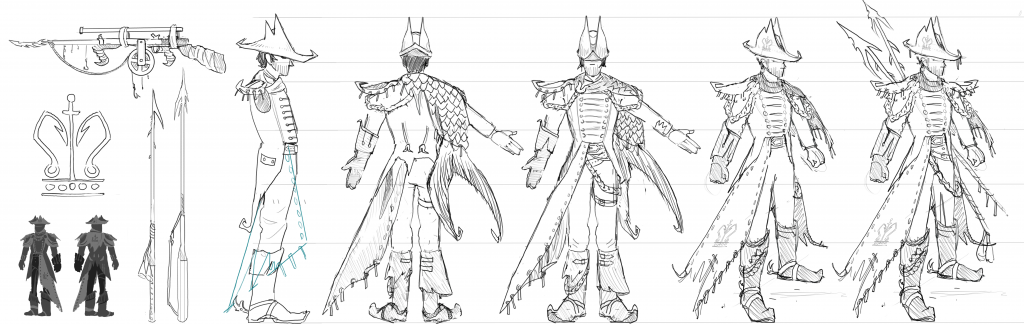
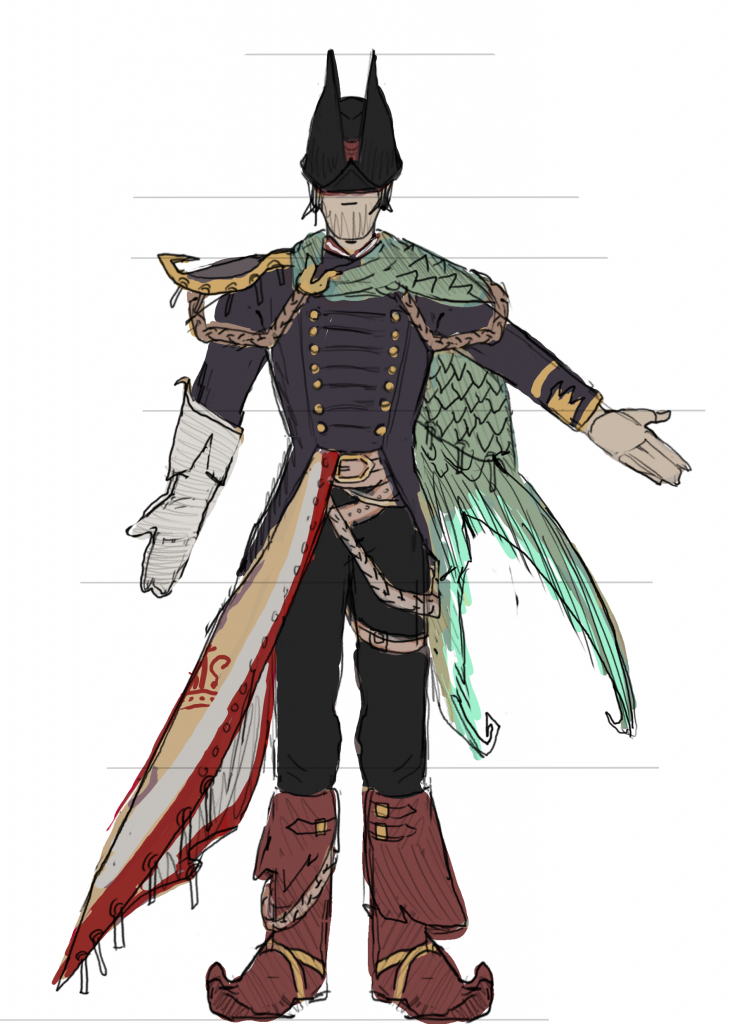
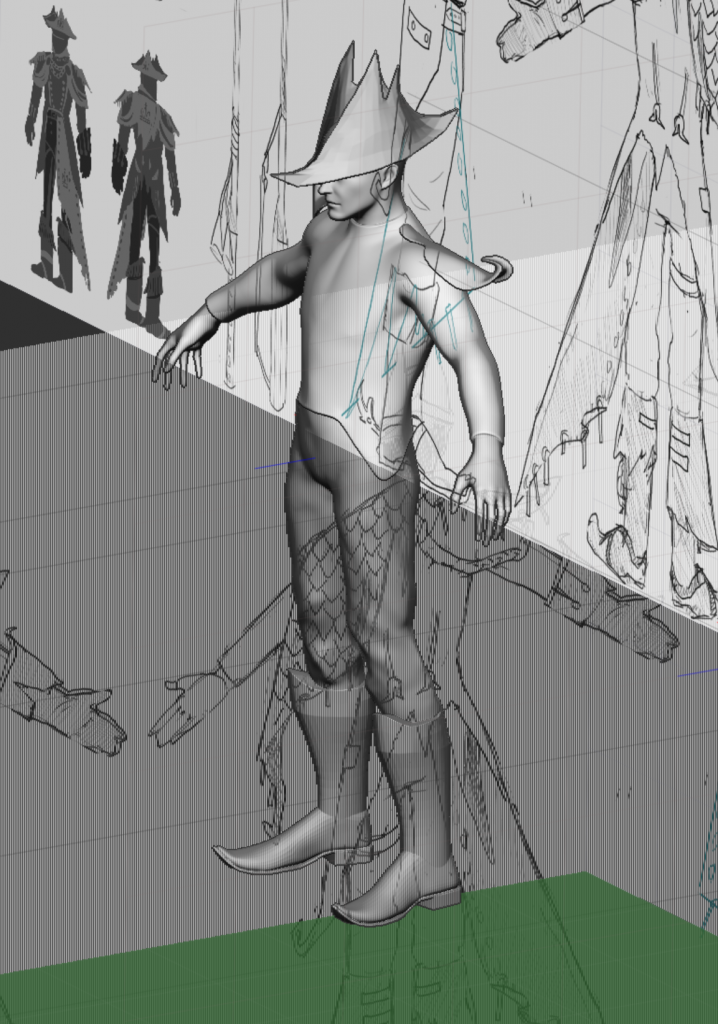
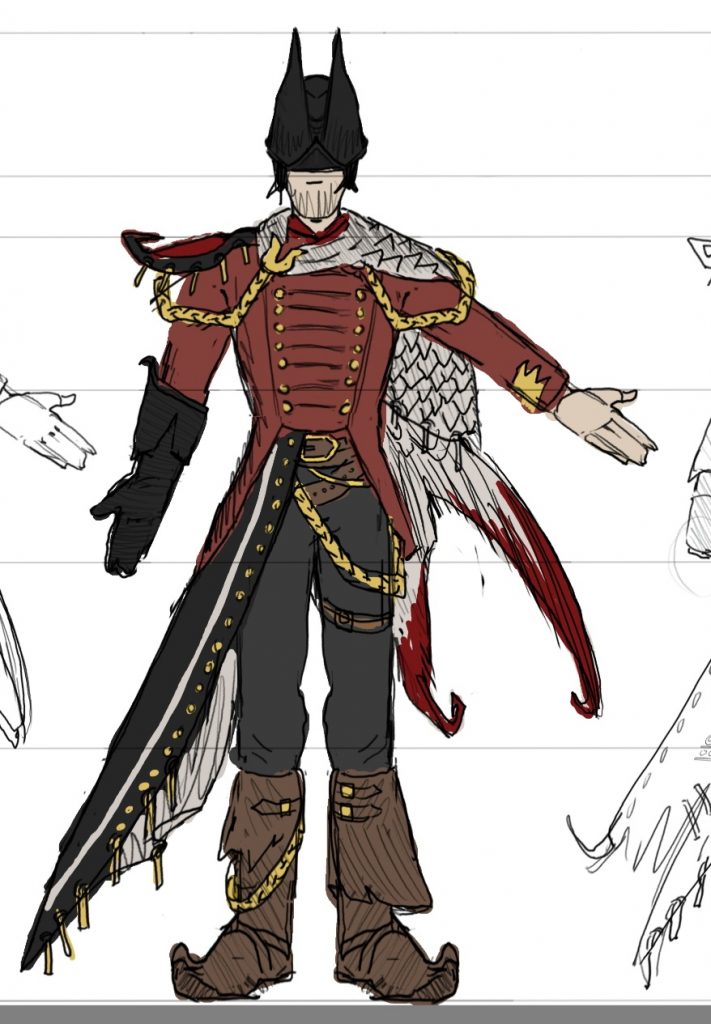
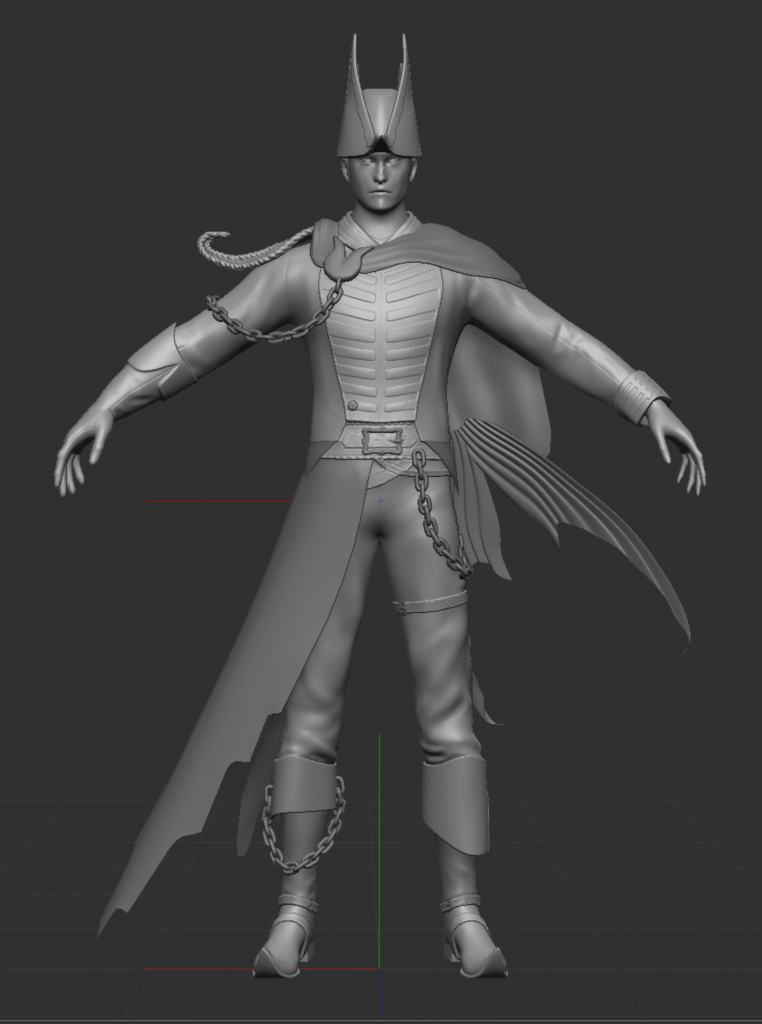
updated character ref sheet with corrected proportions and tail included:
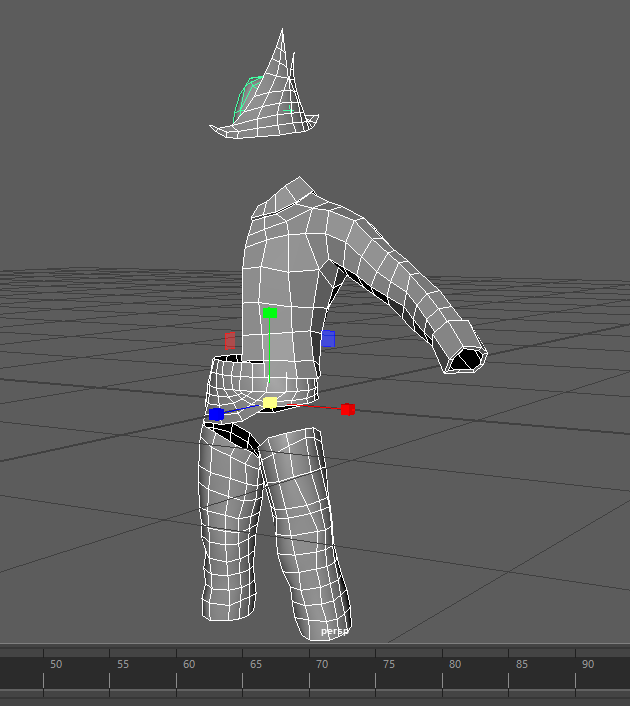
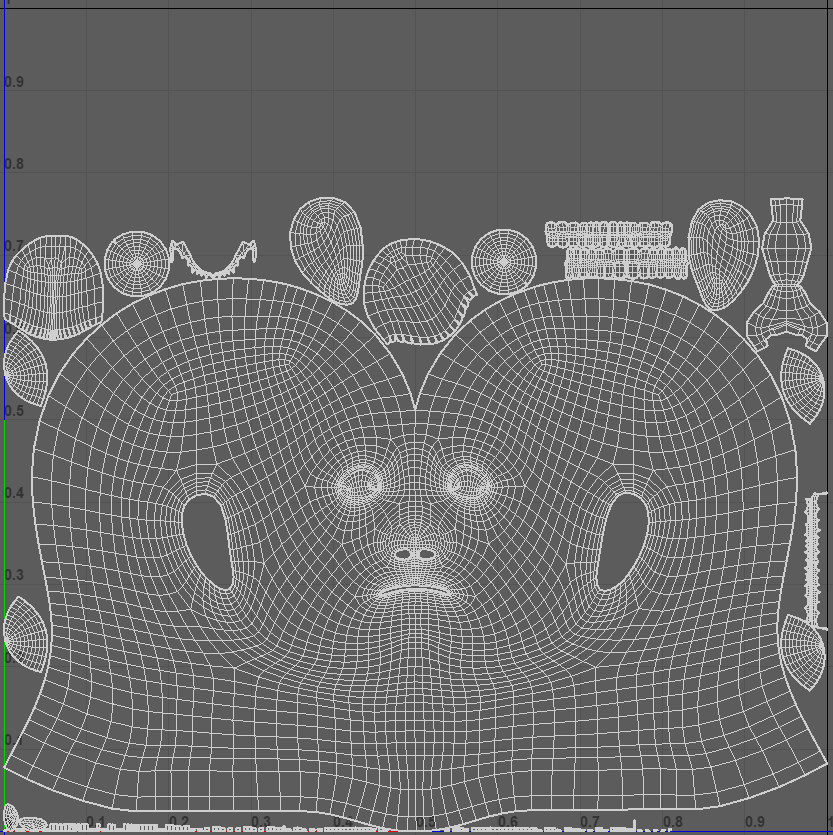
base mesh plan:
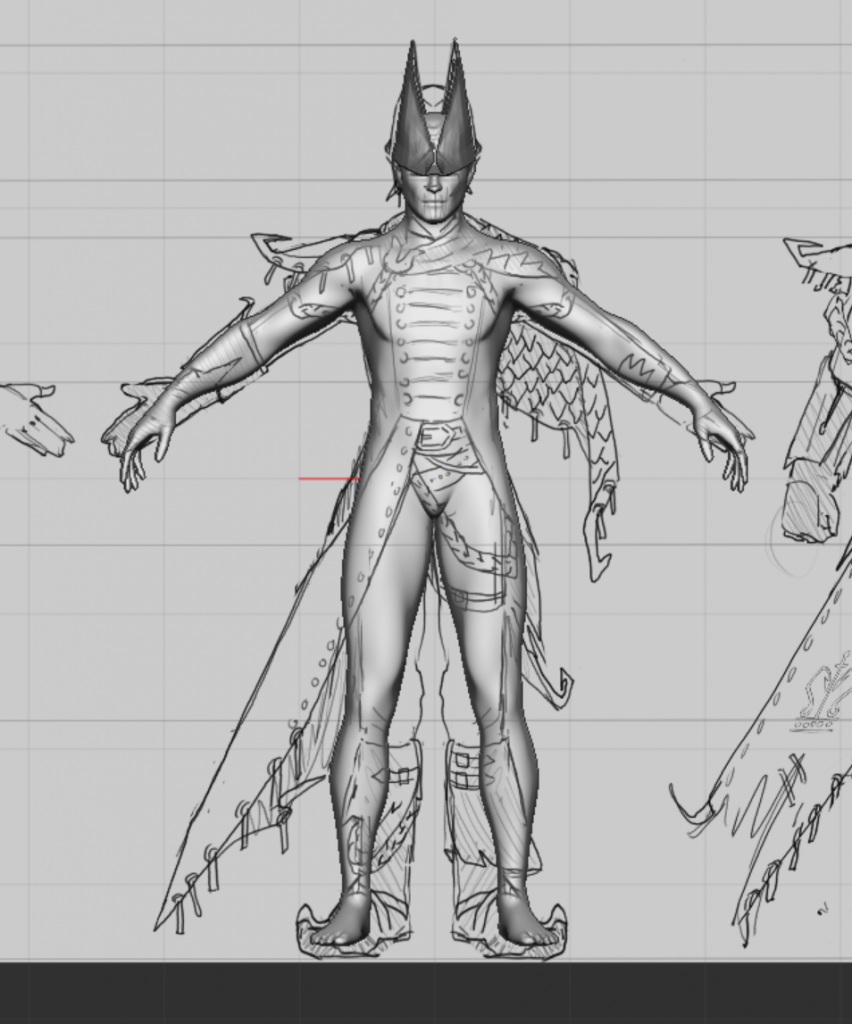
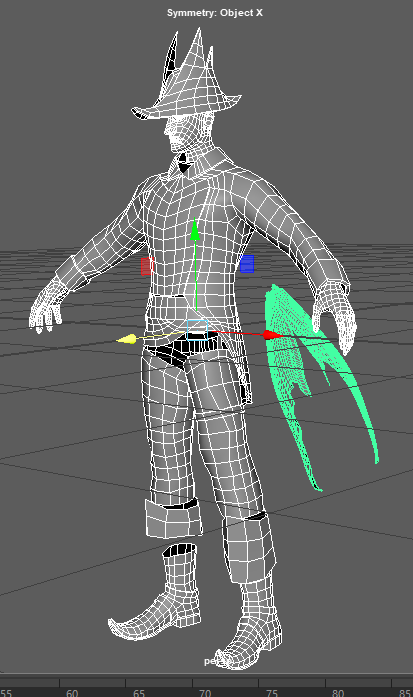
character watertight base mesh plan: (I may need to separate the head when creating the base mesh as well, also the buttons and potentially any buckles will be separate objects too)

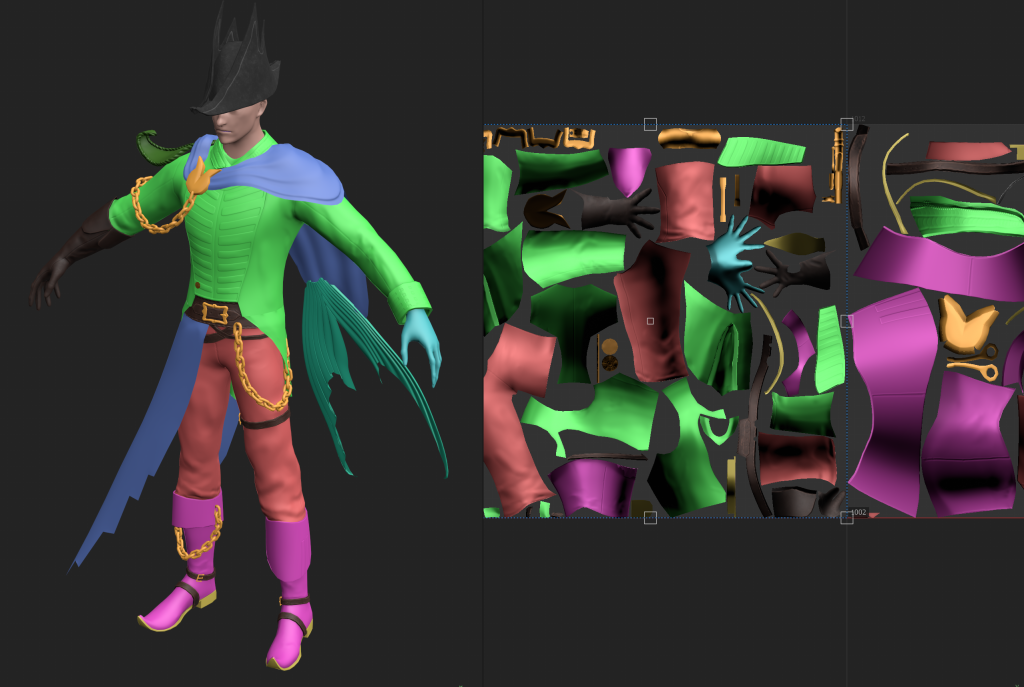
colours
when deciding the values to use for my character i was stuck between choosing 2, 3, or 5. in the end i decided to go with 5 because the darker shades fit the character more and the flag and tail cape would be brighter as i imagine them having brighter colours
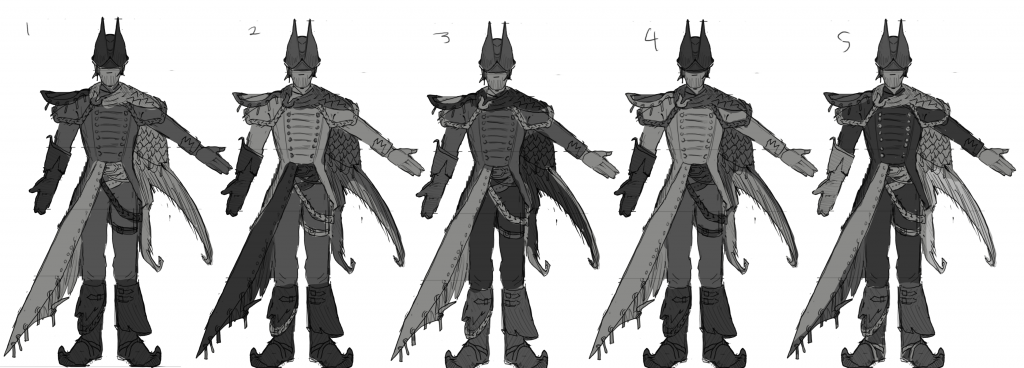
i felt like the tail cape should be green and the jacket should be a navy blue, however i did experiment with different colours to see what might work. i have decided to go with 3 as i liked having yellow and blue as those colours are associated with the navy but the more faded variation looks more harmonious with the green tail.

wanted to add some red and black into the 3rd one to make it appear more villainous
worked on the colours some more but not sure if I’m getting anywhere. i think it looks too overcomplicated and doesn’t look like a villain. also, the colours of the jacket look modern despite being accurate to the 18th century. i think instead of focusing on what i think the colours should be i will just try to go with what looks good.
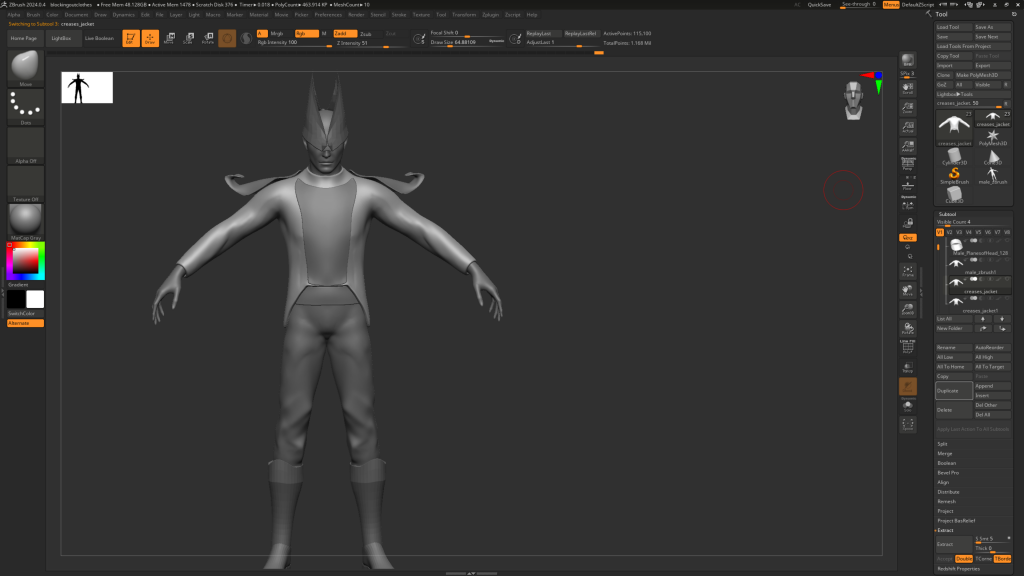
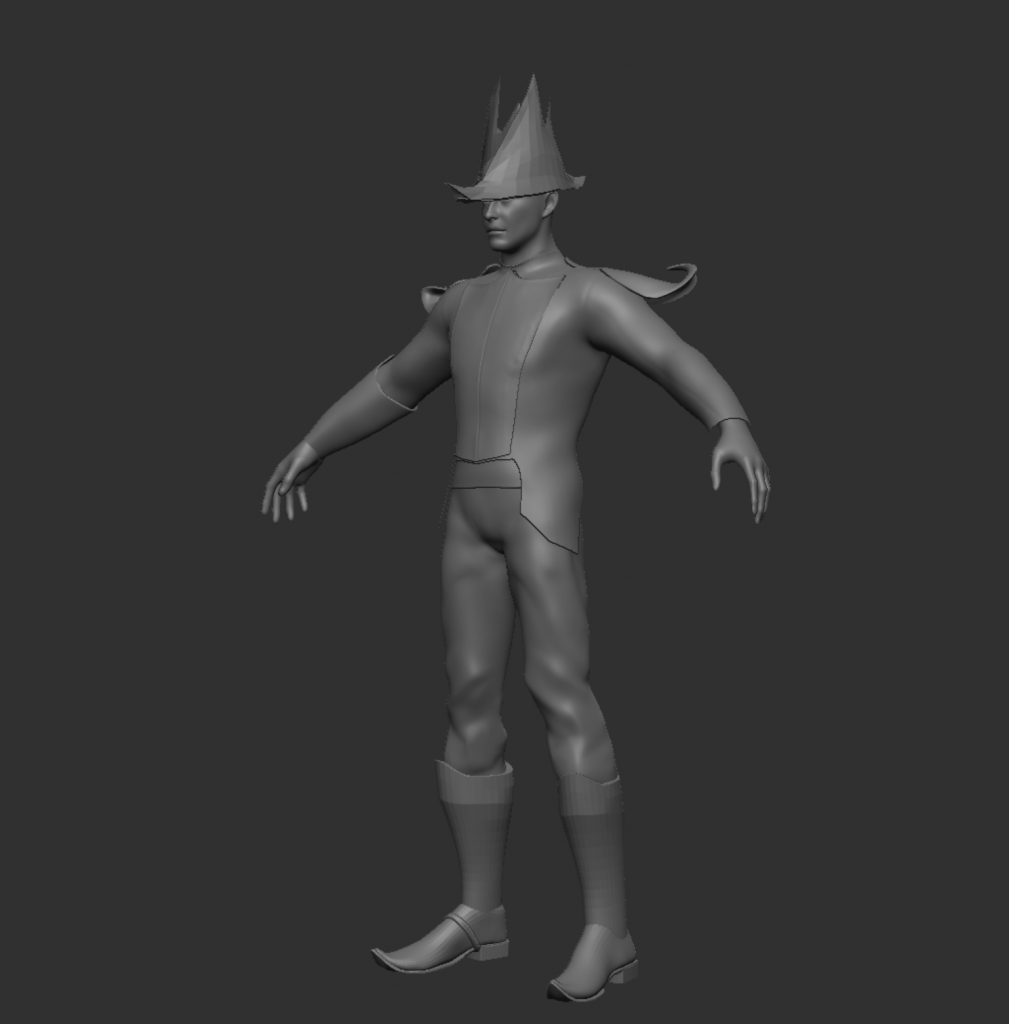
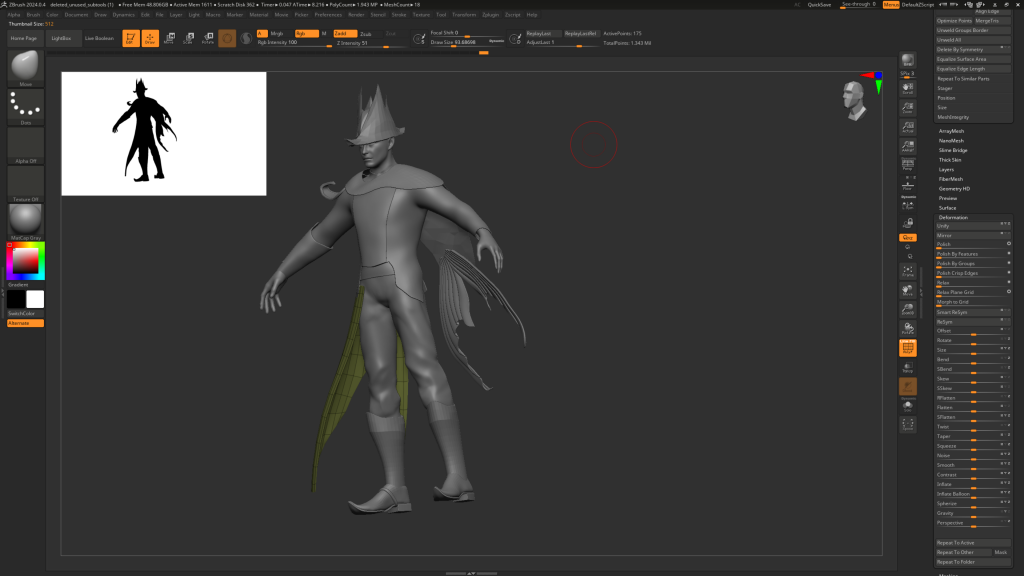
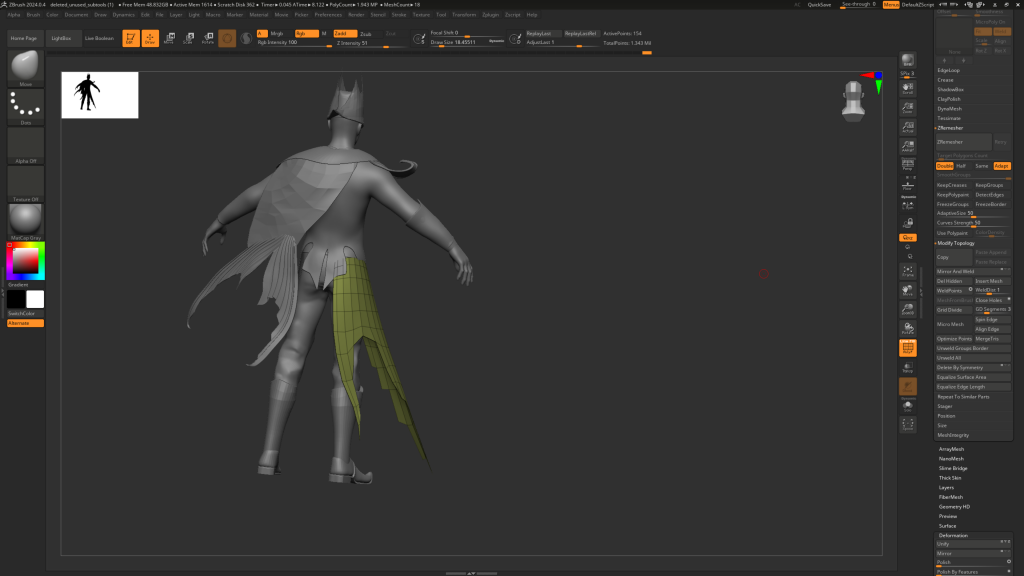
building up more of the character with basic shapes in Zbrush:
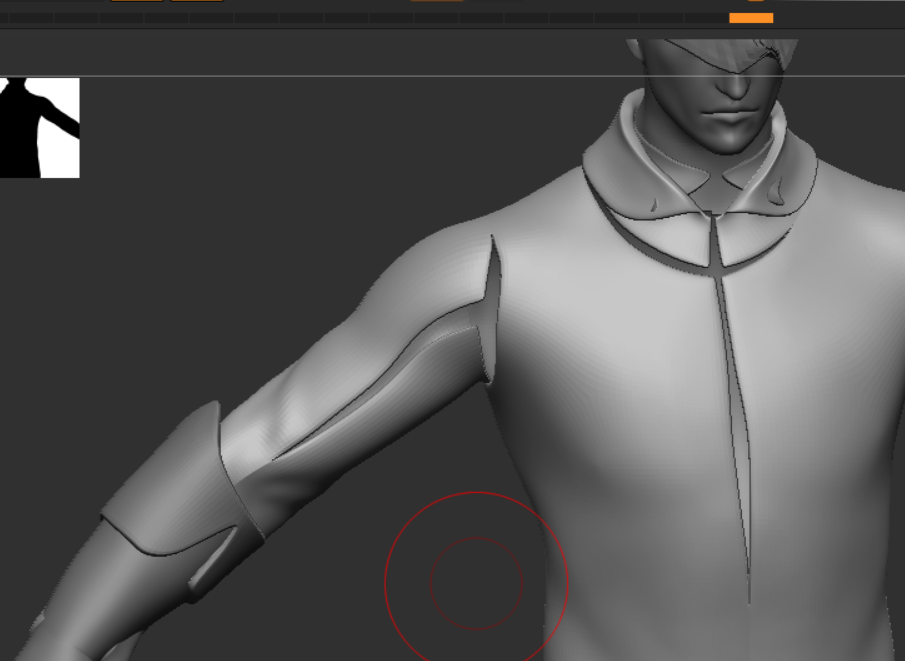
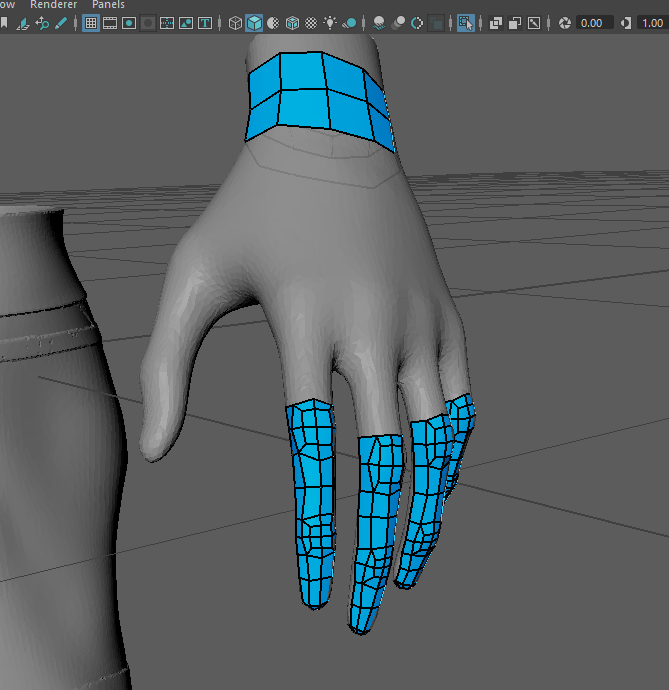
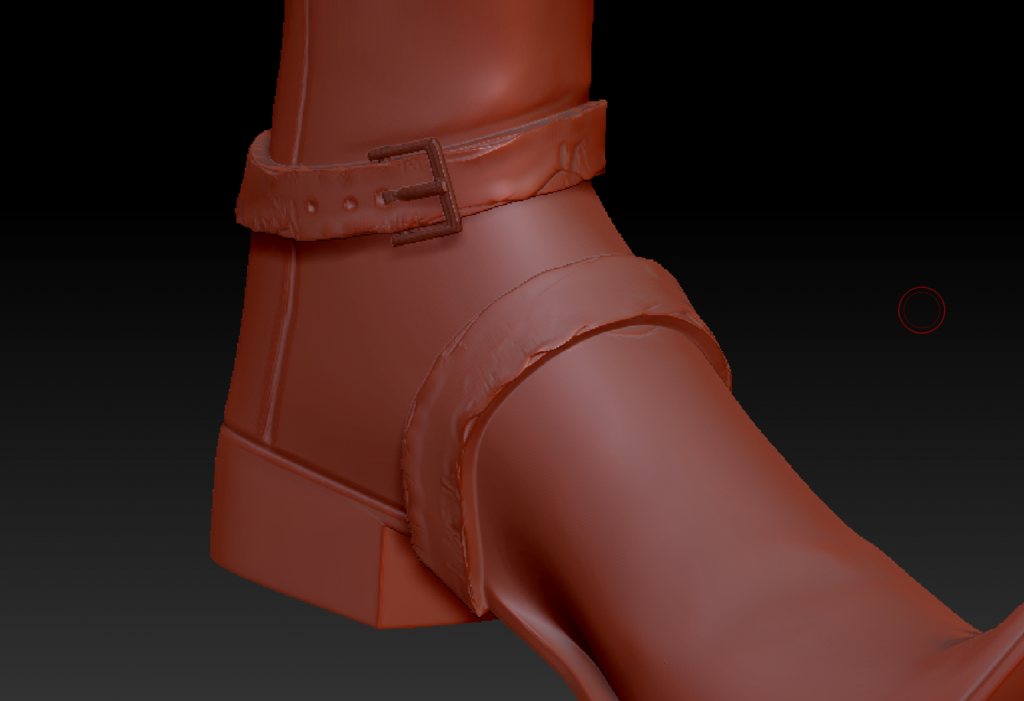
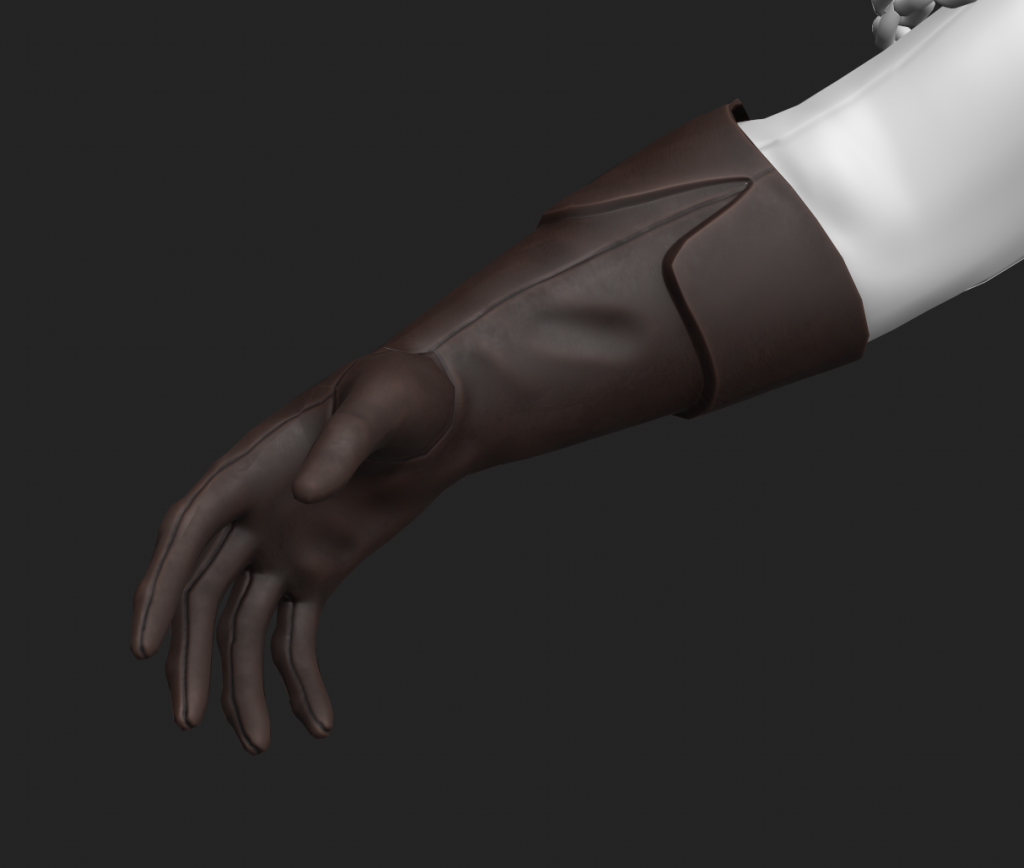
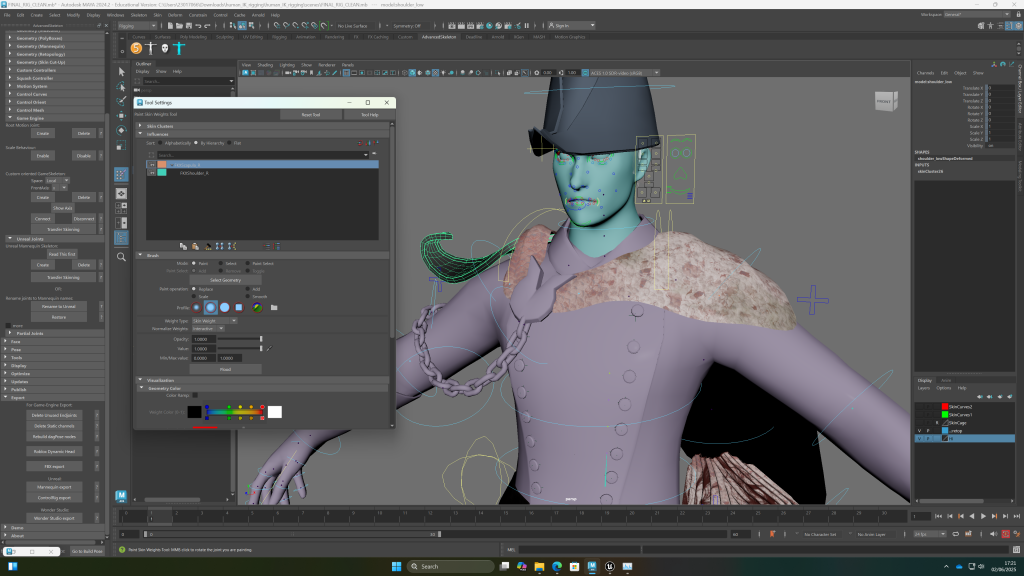
As I was unsure weather to make the glove seperate, I asked for some advice about what to do. Amil suggested to make the glove in the same mesh, although it would be possible to make it separate, but this would present another rigging challenge. The advice was to model the sleeve down into the glove, then have the glove go back over the sleeve mesh and back down into the hand. From there I can extract the fold of the glove and merge everything into one object. additionally, i am now aware that distortion is normal with watertight meshes so i will have some of the belts be in the same object. however, the buckle and spurs will be separate objects as they can be parented.

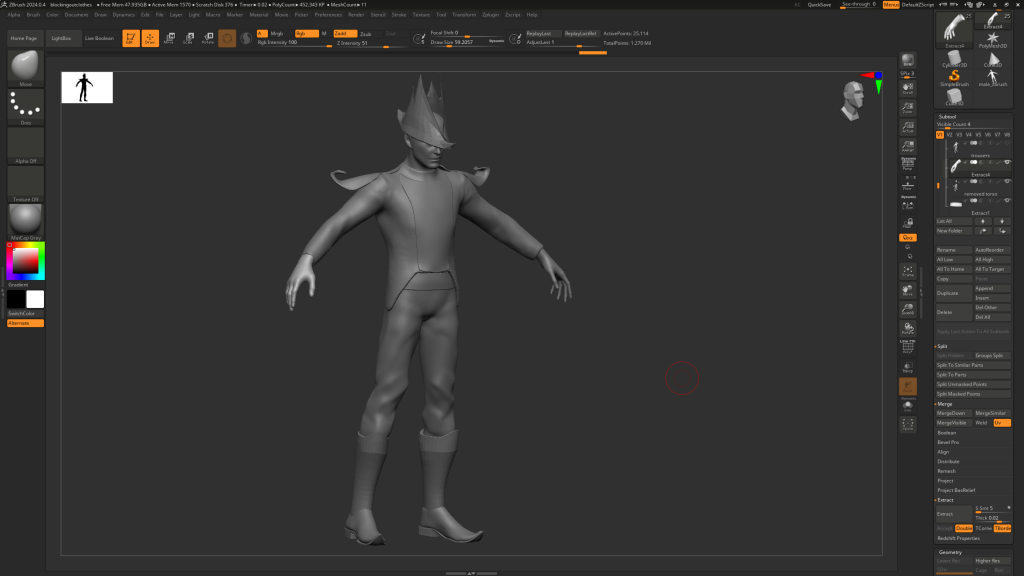
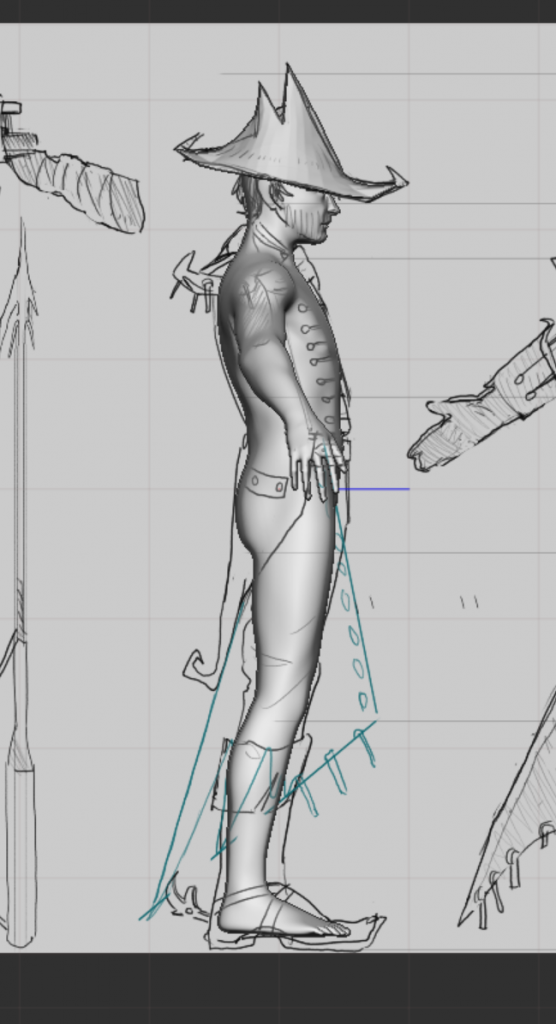
i decided not to spend too long on the folds at this stage however i did want to decide on the thickness of the fabric and how that would affect the appearance and direction of the folds.

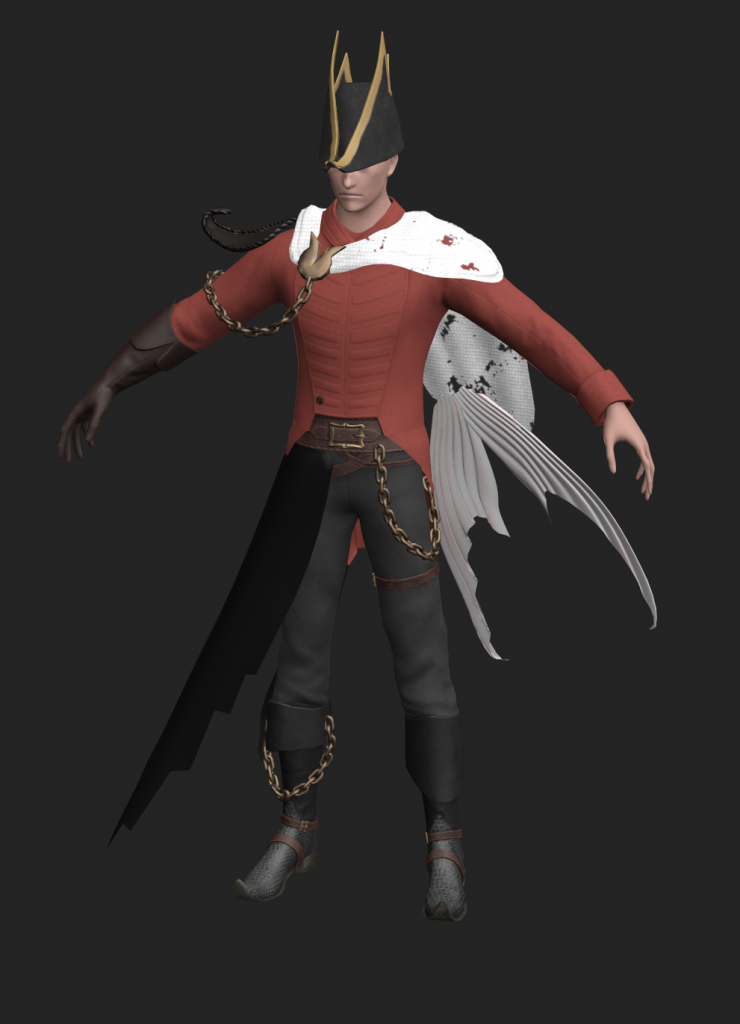
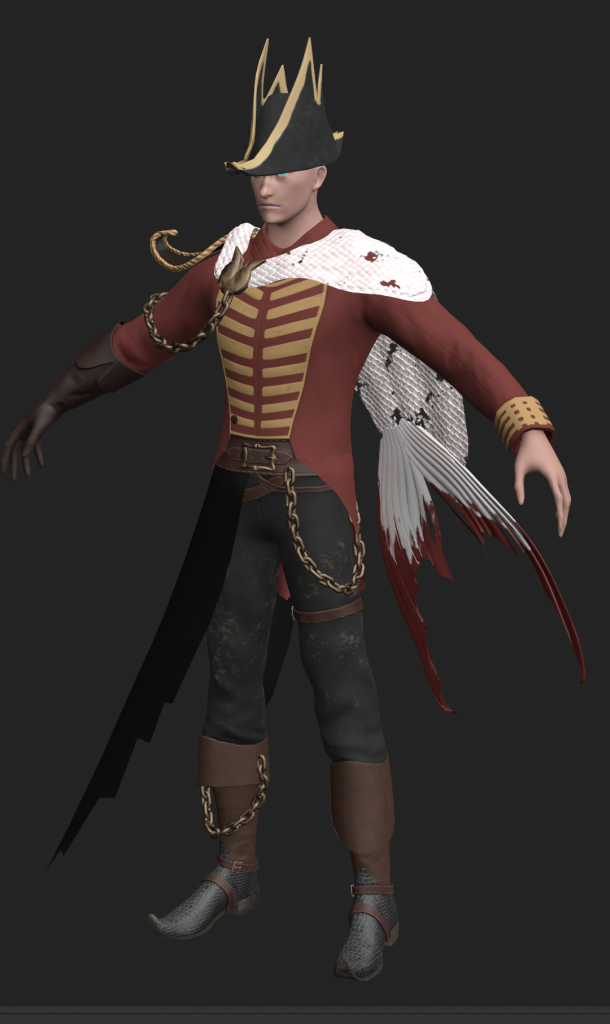
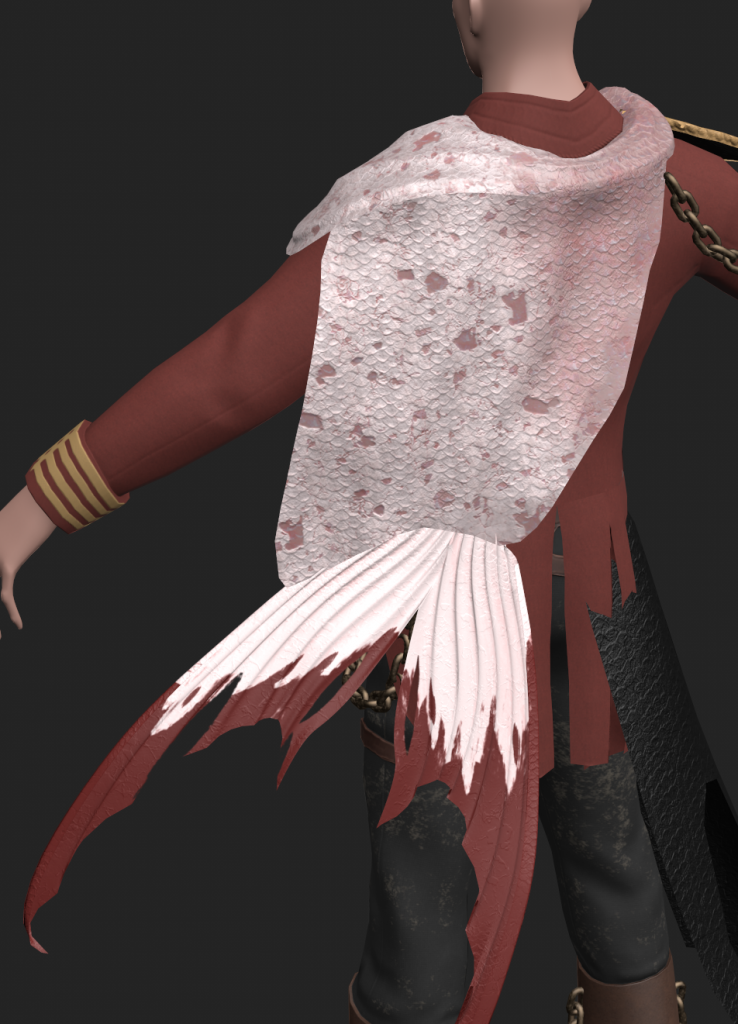
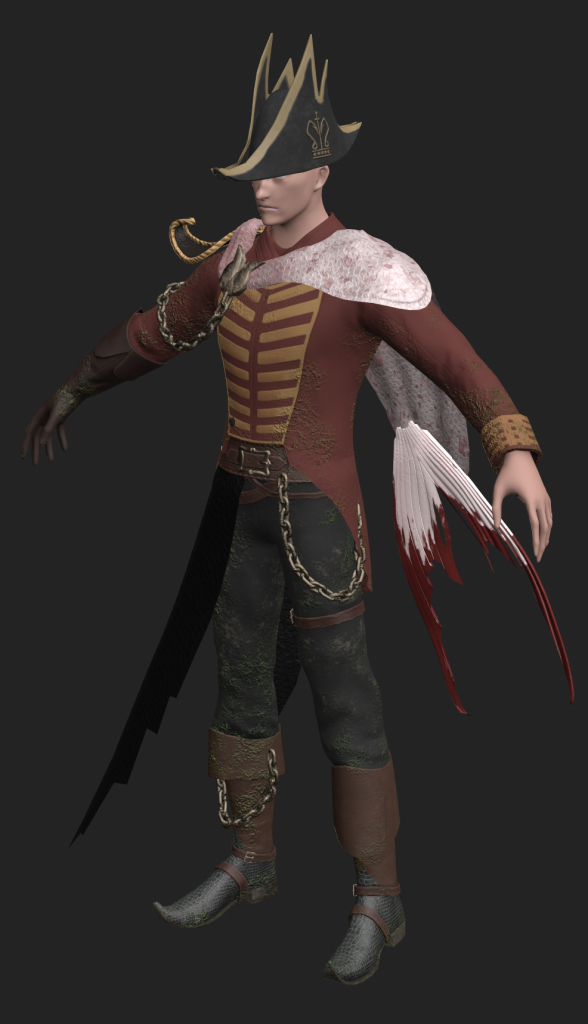
I decided I wanted the tail to be white (because i want to make the scales iridescent when texturing), and I finally decided on this colour pallet with the red jacket. Red, black, white and gold are commonly seen in villain characters, however I think making the red jacket slightly grey and washed out and also adding brown into the boots recovers it slightly, as well as making it look more pirate-like. Losing the navy blue made sense as this is a fantasy navy so the uniform can look different. I think it’s still recognisable because of the buttons and the symbols.
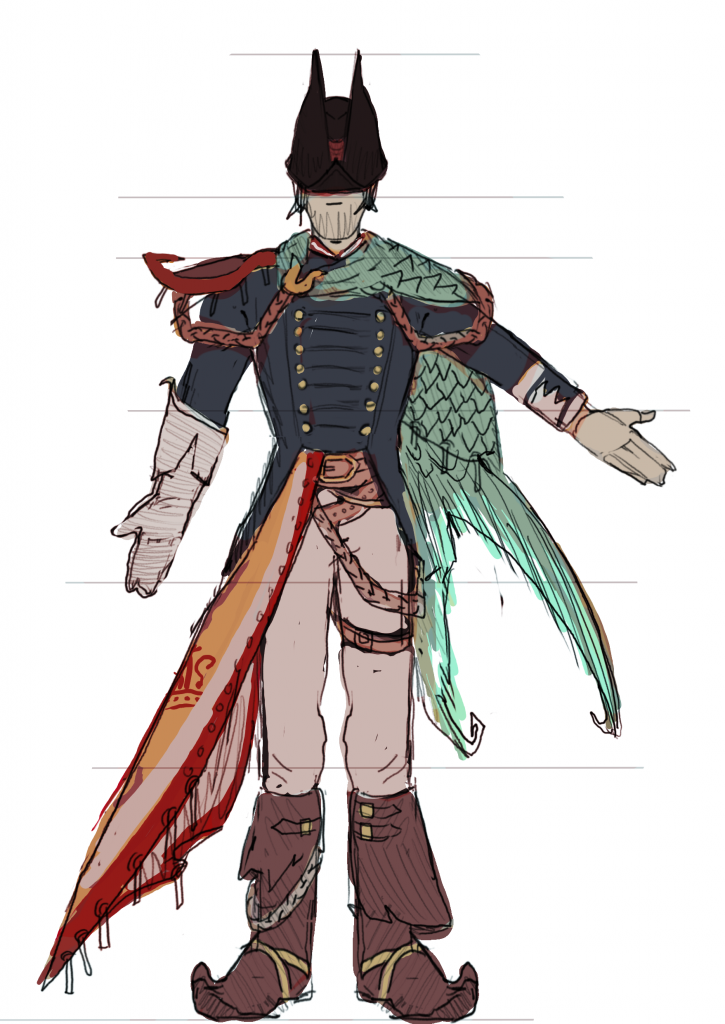
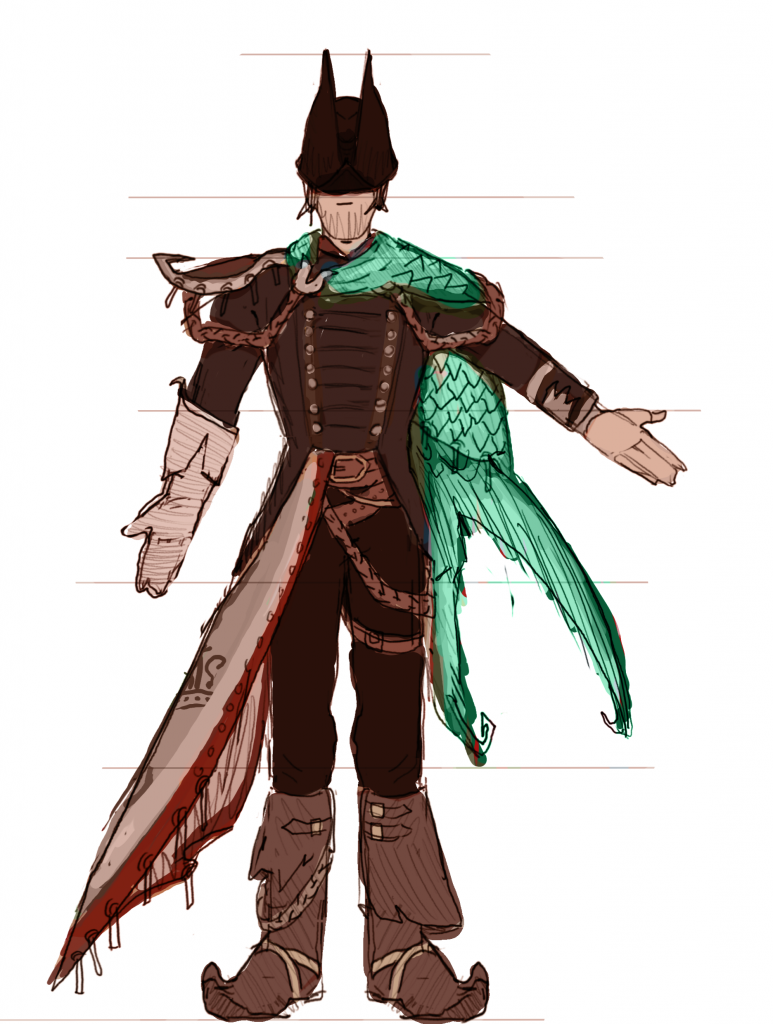
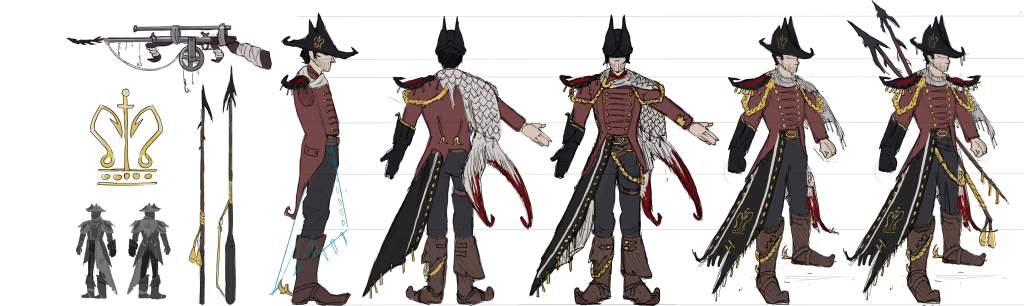
coloured ref sheet:
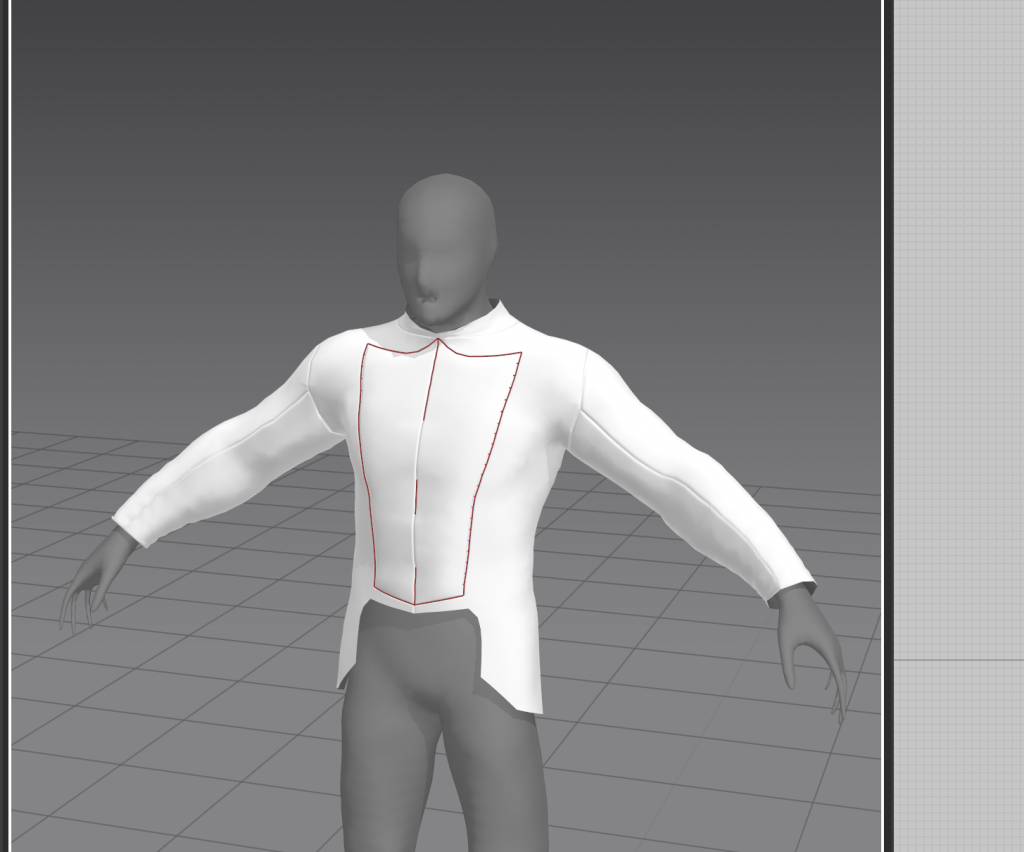
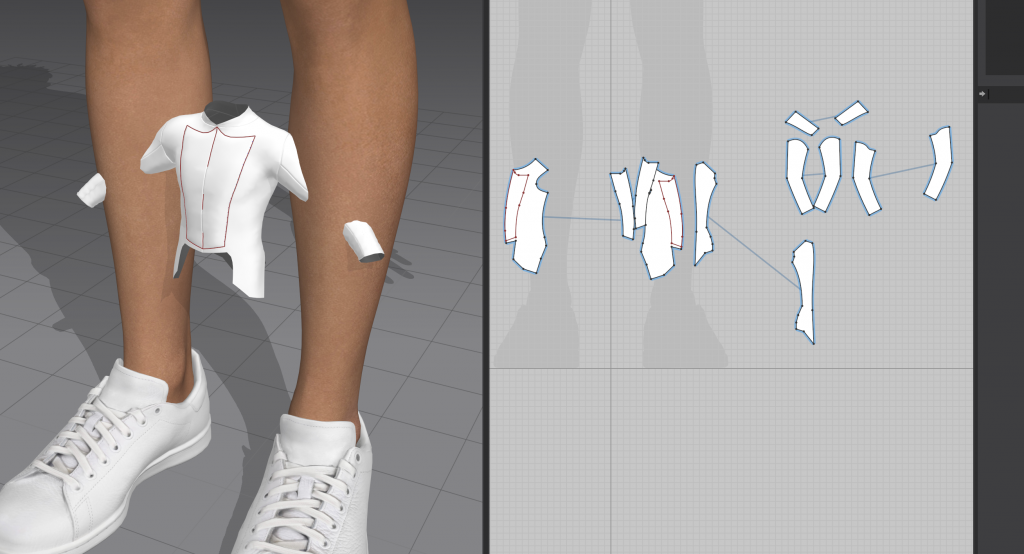
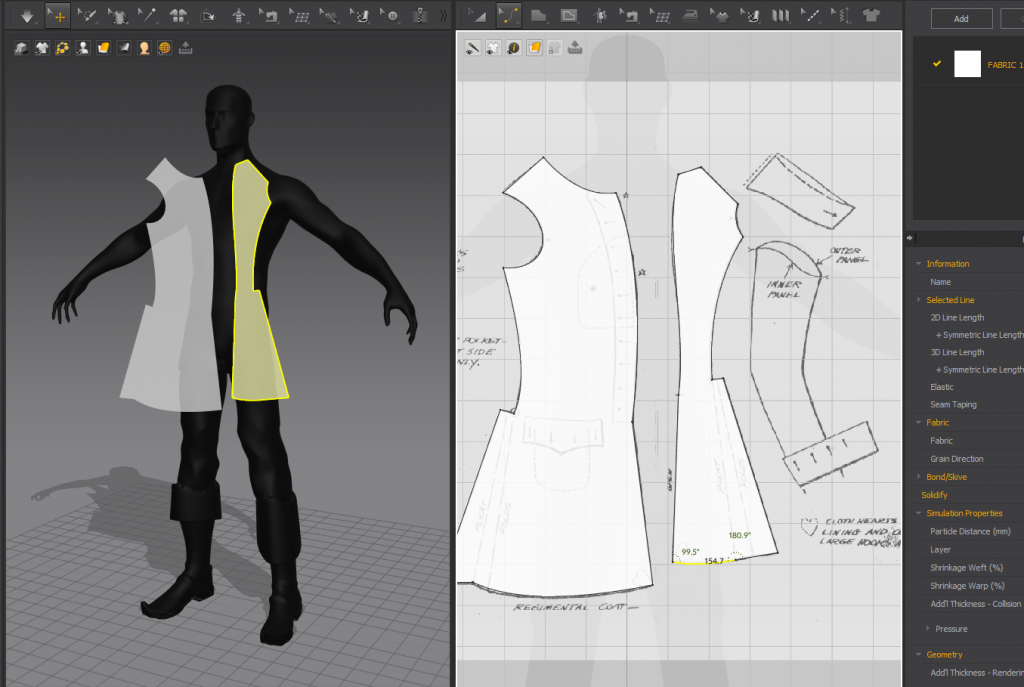
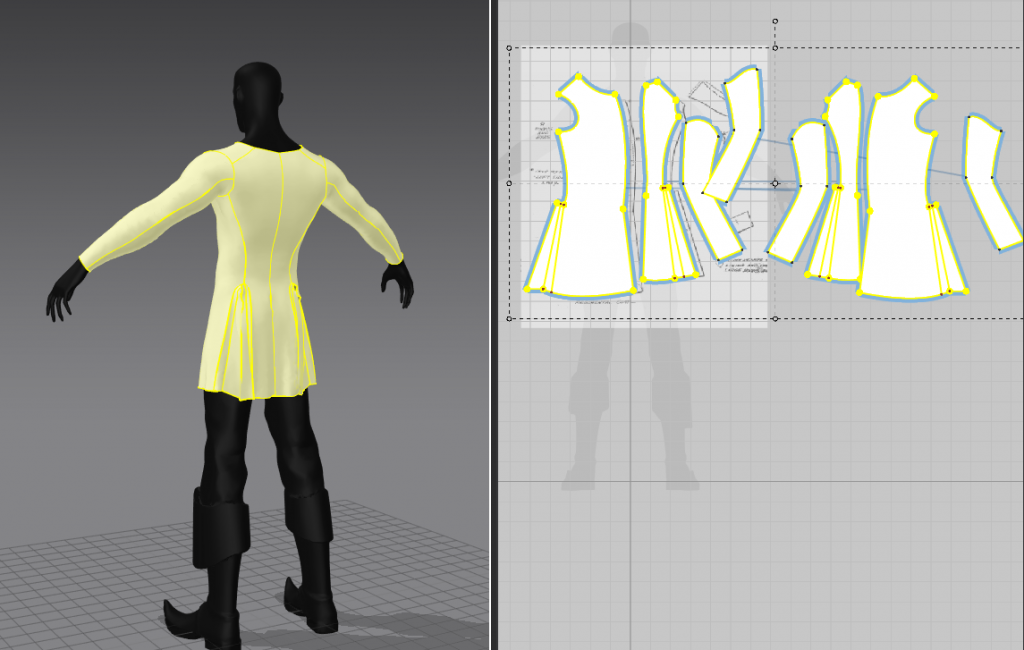
Marvellous designer
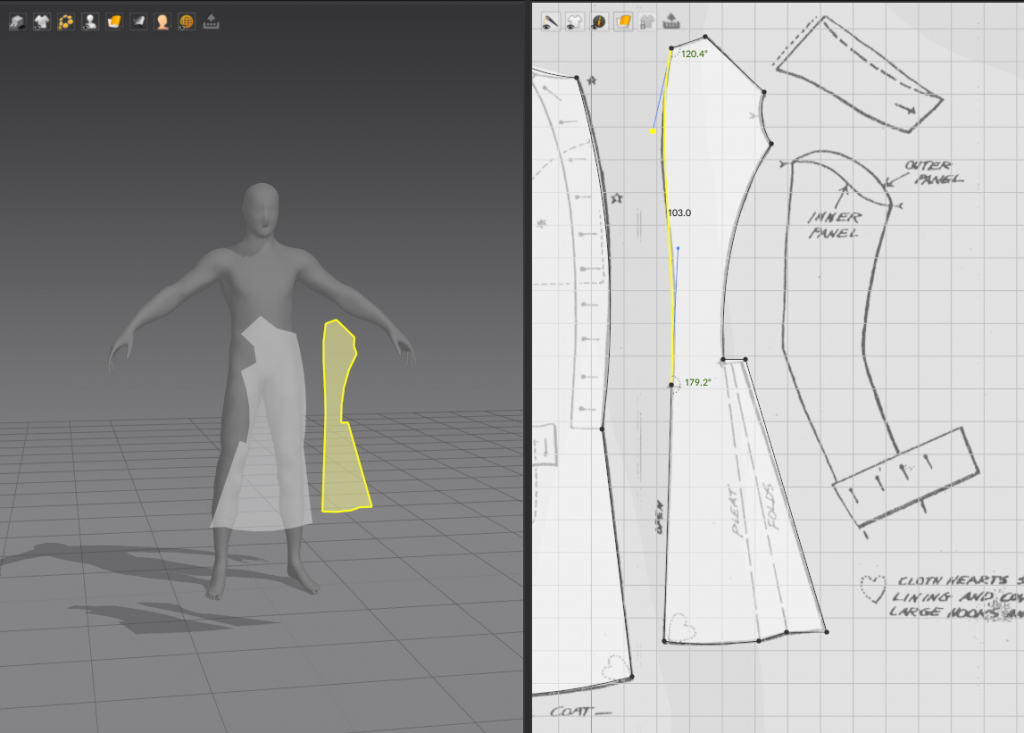
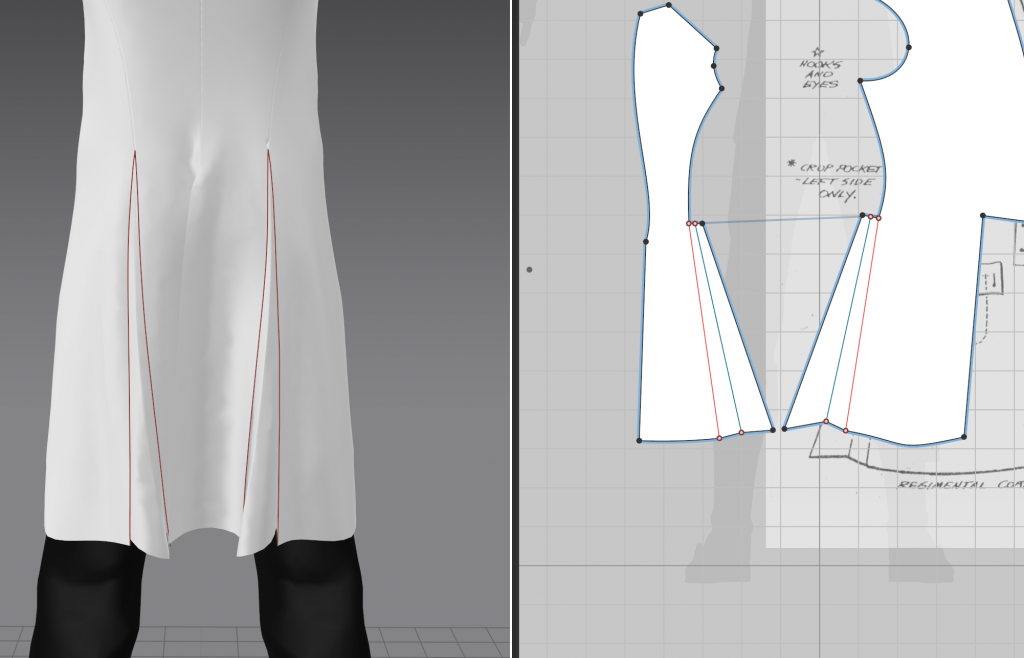
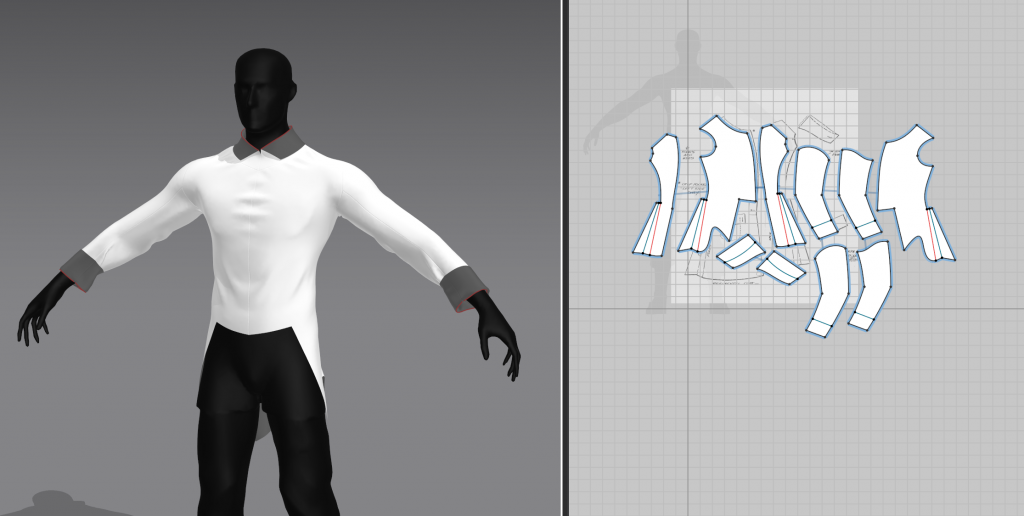
i decided it would be better if i made the jacket in marvellous designer, as it would be more logical in how the seams go and the folds would look better. i followed this document for the pattern:
https://www.nwta.com/wp-content/uploads/2015/02/243RegCoat.pdf
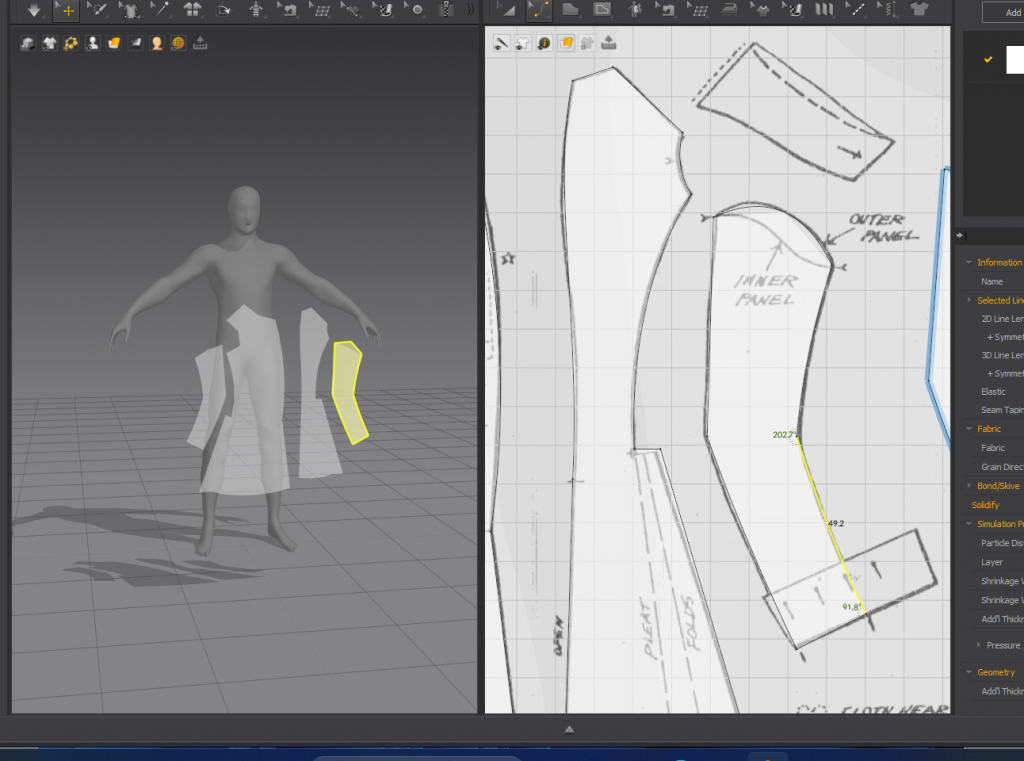
doing this has also made me consider how the jacket actually works. i have decided the buttons on the outside will be purely decorative and it will be fastened down the middle. i will do the sleeve folds in zbrush as i think it will be easier as i haven’t used marvellous much.

i decided not to make it perfect in marvellous as i could edit the proportions in zbrush. i am mainly using it for the folds and seams.
had to make sure it was welded when i exported it.
the difference is very subtle. i moved on to something else as i felt like i wasn’t getting anywhere with it
week 4
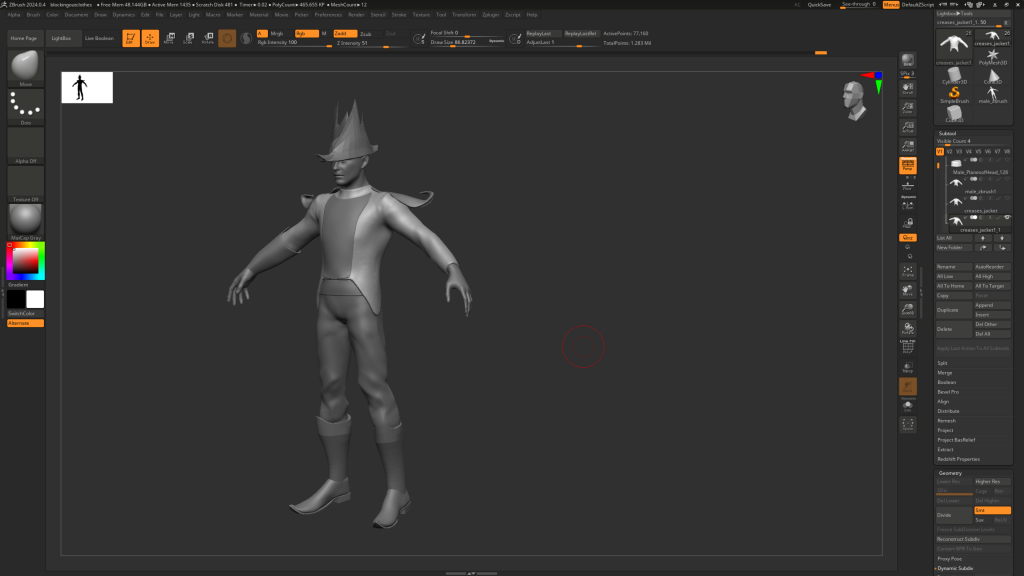
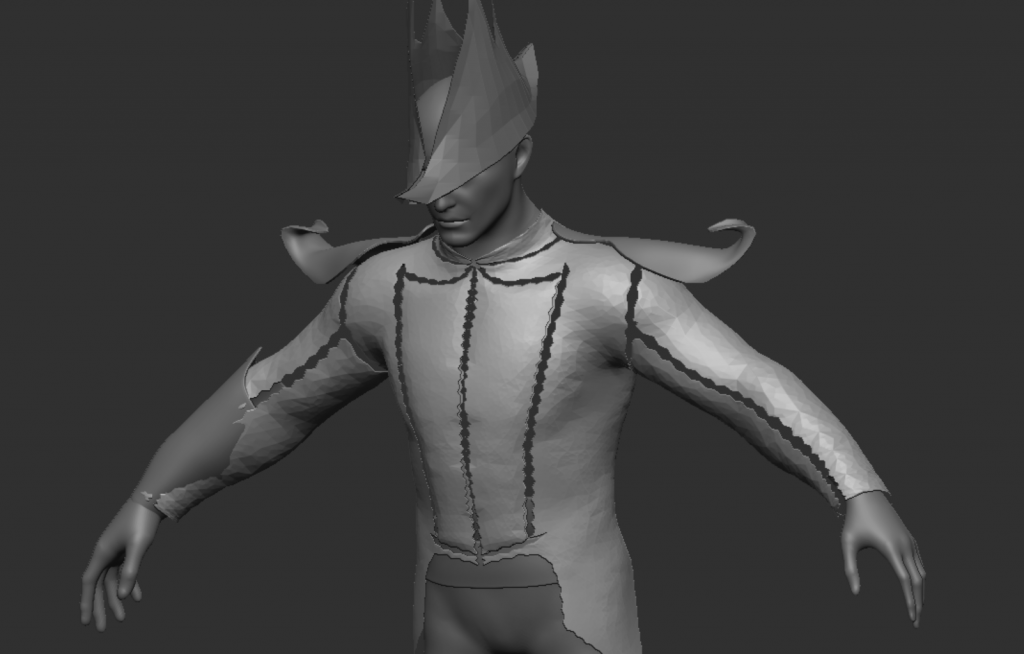
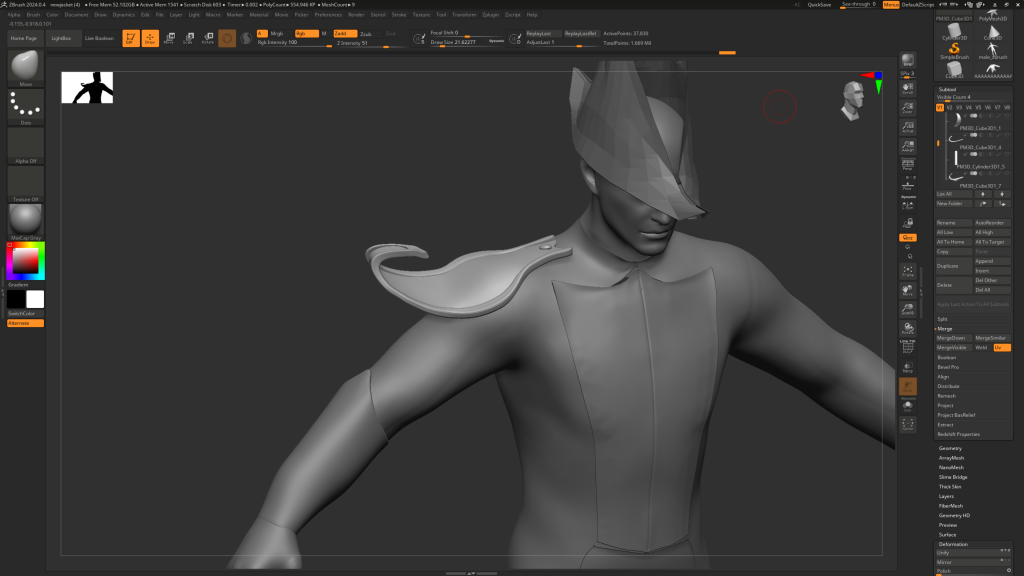
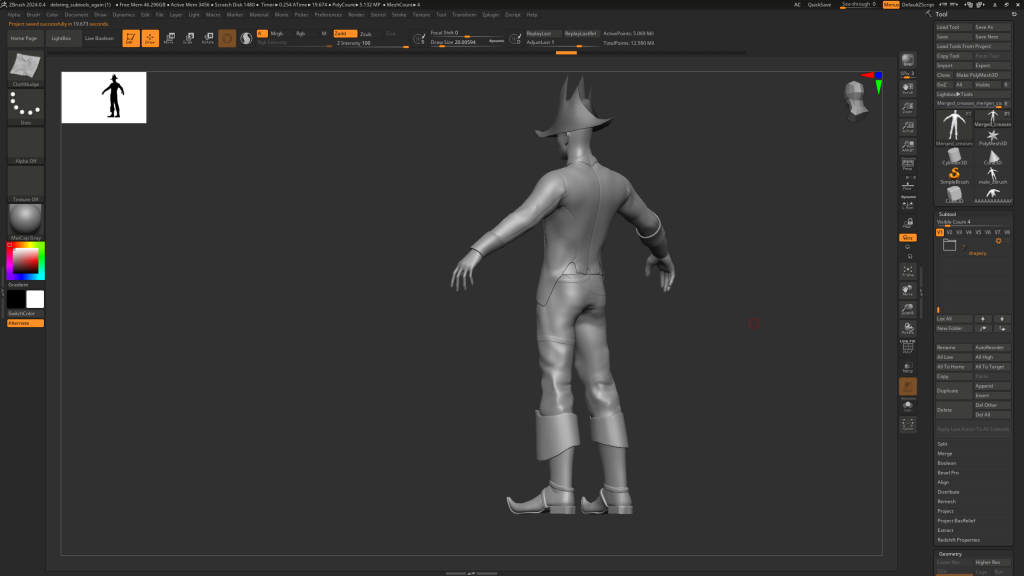
shoulder pad- I sculpted another version:

tail cloak:
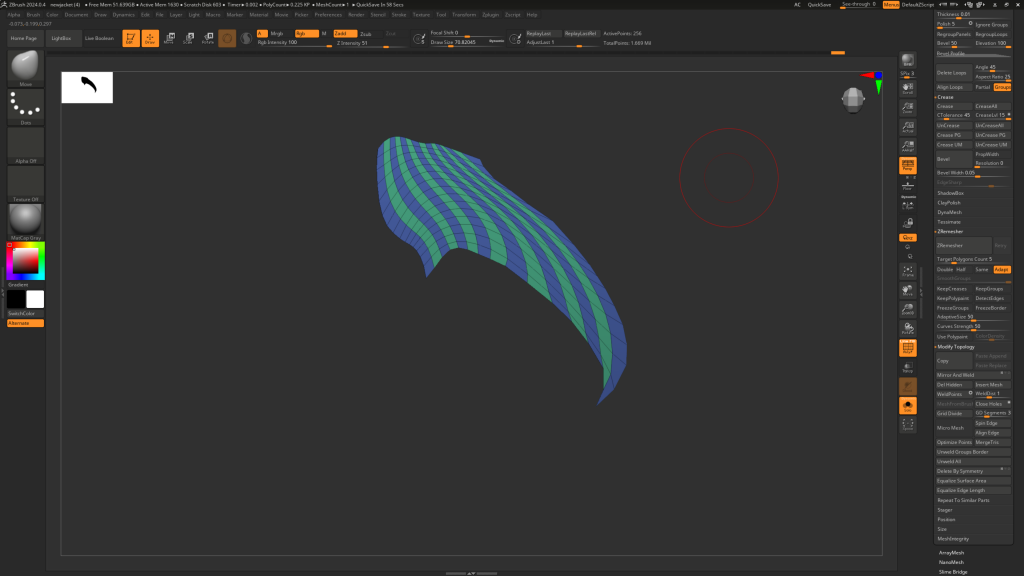

masked off one of the poly groups and moved it out and scaled it to create a ridged effect.
used dynamic subdiv to add thickness to tail
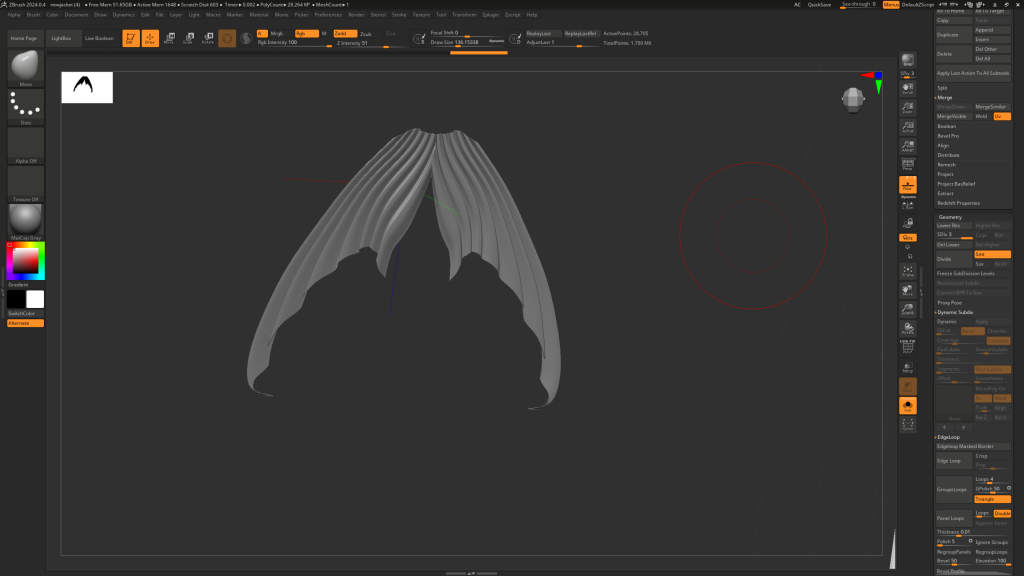
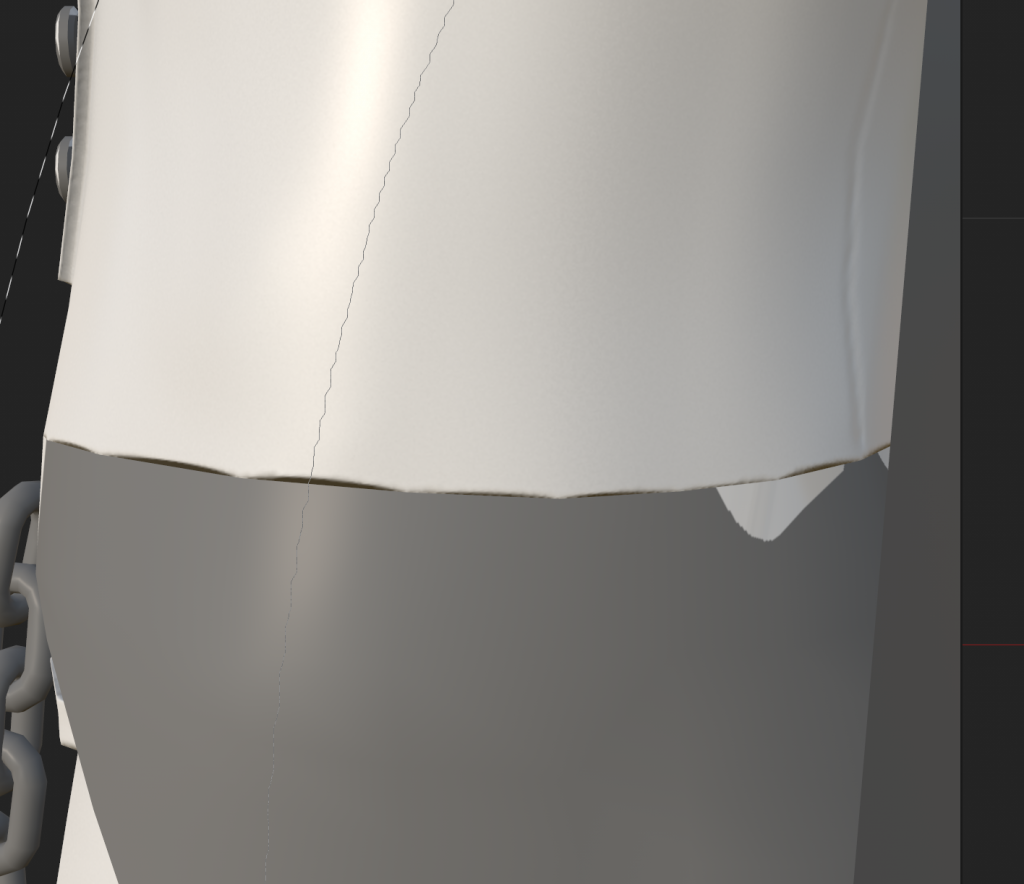
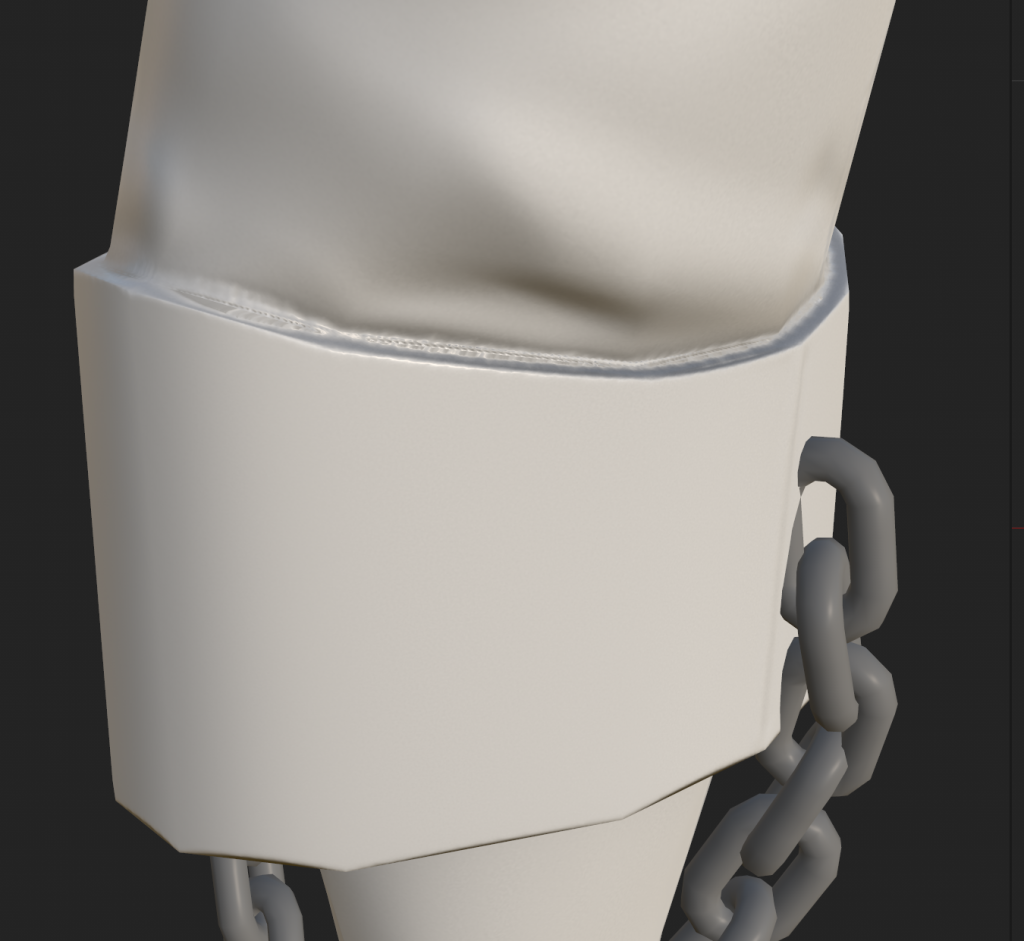
added thickness to the coat, had to zremesh so dynamic subdivide would look neater, but this lost some detail. i will sculpt it back when i have merged the jacket in the final stages
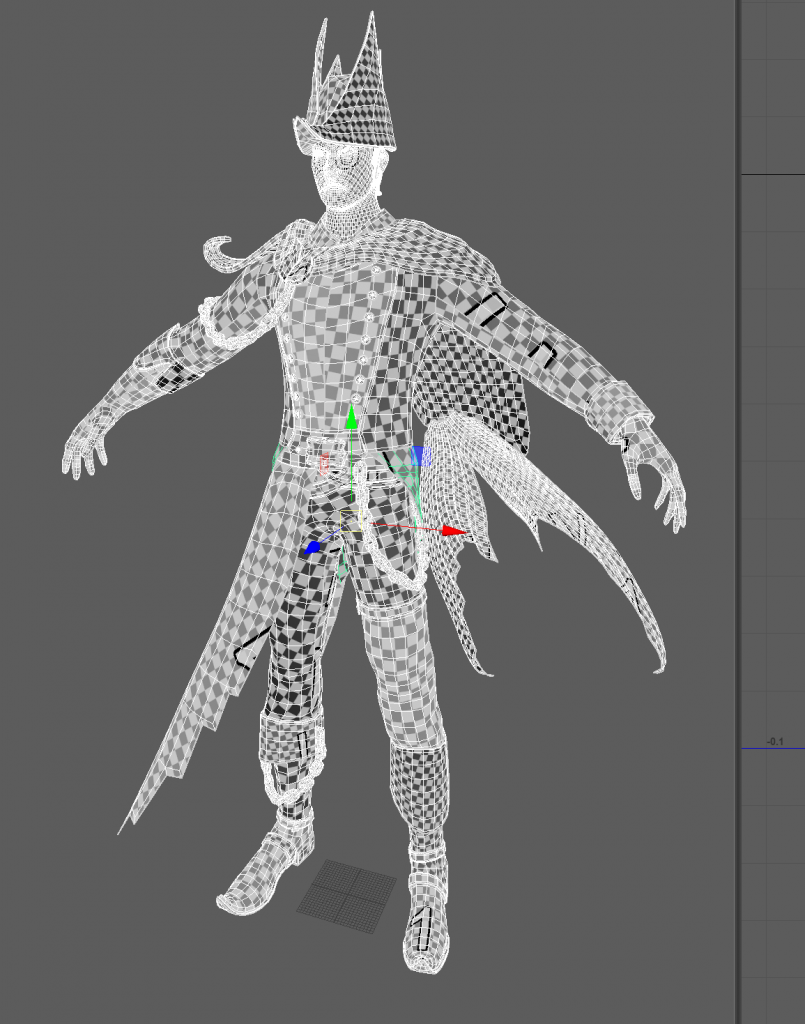
adding the drapery made the silhouette start to look closer to what i was aiming for in my concept art. i found it easier to shape when there was less topology so i zremeshed until it was low poly
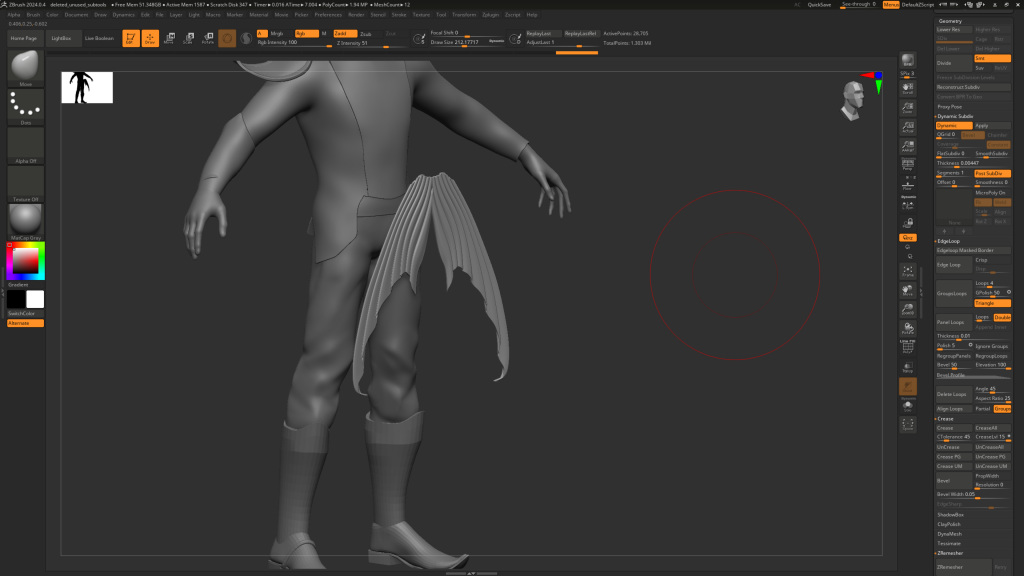
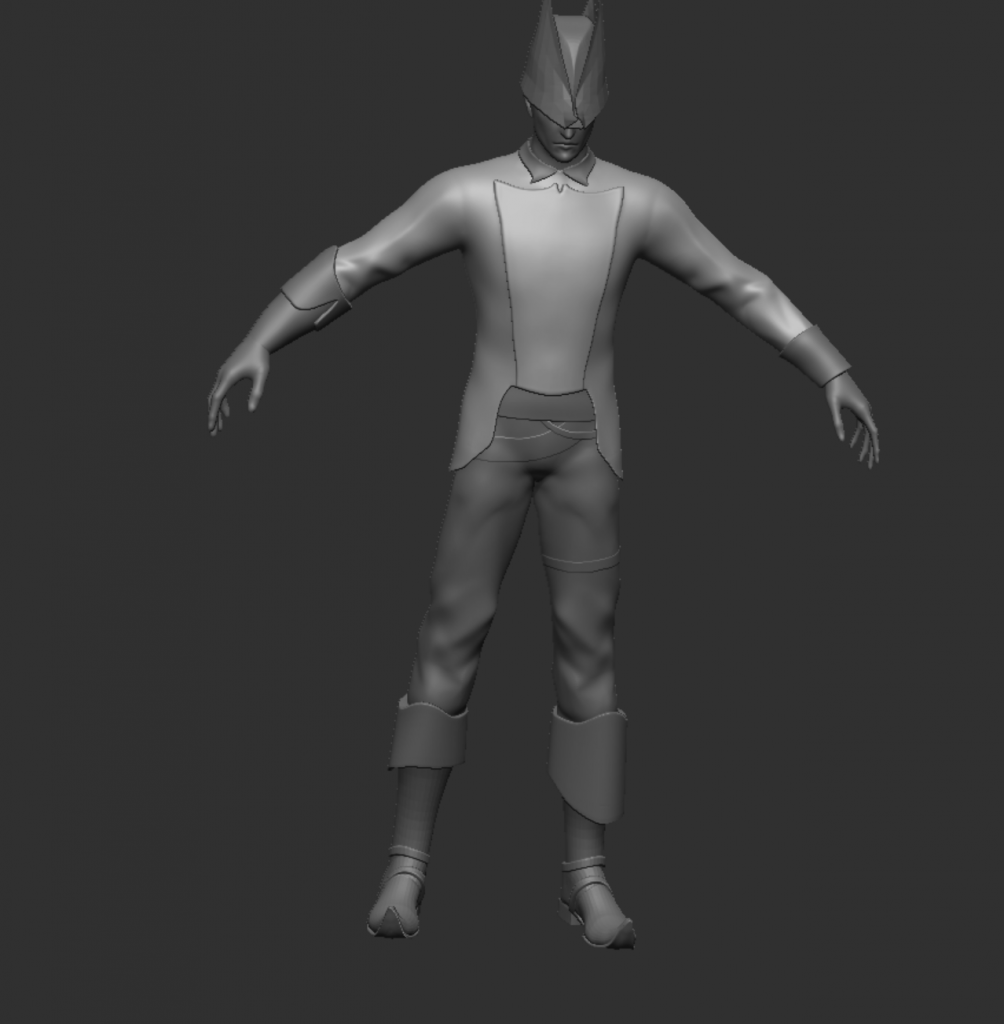
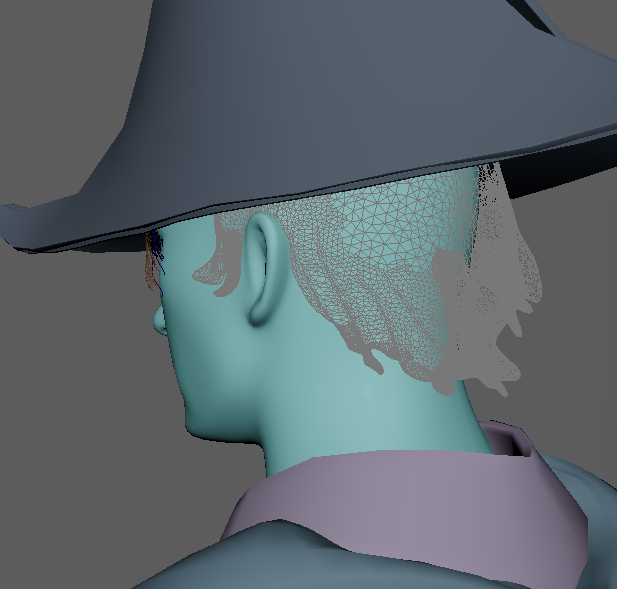
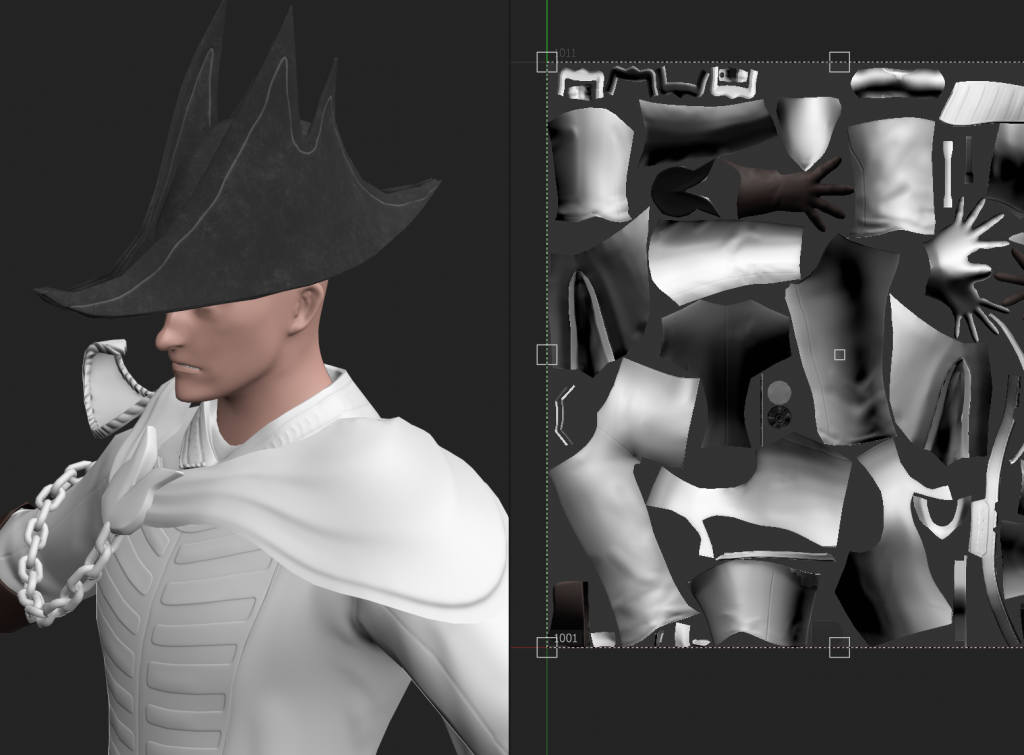
need to start merging my subtools so i can start sculpting details, but still need to sculpt straps around boots and waist first, as well as block out hair shapes which will be a guide for hair cards later.
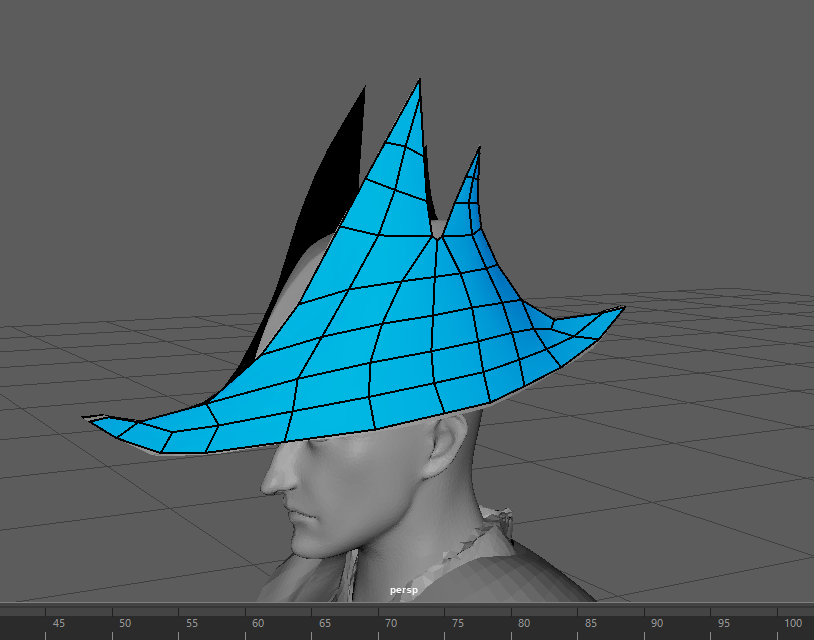
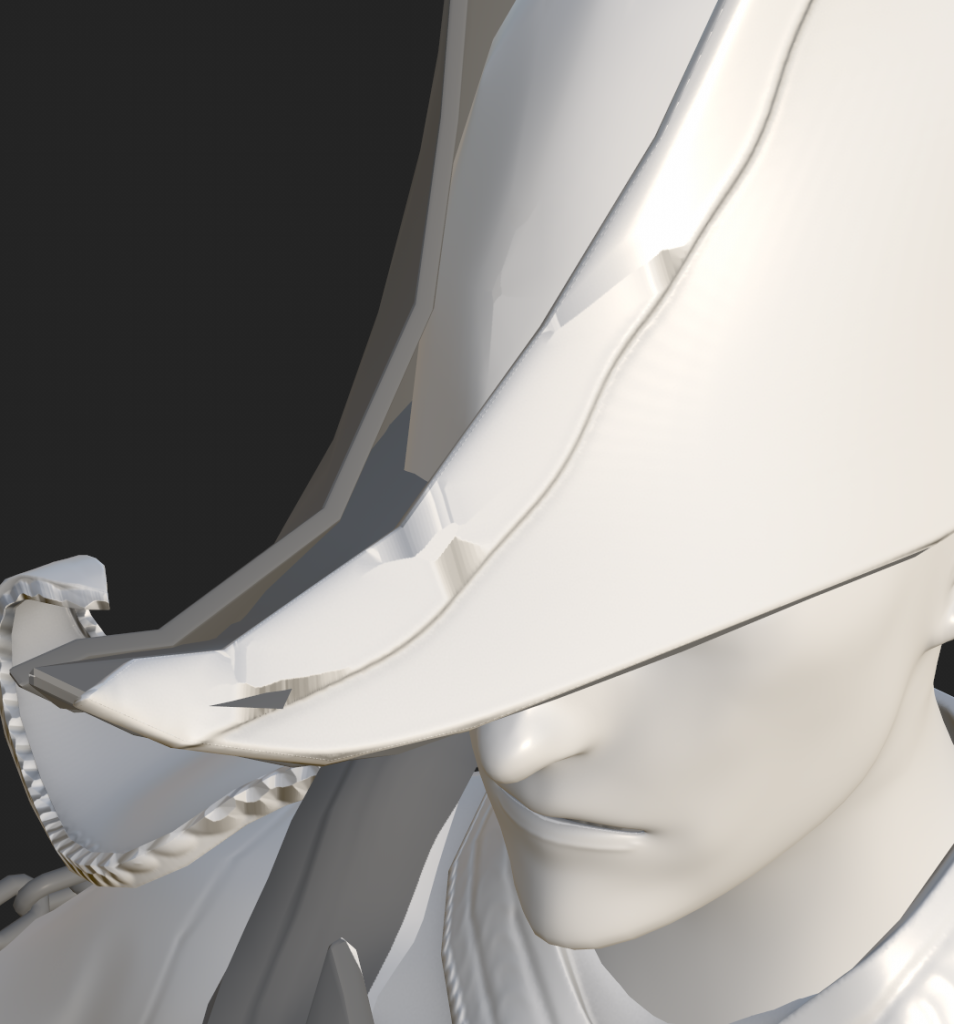
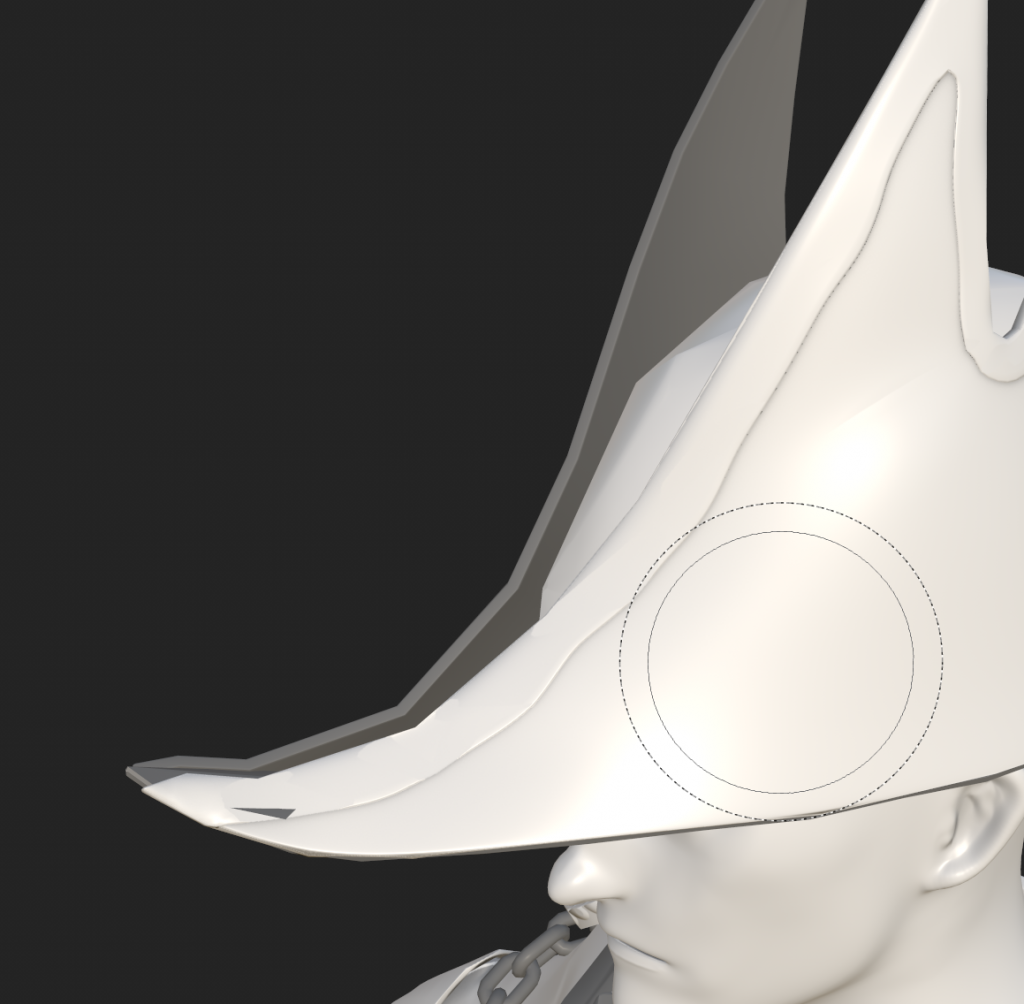
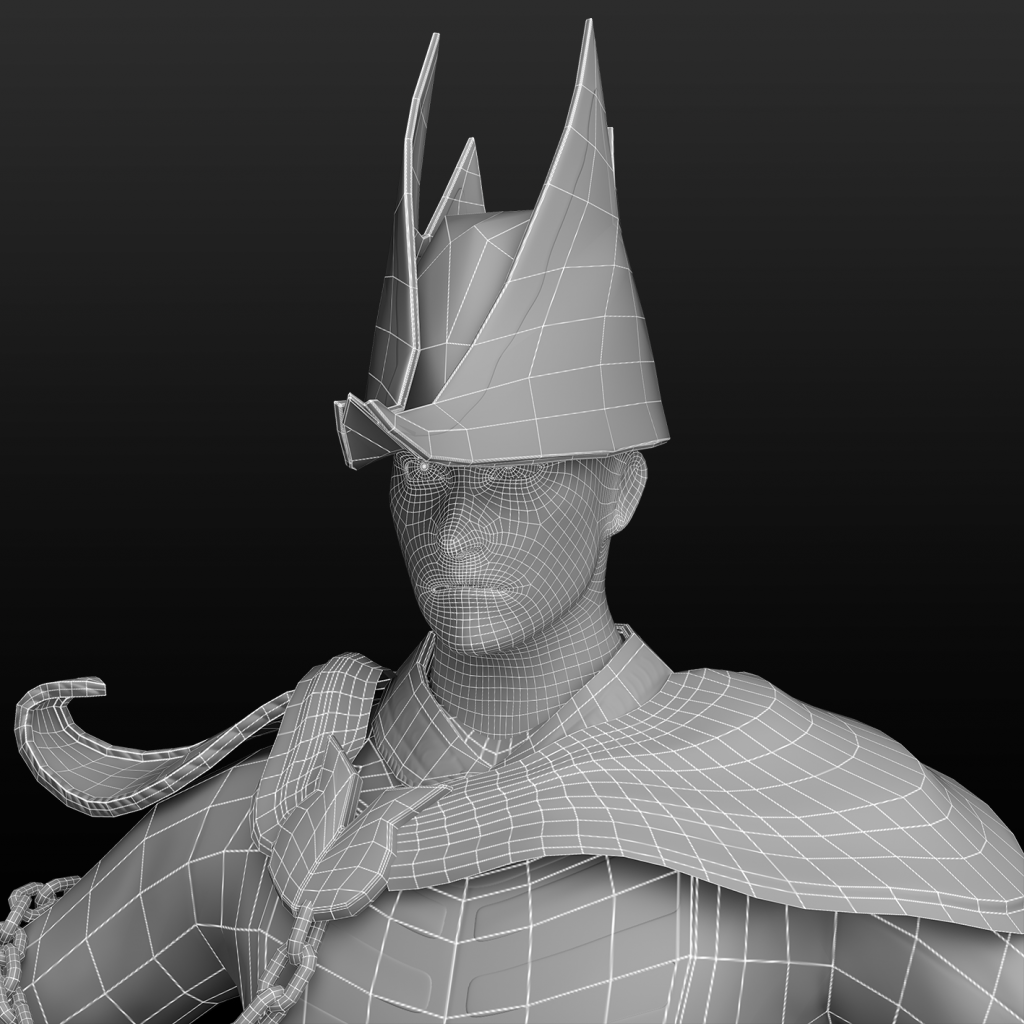
starting to merge the hat, needed to put the dynamesh resolution very high
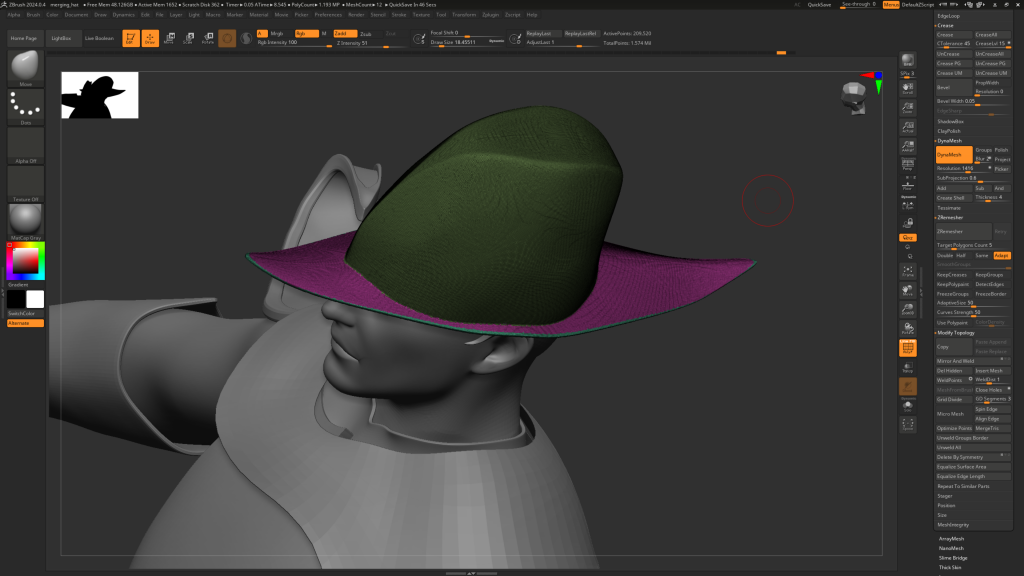
decided there’s no point merging the hat at this stage. it ruins the edges. i might make the hat as three or four separate parts
Pipeline:
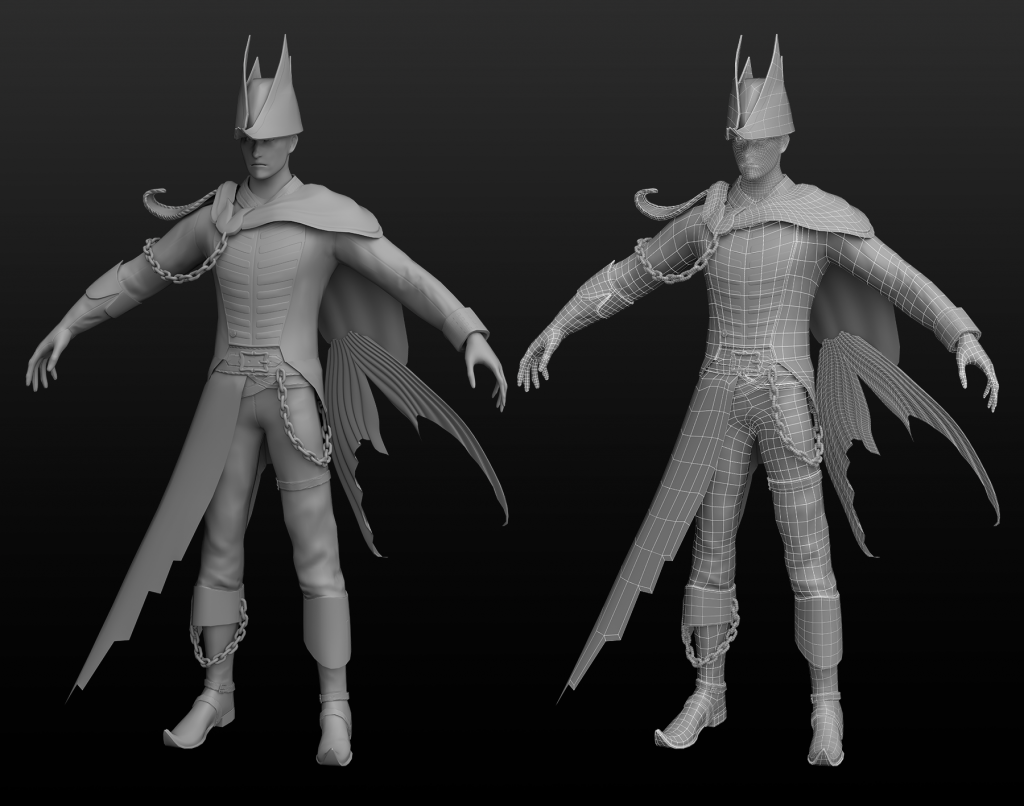
Starting with base male character in zbrush, retopo in maya, back to zbrush to sculpt details for baking high and low poly in substance painter
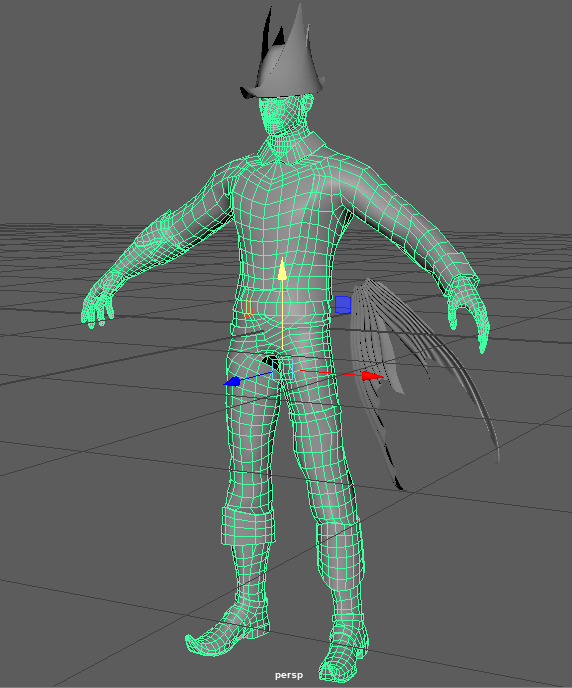
Merging subtools:
dynamesh ruins edges of mesh

fixed by turning blur to 0, adding auto clay polish, and making the resolution 2000
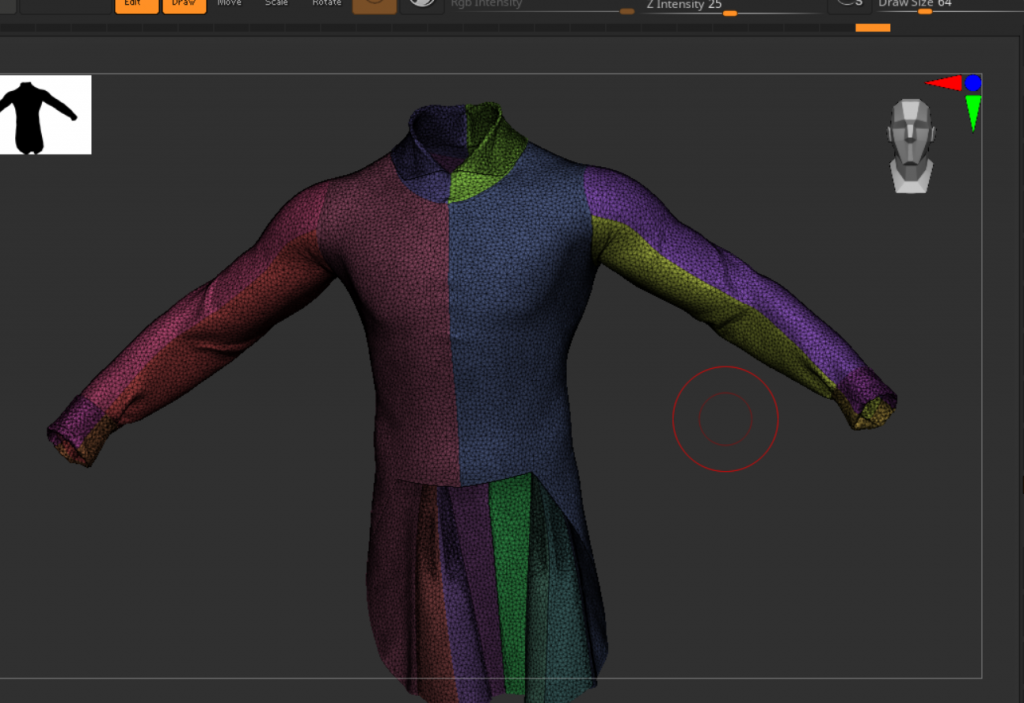
when zremeshing, i chose keep groups, creases, detect edges and freeze groups and halved the polycount.
but then there was a zremeshing error and it didnt work
so in the settings i only enabled keep groups and then i went to deformation and polished by groups and this gave a very good result. i also made sure to check mesh integrity and weld points after dynameshing
Its also helpful to keep the inside as a separate polygroup as i will be merging this mesh with the body later and may need to delete it
Steps for merging:
make sure dynamic subdiv is applied and looks good. all base shapes are correct THEN MERGE, BUT DUPLICATE FIRST IN CASE IT GOES WRONG
dynamesh: blur 0, auto clay polish, resolution 2000
zremesher: half, keep groups
deformation: polish by groups
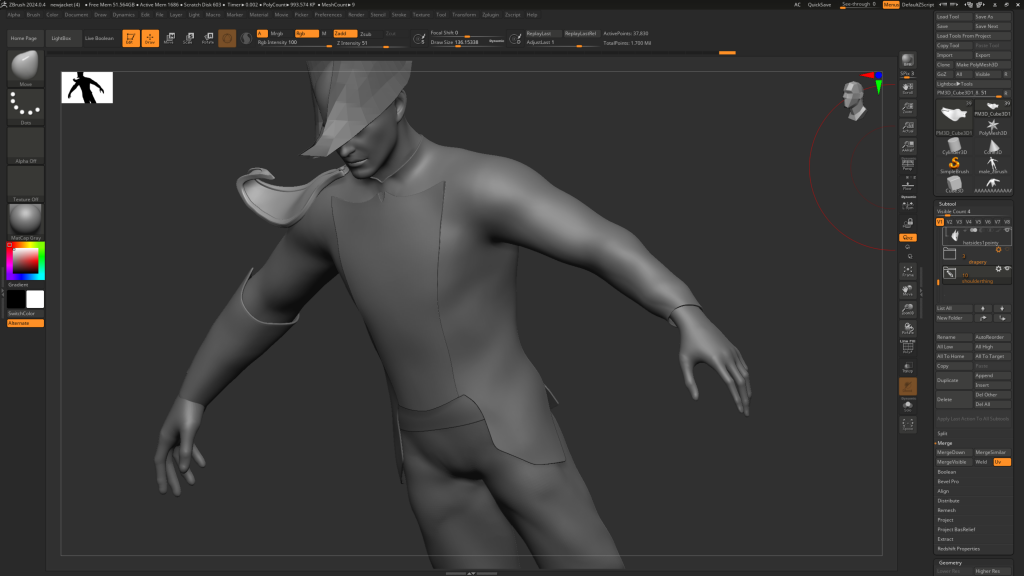
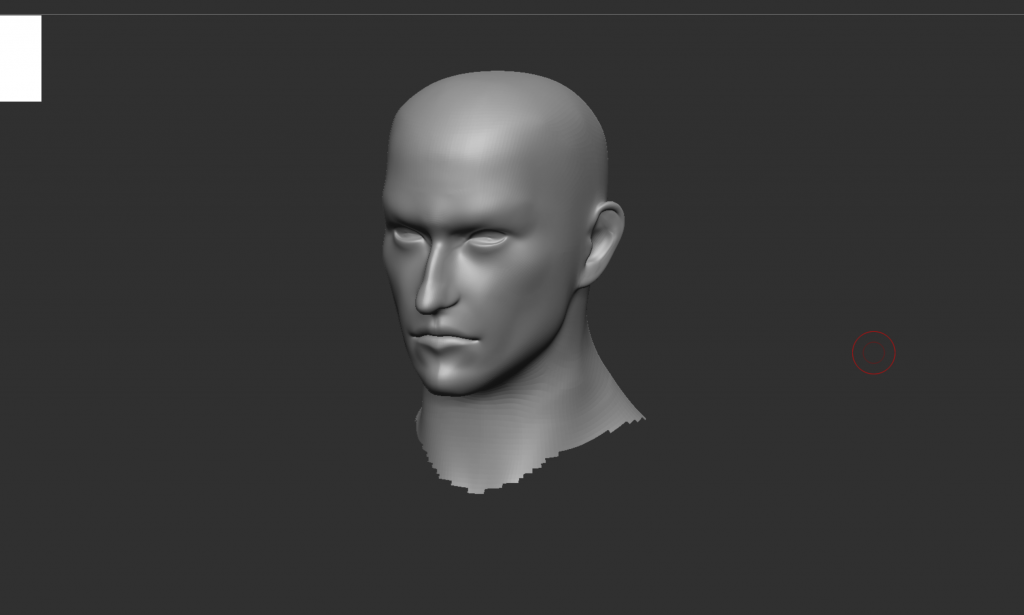
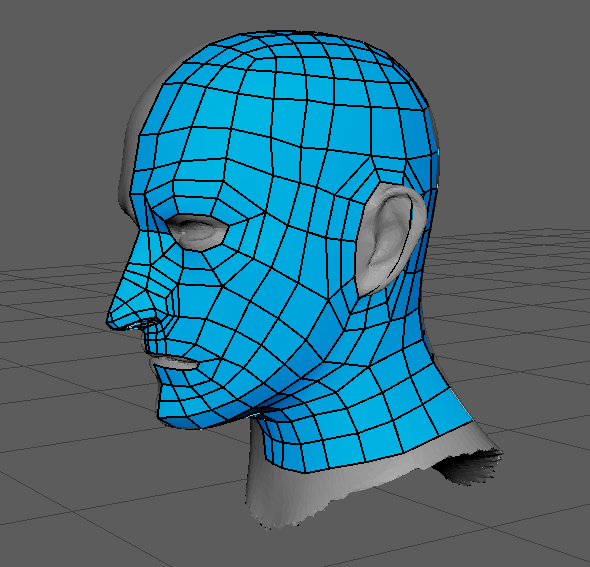
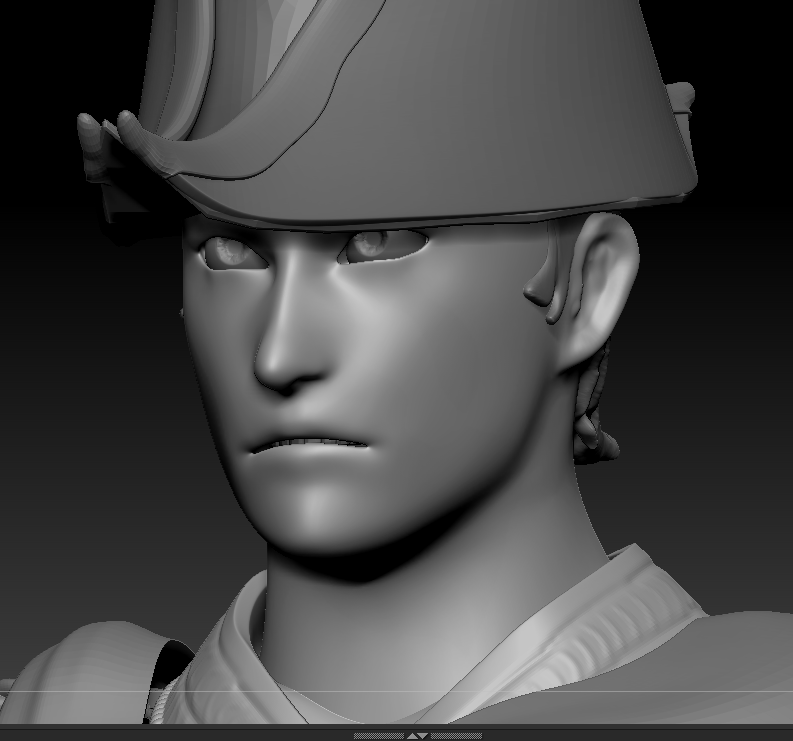
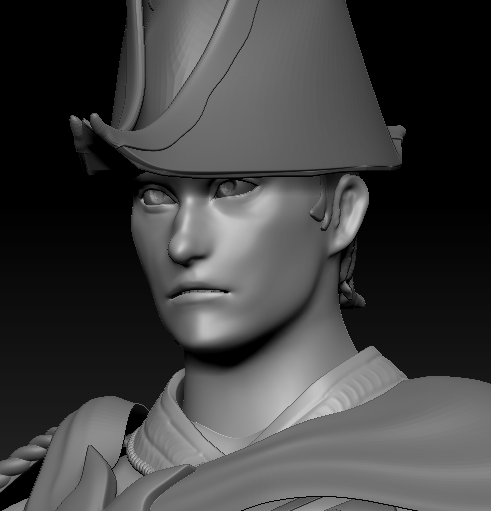
sculpted the face shape, will make it asymmetrical later
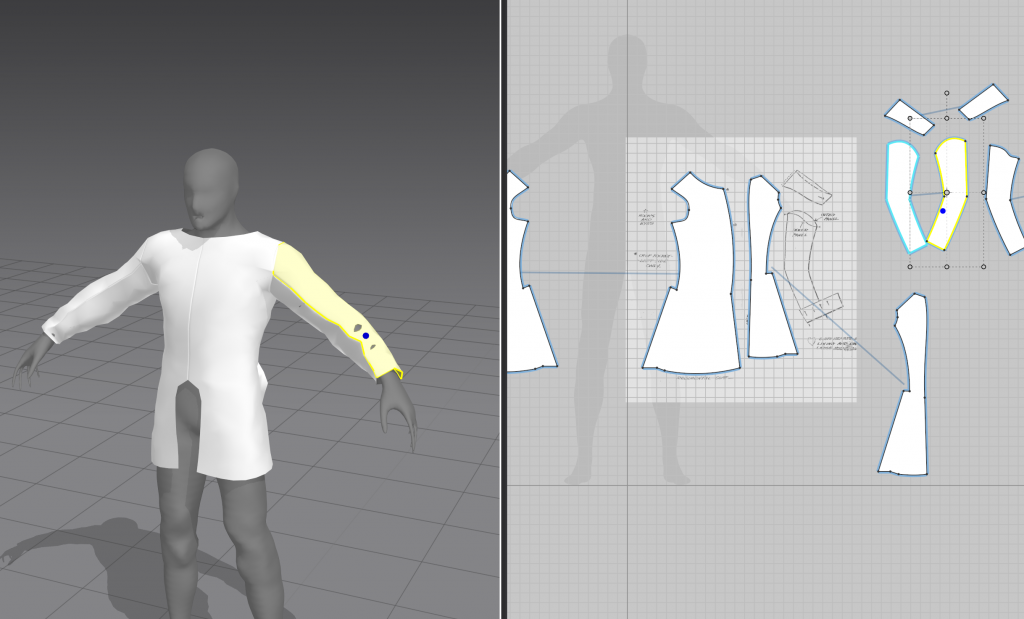
sculpted some folds into the sleeves
the reason i was unable to achieve folds in MD was because it was the wrong size. i did resize it in maya however it was in cm and md is in mm so it was 100 times too small. a solution would have been to make it 1000% the size in the import settings and export it as its original size.
merged and dynameshed the base mesh
sculpted the seams back in again, they will be lost when i retopo it but i can make the topology flow follow them so the uvs will be accurate
marvellous designer attempt 2
because i really wanted realistic folds for this character, I decided to try again in marvellous designer, this time making sure the size was correct.
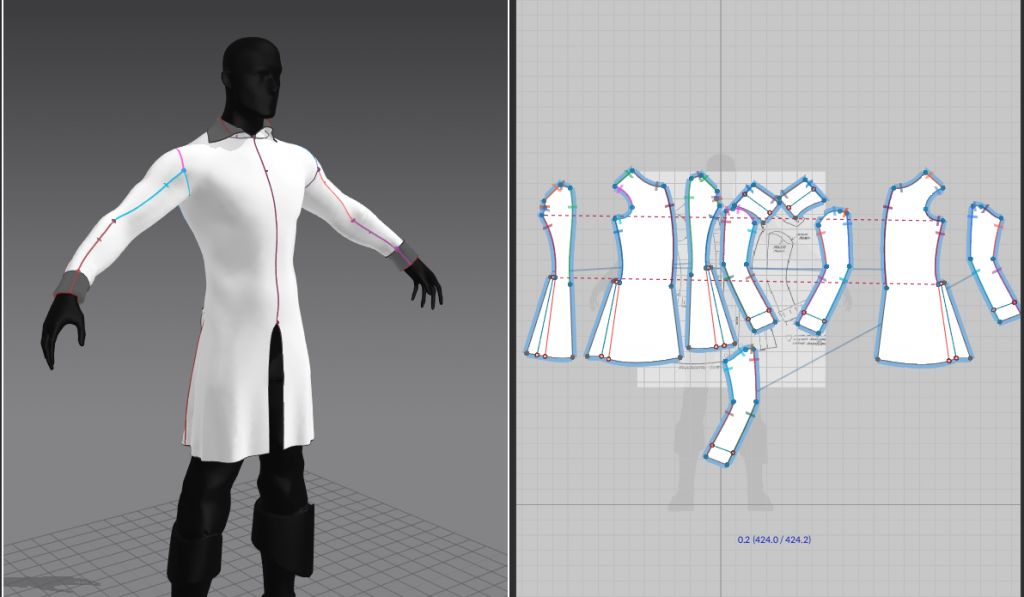
added buttons this time
tried adjusting it to get some interesting folds however the more i tweak it the worse it seems to look
week 5
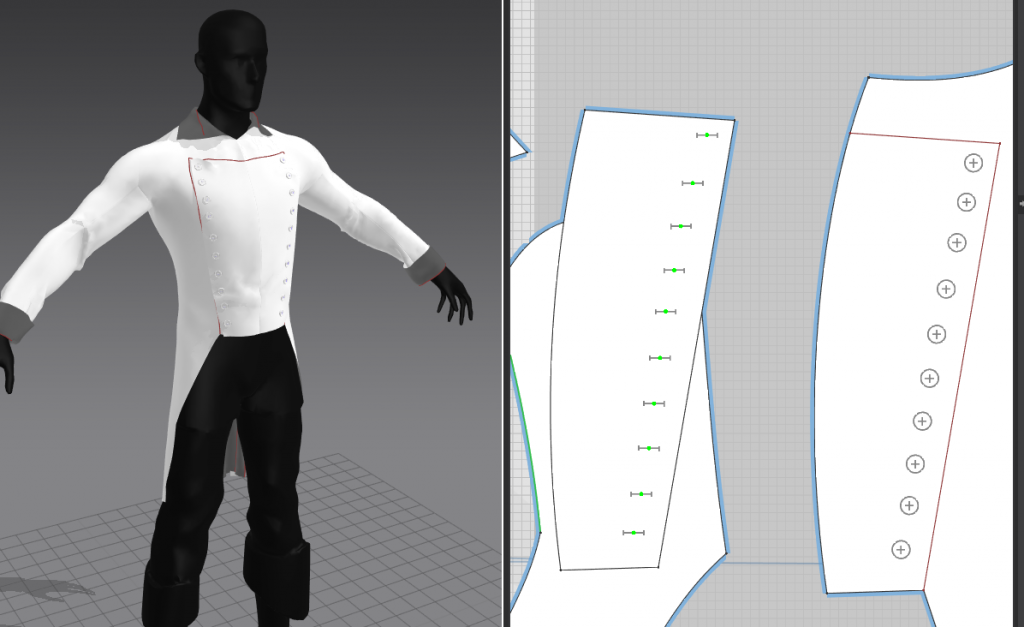
decided to try again because of all the issues with the fit and crumpling
this time i was able to get the pleats to work
there were still a lot of issues with the folds
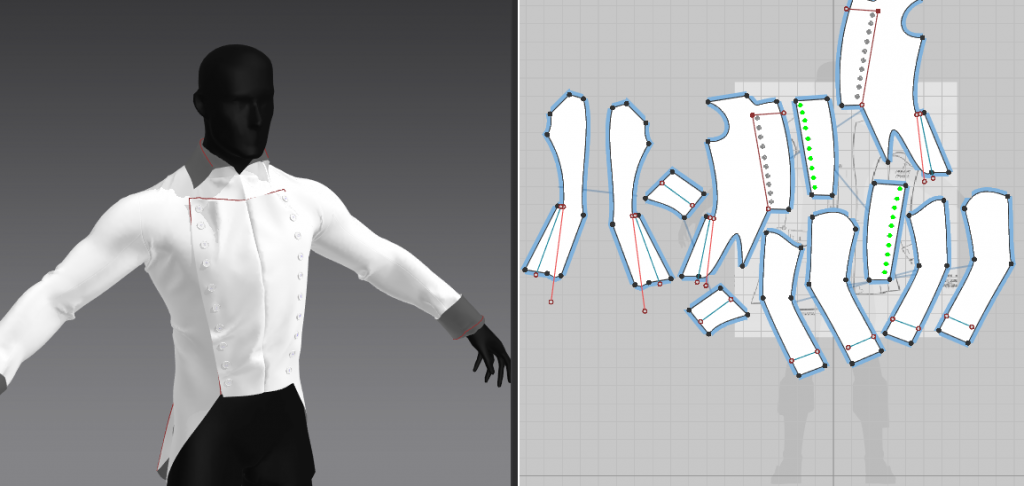
as well as the toolkit on importing md into zbrush, i found this video helpful. mostly it was the weld points feature and panel loops
importing to zbrush
seams not working again. my process involved welding points however checking and fixing mesh integrity may have unwelded them somehow. not sure what else it could have been
Retopology
this article was useful, though it looks like the character models were used for cutscenes and trailers, they might have been more optimised in game:
for the buckle i took the it from one of the imm folders in zbrush and edited the shape in maya
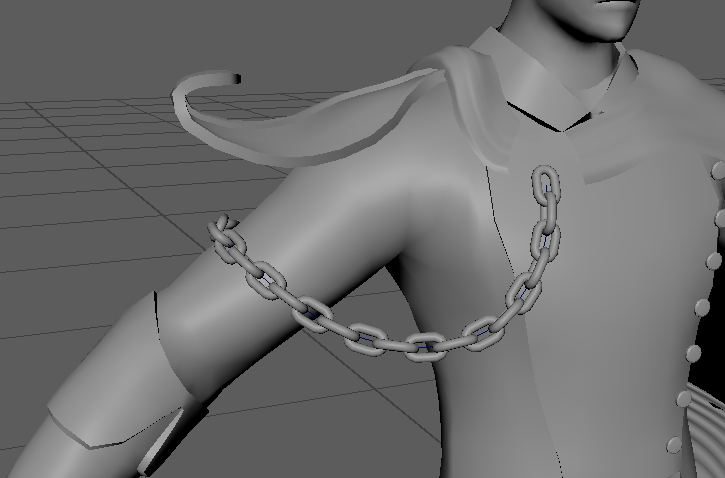
used curves and mash network to make chains
feedback
feedback was to separate the head from the rest of the body so i could smooth it and have more detail without increasing the poly-count of everything.
i deleted the history of the chains and froze the transformations so the MASH settings were set and i could delete the curves.
i also needed to bevel the sharp edges of my mesh so that when i divide it in Zbrush it will look consistent. my approach will be to take the retopologised version into Zbrush and divide it and sculpt onto it without projecting it onto the old high poly mesh, as there are a lot of differences to the shape that i made in the low poly that wont translate well if i try to project it. then i will take the high poly and reduce it to the original polycount and it will be this mesh that i will UV unwrap.
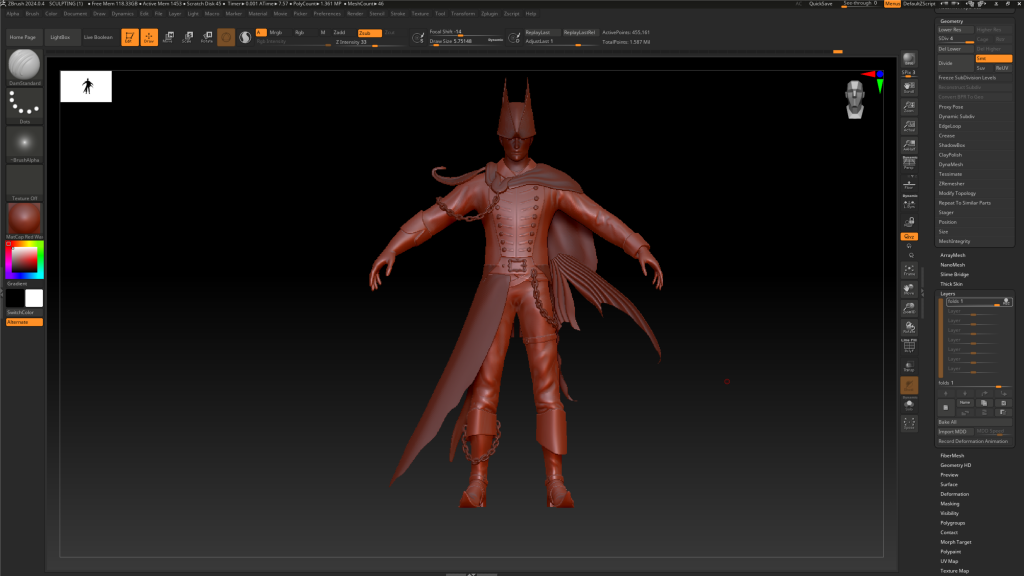
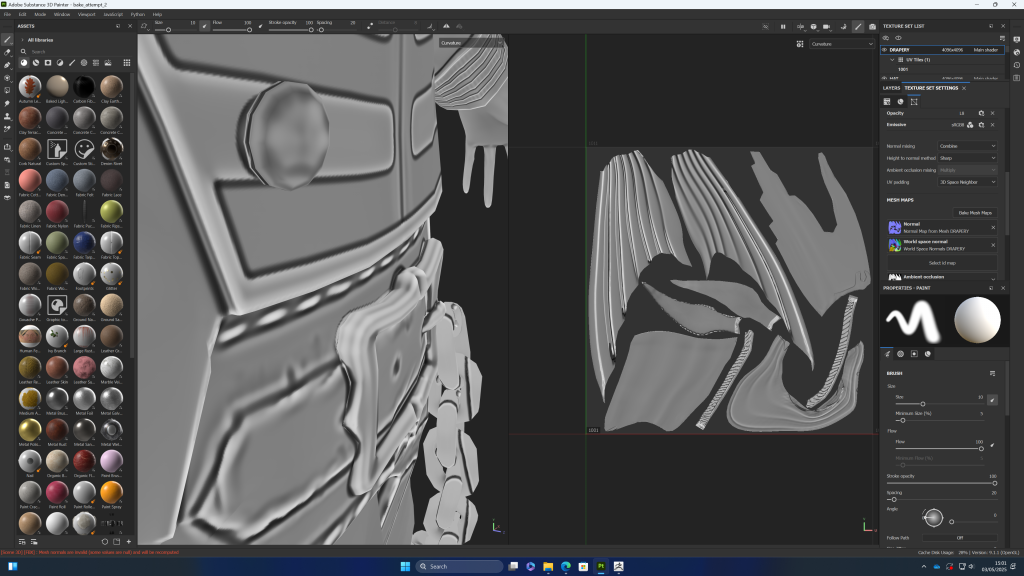
adding detail in zbrush
i used layers and morph target so i could have a non destructive approach to modelling the folds
i found that starting with a smaller brush at the more compressed part of the fold (like at the lower leg) and increasing the brush size as there is less compression going up looked convincing
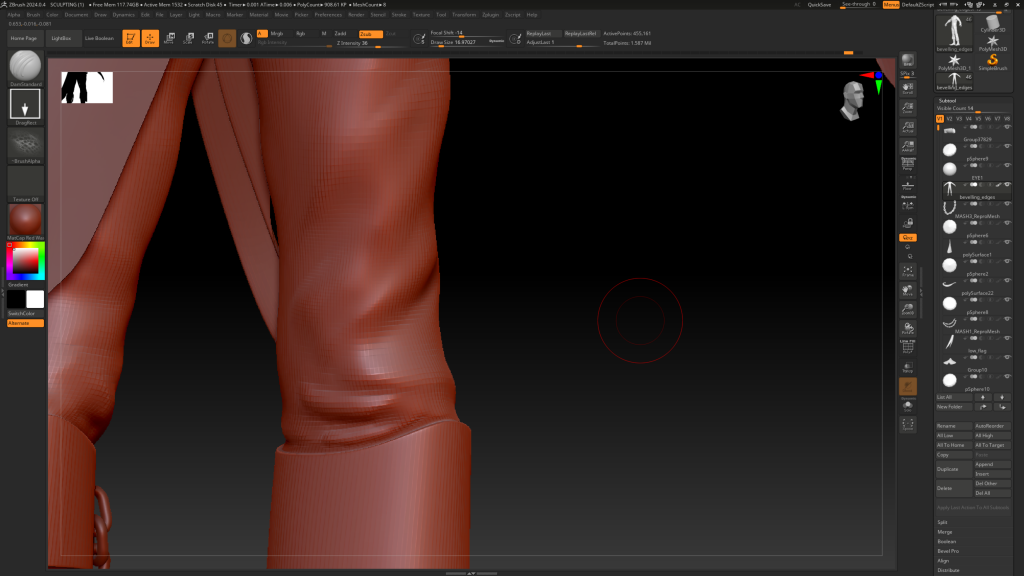
i also used lots of references for the material and clothing pieces so i could decide the direction and the thickness of folds
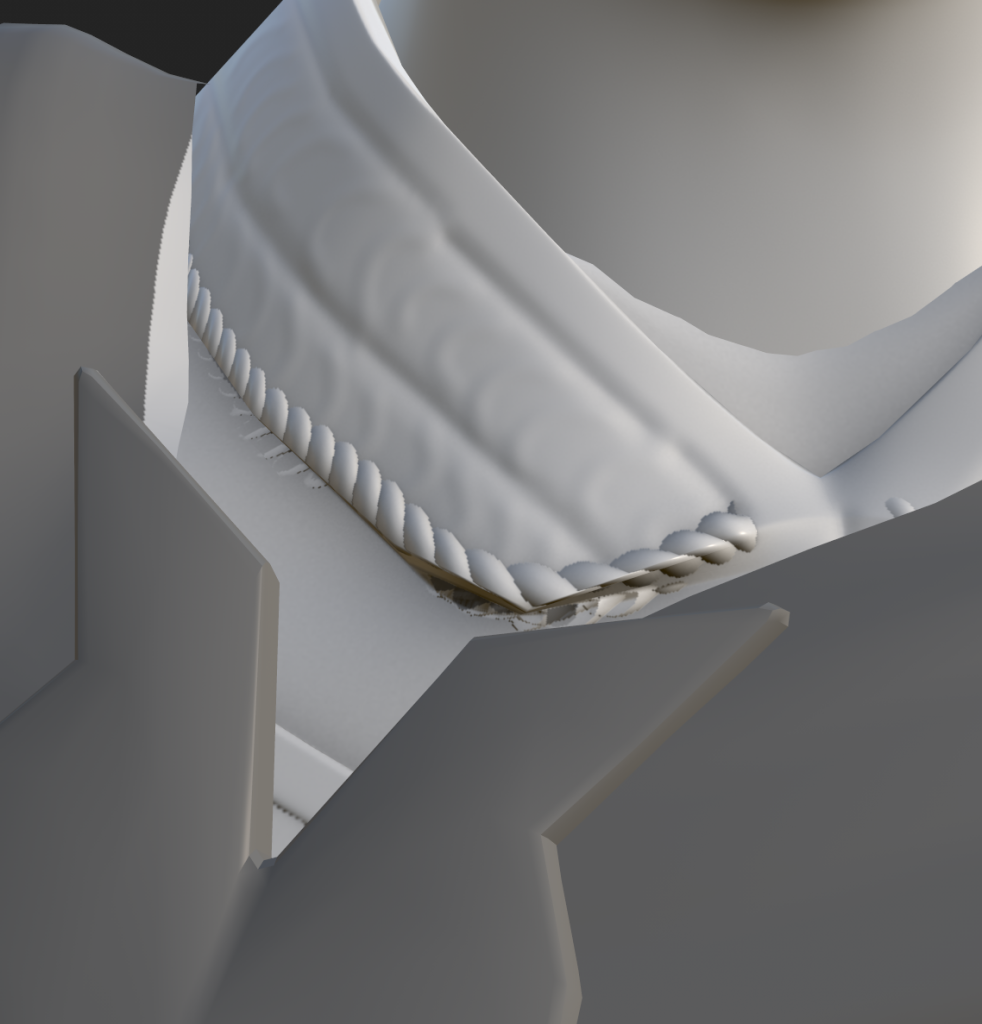
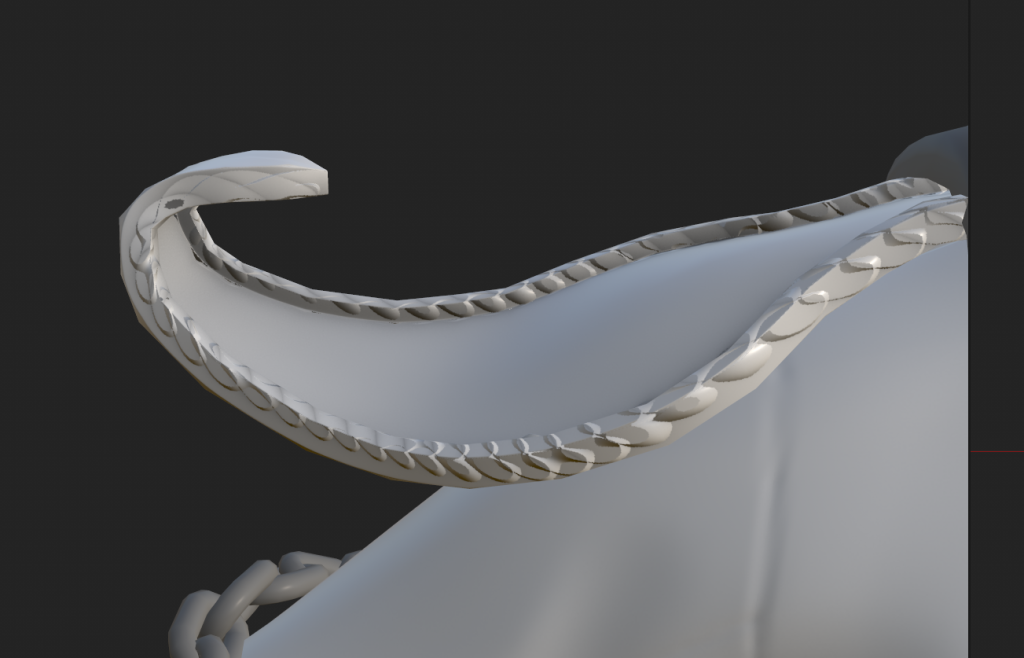
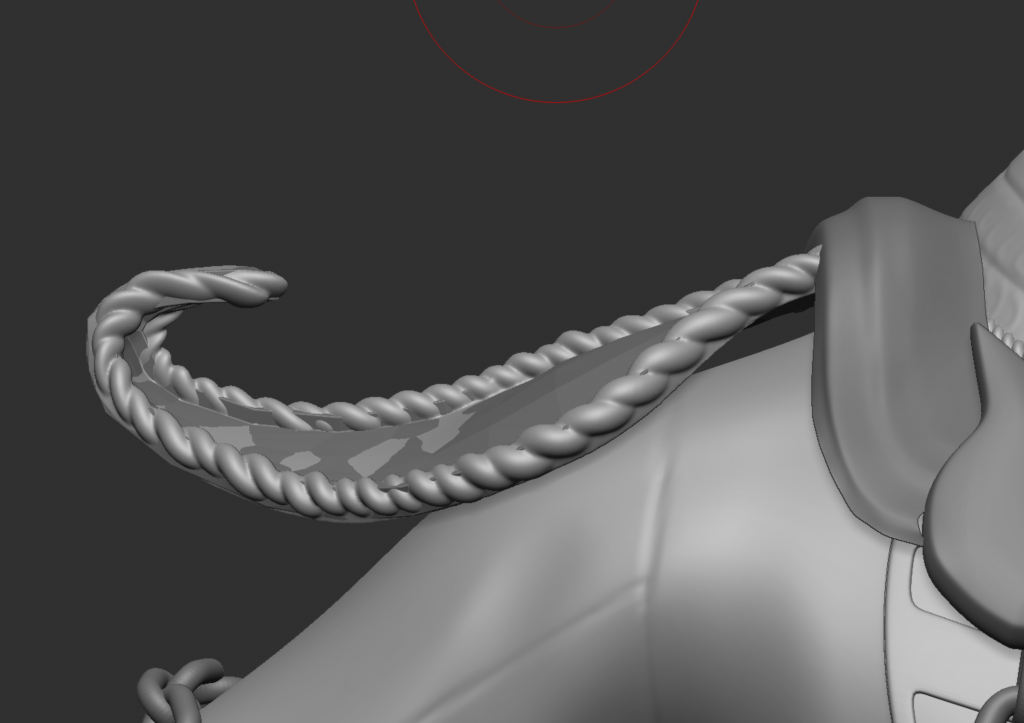
i made a rope imm brush that i will use for some small details. Because imm brushes dont work with subdivision levels i will duplicate the base mesh, delete the subdiv layers, draw the imm curves over it, separate and delete the duplicated base mesh and then i will have the ropes as separate objects that will hopefully not break the silhouette enough to interfere with the bake
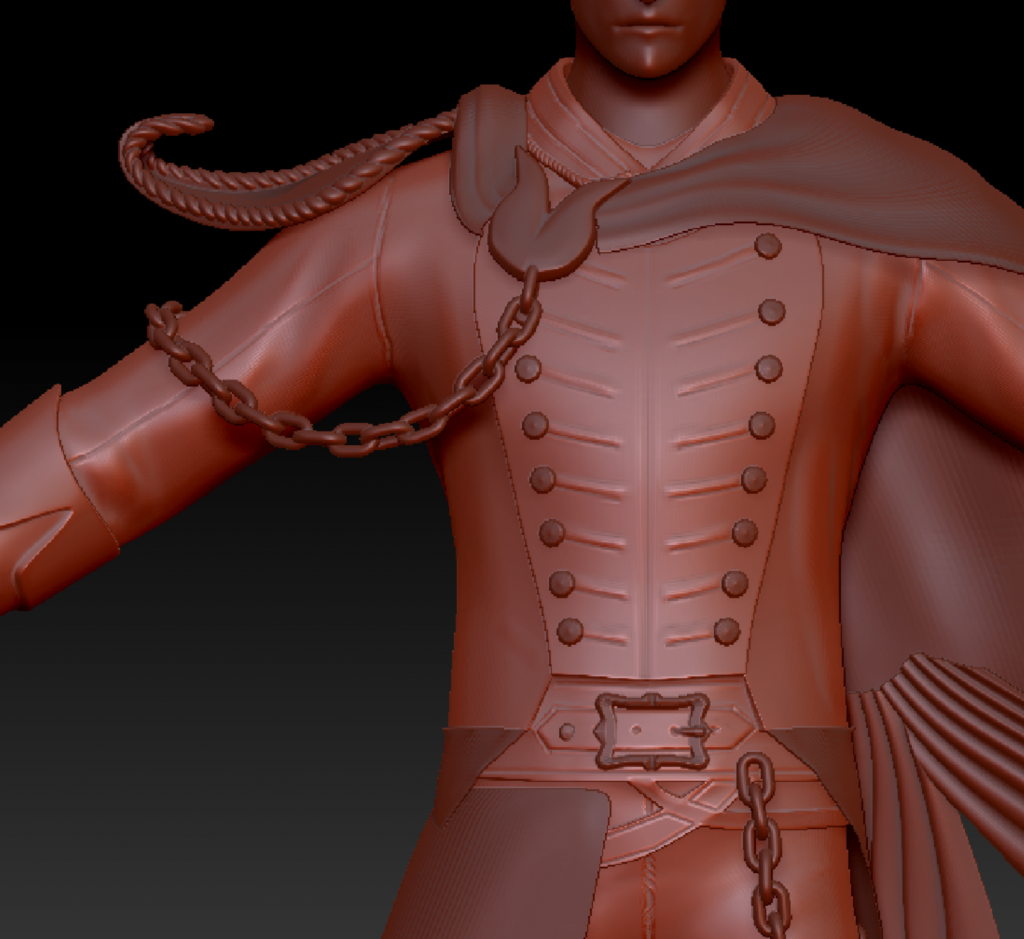
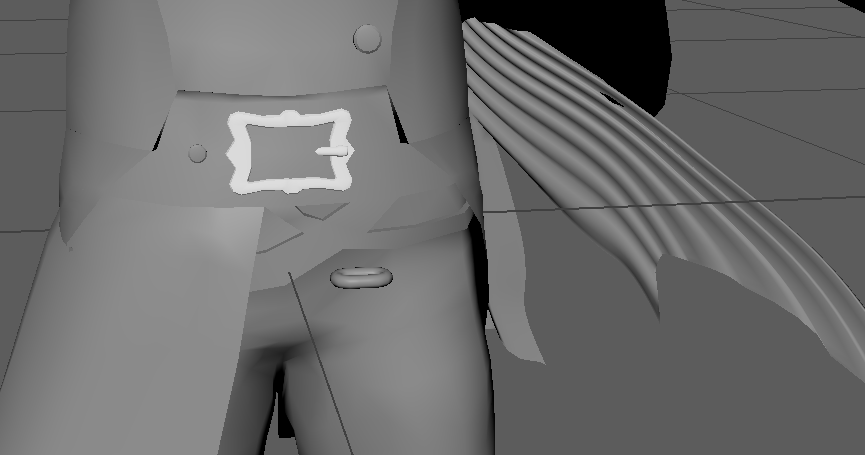
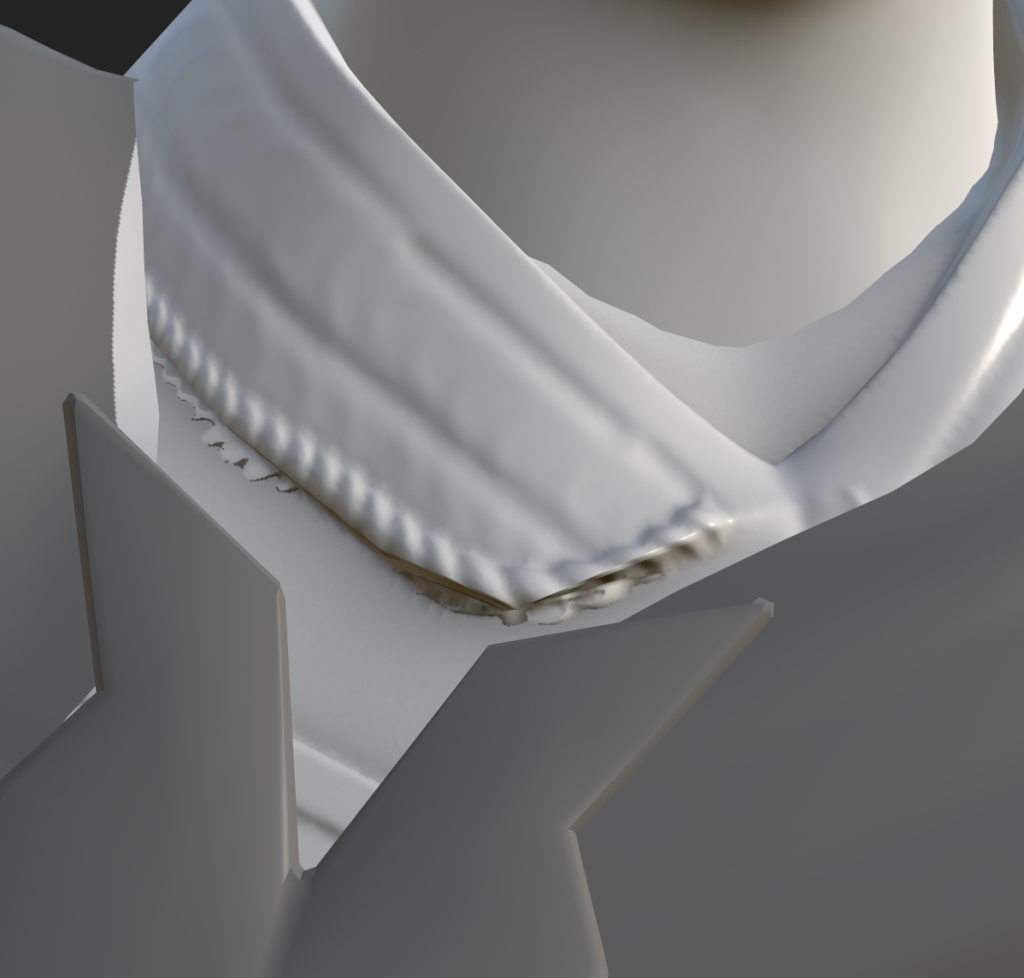
added some damage to the belt
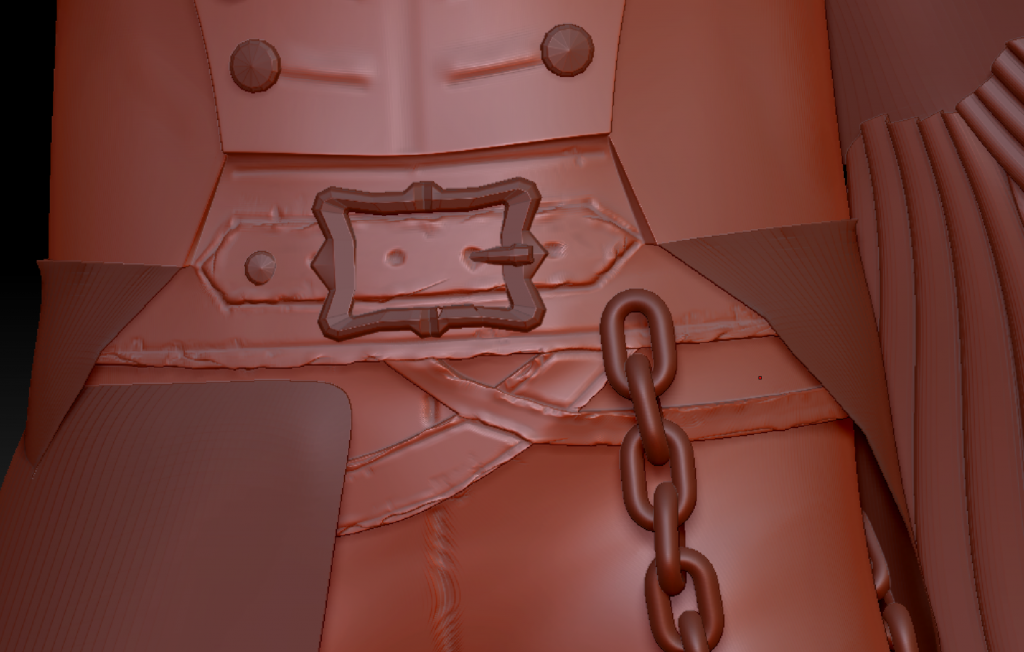
used slash and trim dynamic brushes to add the worn edges

Added detail and structure to the face
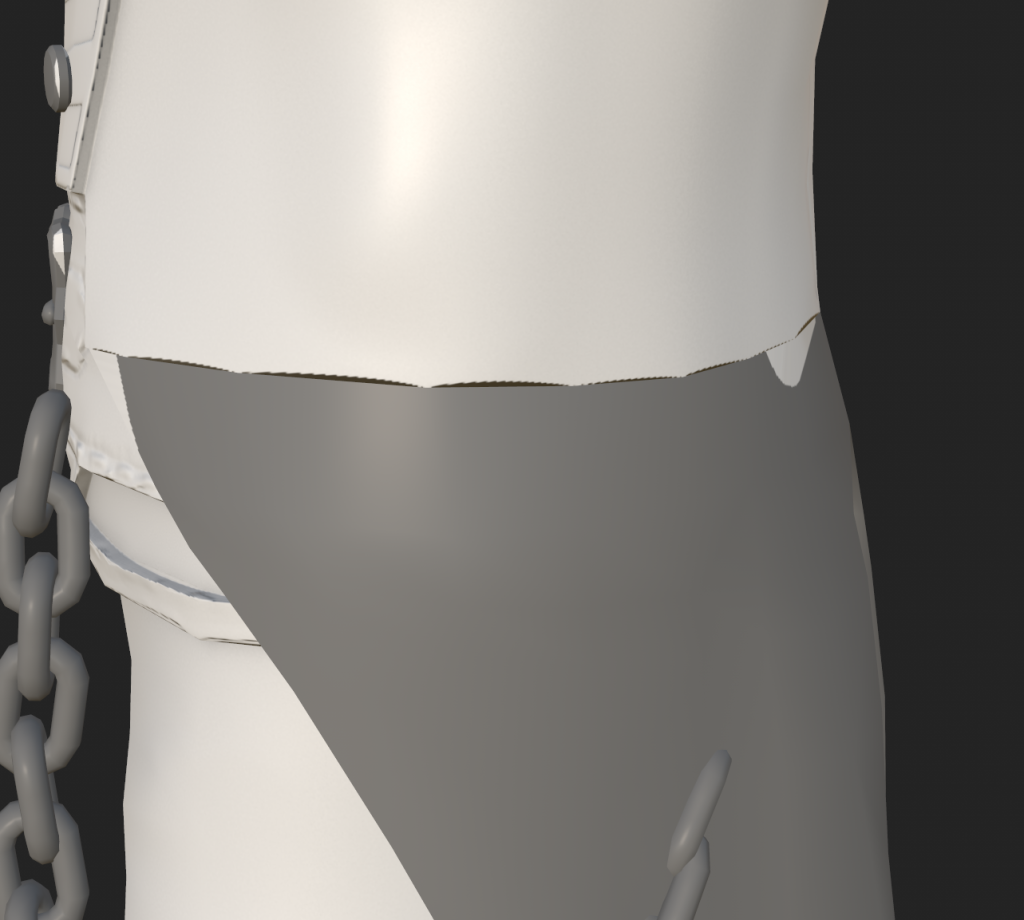
when exporting the high poly version i merged the parts of the base and deleted the parts i didn’t sculpt on. then i decimated the parts and exported a version where they were just merged and exported a version where i dynameshed it to see what the difference would be in the bake
UDIM tutorial video:
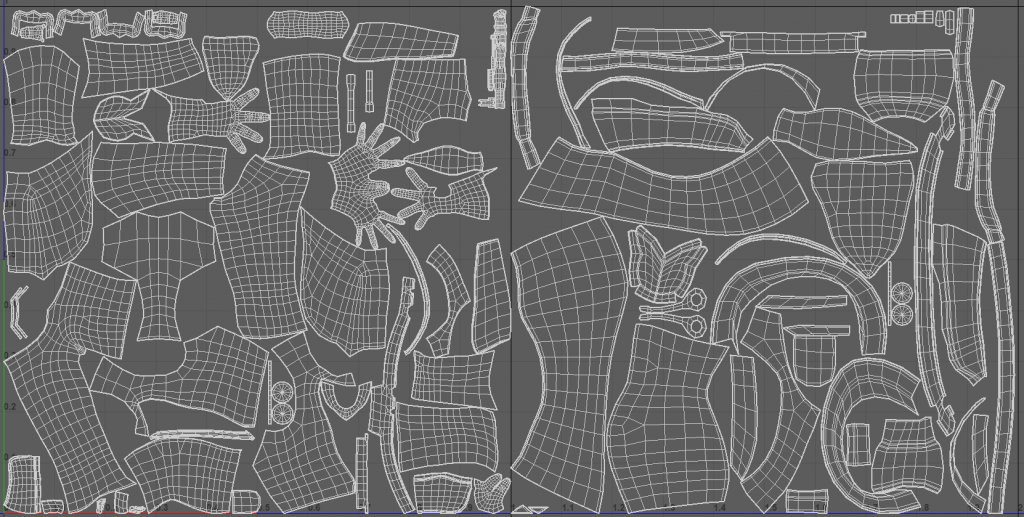
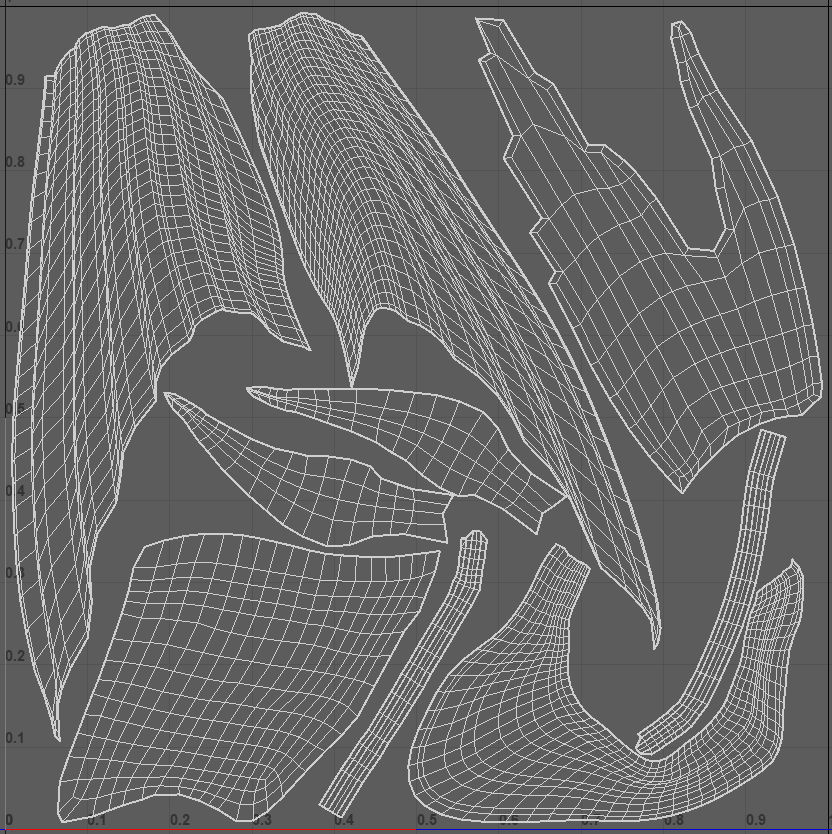
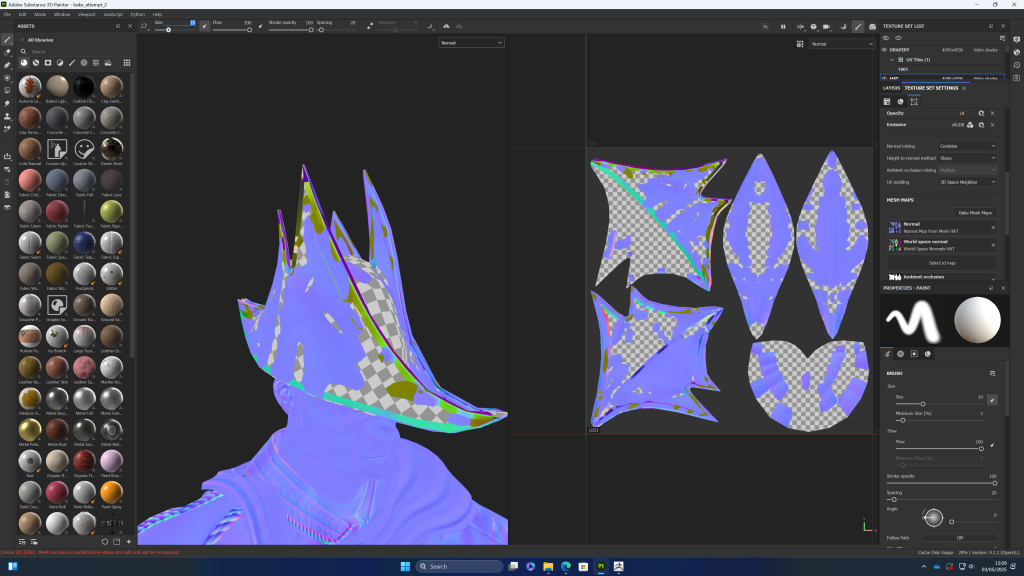
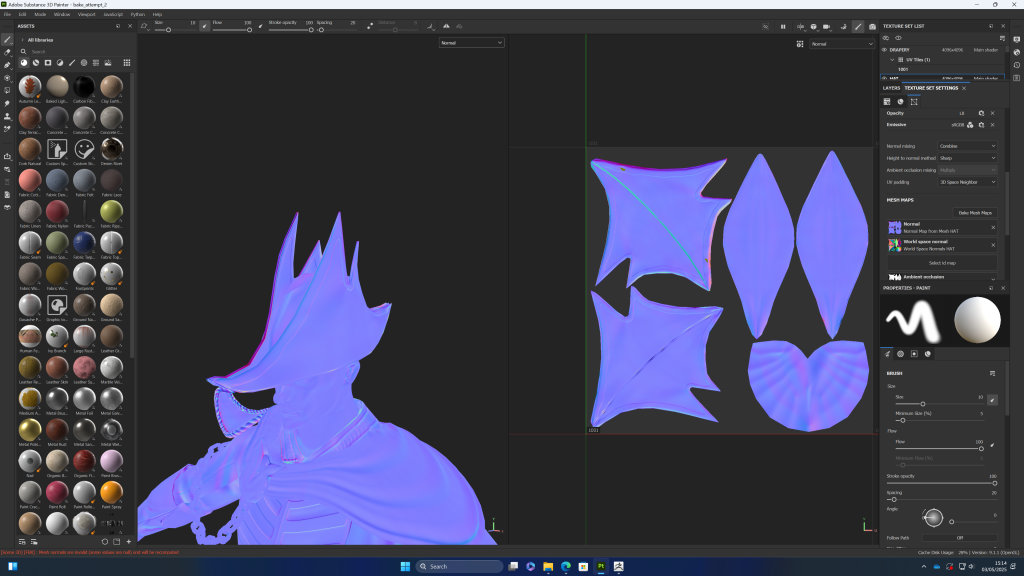
i uv unwrapped my character, thinking about the seams of clothing and changes of materials


left a space for haircards:
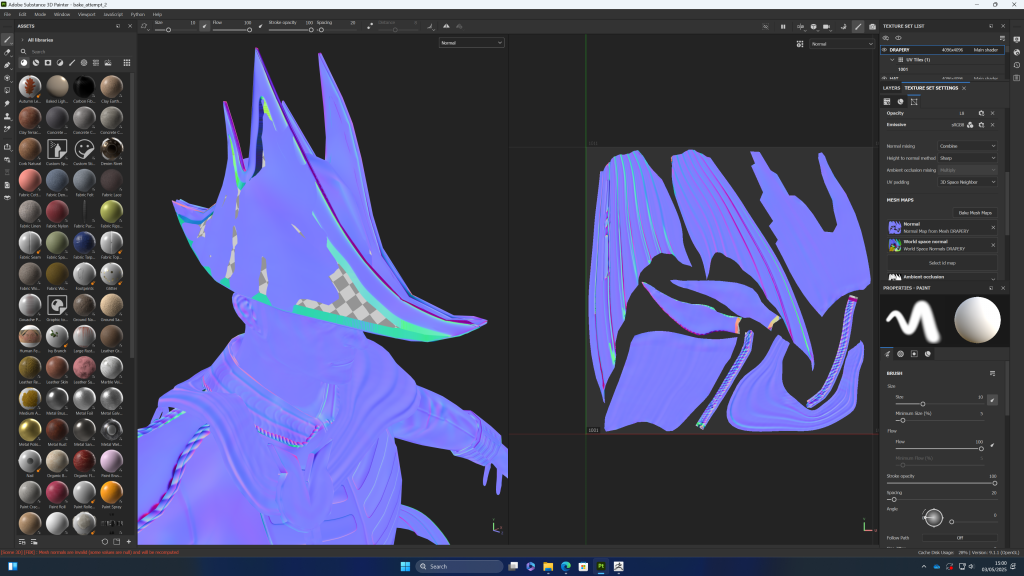
first bake attempt
i am happy with how the folds and seams were baked, and the small details of the belt came out fine. however there were a lot of problems
not sure why the hat was doing this, also the other half of the hat wasn’t baked so might be a problem with the naming of the objects
areas where the high poly deviated form the low poly. this happened where i put the rope texture, it added a lot of volume that wasn’t present in the low poly
shading around what i wanted to be a sharp edge. i think this is from ray tracing
guessing this was from the rough edges caused by Dynamesh
second bake
i tried baking with a high poly version that i hadn’t dynameshed together and, surprisingly, the results were better everywhere except the shoulder pad
this object looked better in the previous version, so i might try making a cage or going back to substance painter and dynameshing it there
i should be able to paint out a lot of these errors however i might first try experimenting with the soften/ harden edge in Maya or potentially try using a cage. also the button wasn’t baked so i will need to find out what i did wrong. hiding the rest of the buttons from the low poly might be the solution as i only made one high poly button and they all share the same texture
i might also need to take the objects that don’t have a high poly version into substance painter and make them a part of the high poly so that every object has a matching _low and _high, as it doesn’t seem like substance painter can automatically use the low poly as high poly when it is matching by mesh name
i don’t think i have enough time to make a cage
went back into zbrush and dynameshed and made sure the mesh was aligned and imported and smoothed all the other objects
Final hp with all objects, i also had to edit the uvs again as the udim had an island going accross the middle between two squares so it wouldnt open in sp
third bake:

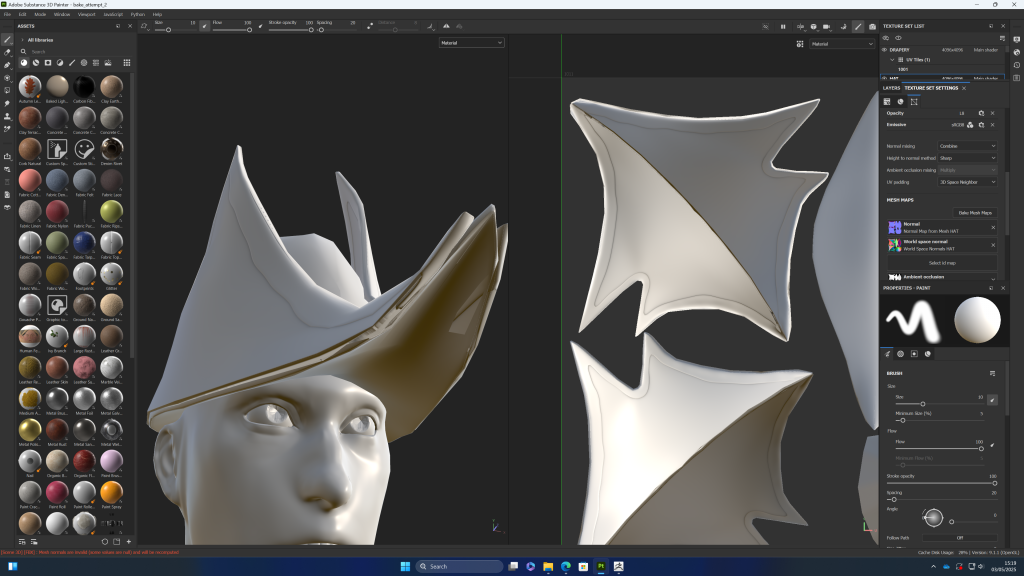
normal map issues with the hat
curvature of button and buckle leaking onto base mesh
tried adjusting the setting but couldnt seem to get a better result
in the baking settings i turned off relative to bounding box and increased the max frontal and rear distance, which improved it a lot
there were still some artefacts, however this part of the hat is a solid dark colour and it will be in shadow, it hopefully wont be seen from this angle much, and i can paint over the normal map if neccesary

in this bake, i wasnt having the same issue with where the 2 pieces of the coat join. this may be because i made sure this edge had a sharp edge in the low poly smoothing groups and in the high poly version i overlapped the 2 pieces slightly.
overall, I’m pleased with this bake, with the only major issue being the button which is completely black in the ambient occlusion
Hair
for the hair, I decided to get the GS curve tools plugin and followed this tutorial by the creator
to make the haircards, i’m going to use FiberShop Realtime Hair Card Texturing Tool
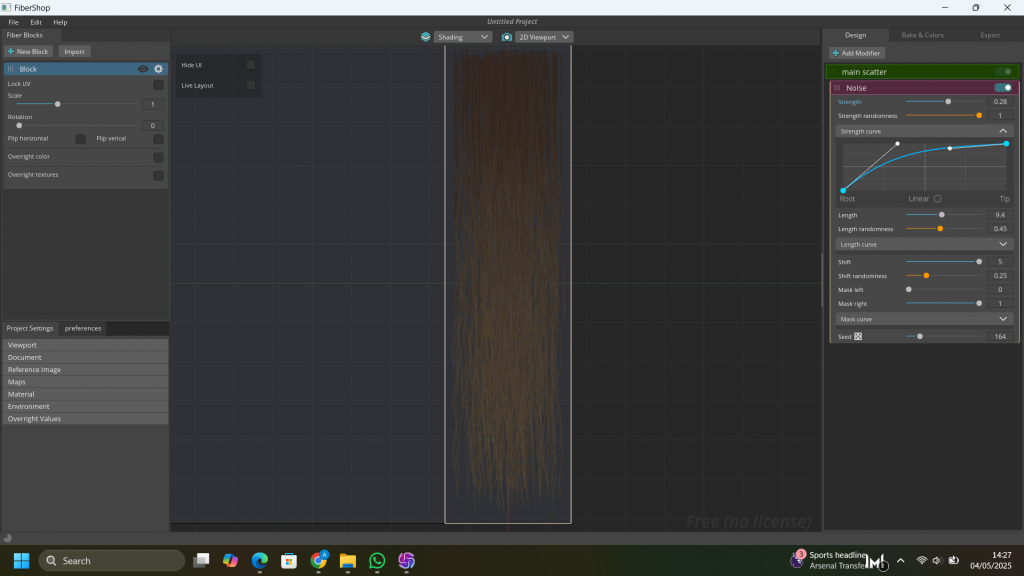
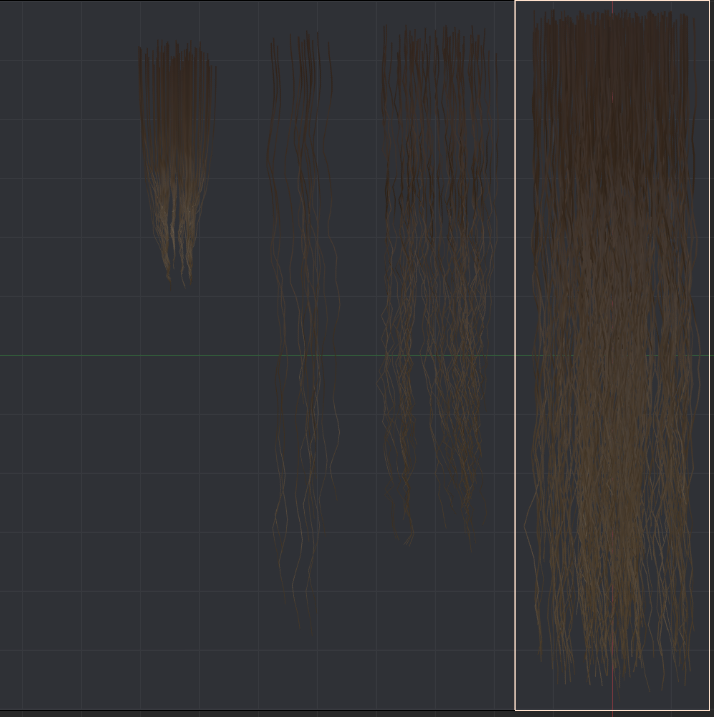
i could only export at 512 by 512 pixels as i was using the free version of fibershop so i took a screenshot and upscaled it get a better quality using this website: https://image-upscaling.net/imageupscaling/

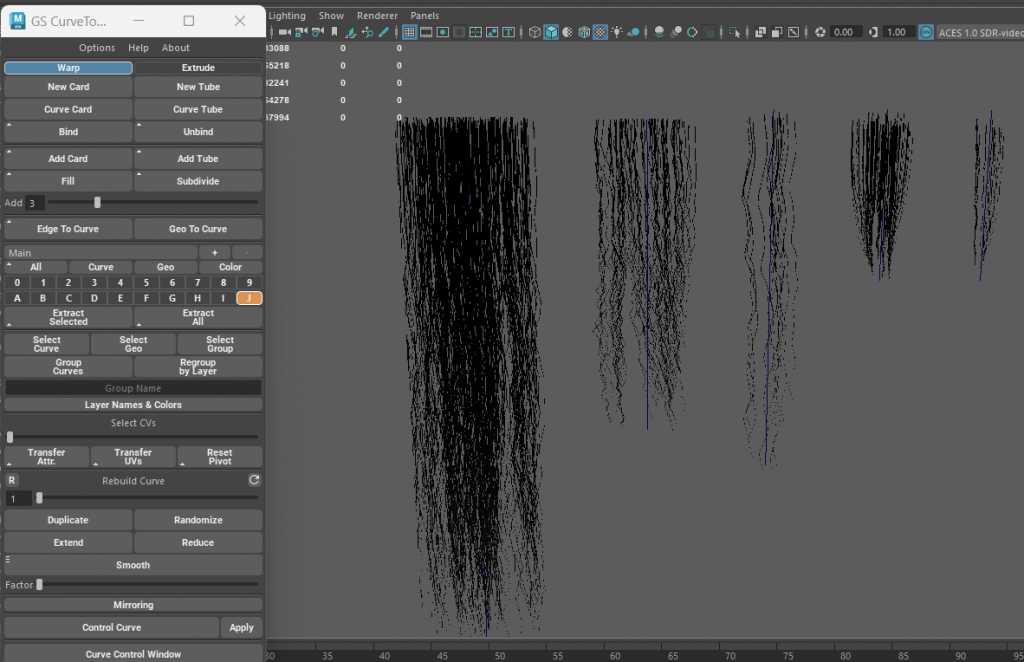
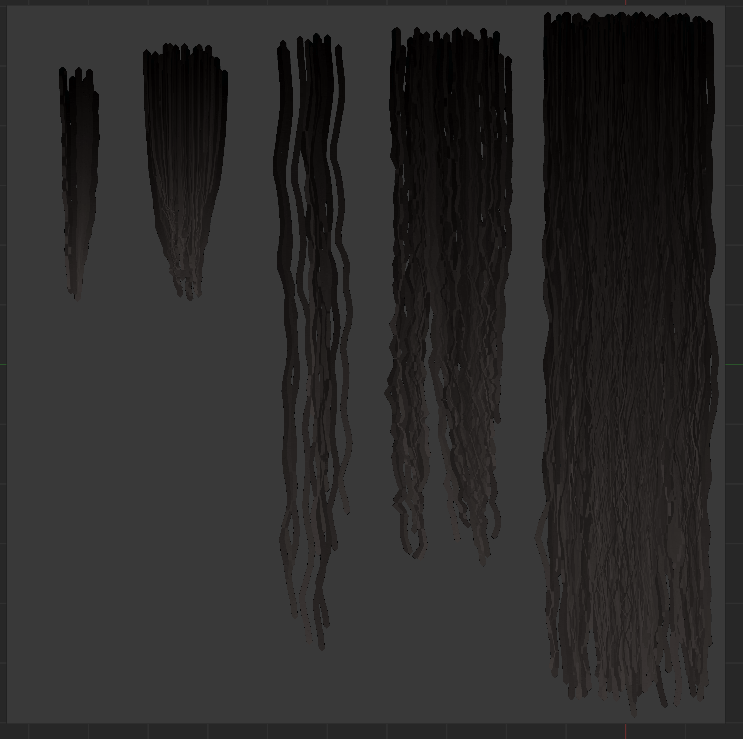
made the haircards in maya using the gs curvetool plugin
first layer of hair:
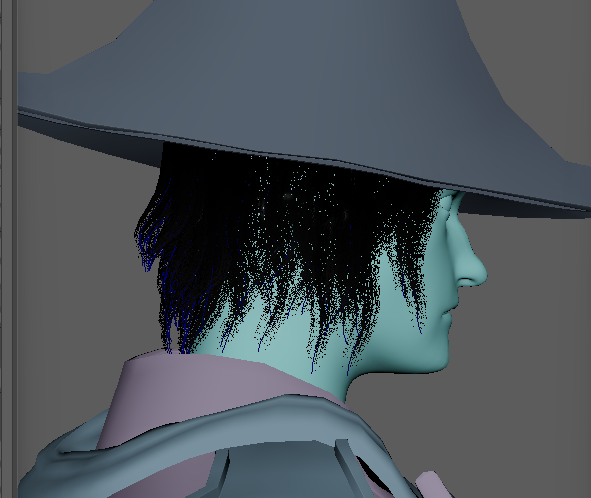
finding it hard to tell what i’m doing
changing it to a lighter colour helped me to see it better as the shadows were more visible, this will be useful as i start to layer the flyaway hairs
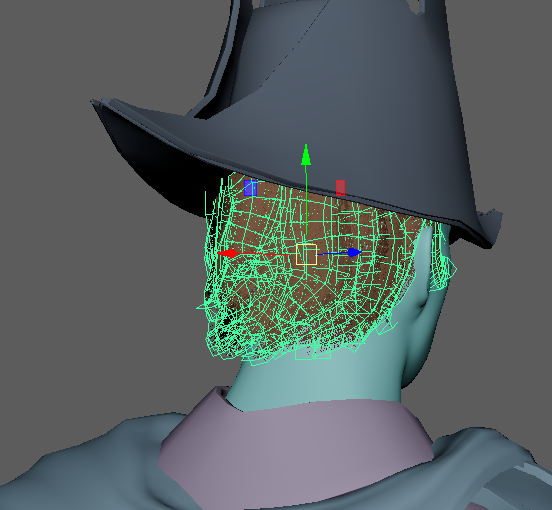
i brought the hair mesh in form zbrush and realised what i did was different to what i designed. So im going to try again using the mesh as more of a guide, then ill choose which one i think looks better
trying to be more careful with the placement
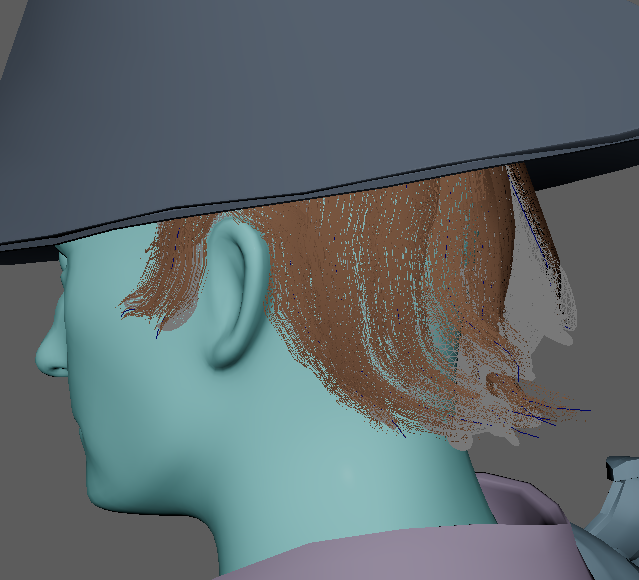
merged all the haircards as one mesh for exporting
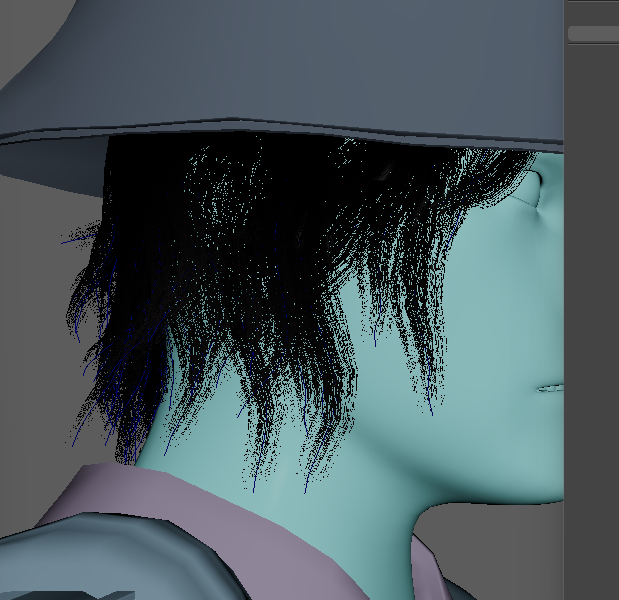
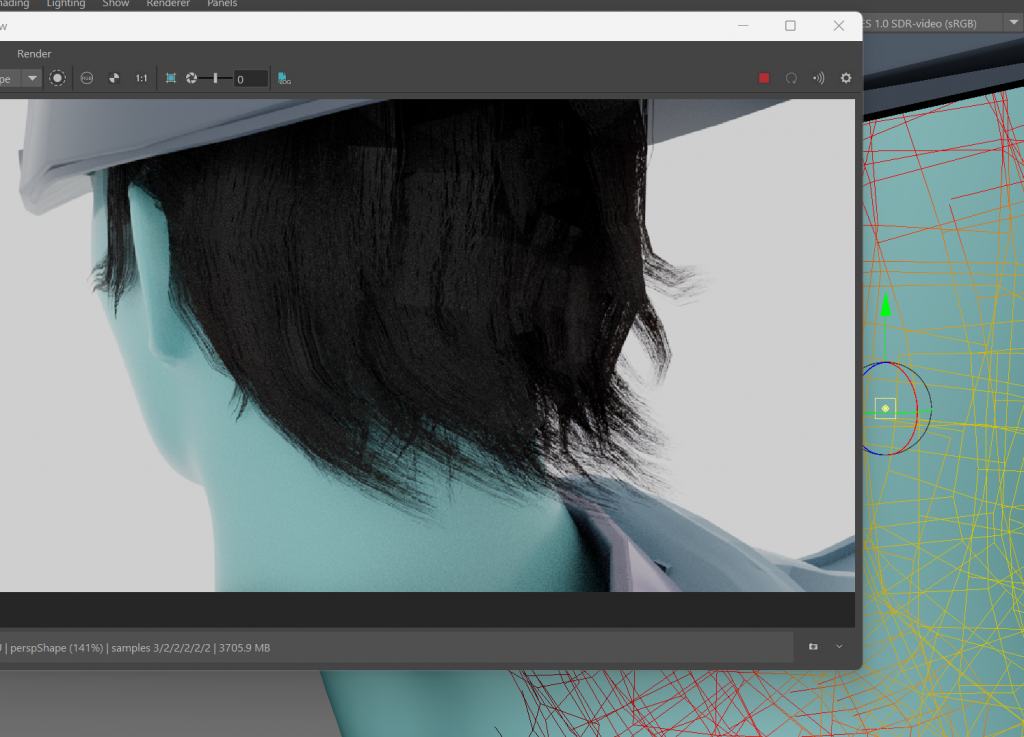
Amil suggested to use the aistandard hair shader for the hair, which made it look better than what i had in the viewport, although i could only see it in the render view.
I’m going to use this shader, however not all the settings worked for me as i was not using xgen hair (such as the melanin randomize option)
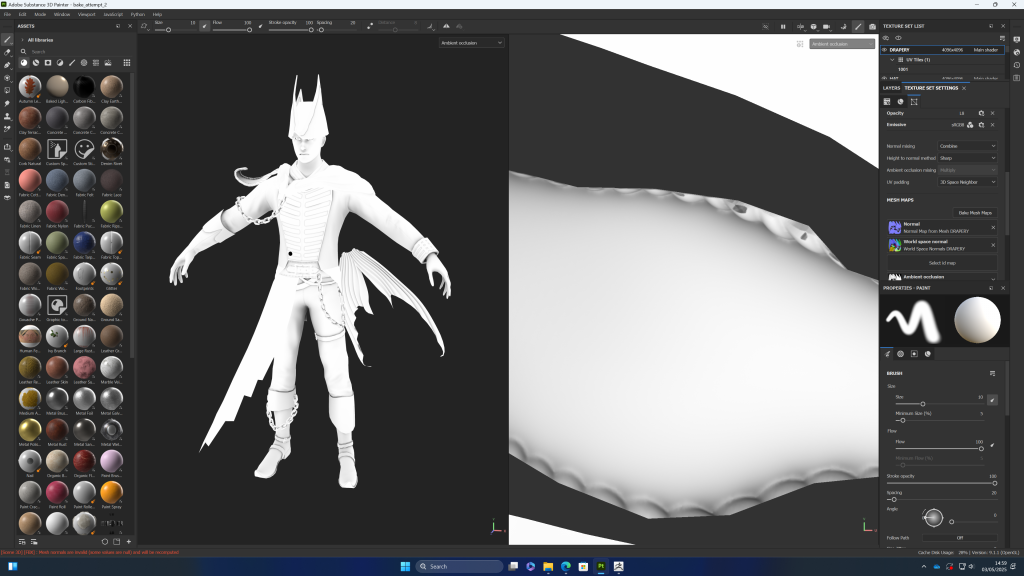
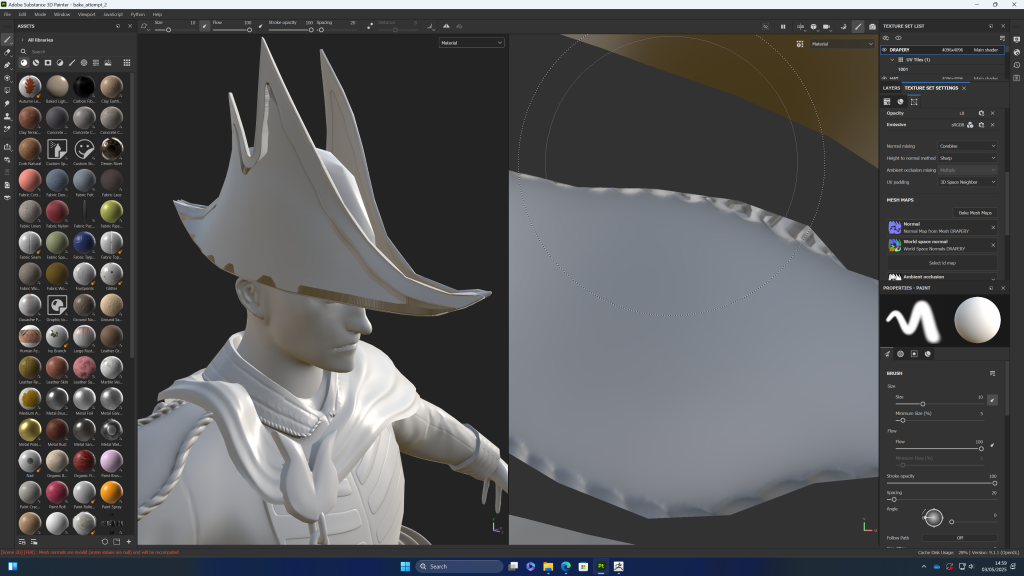
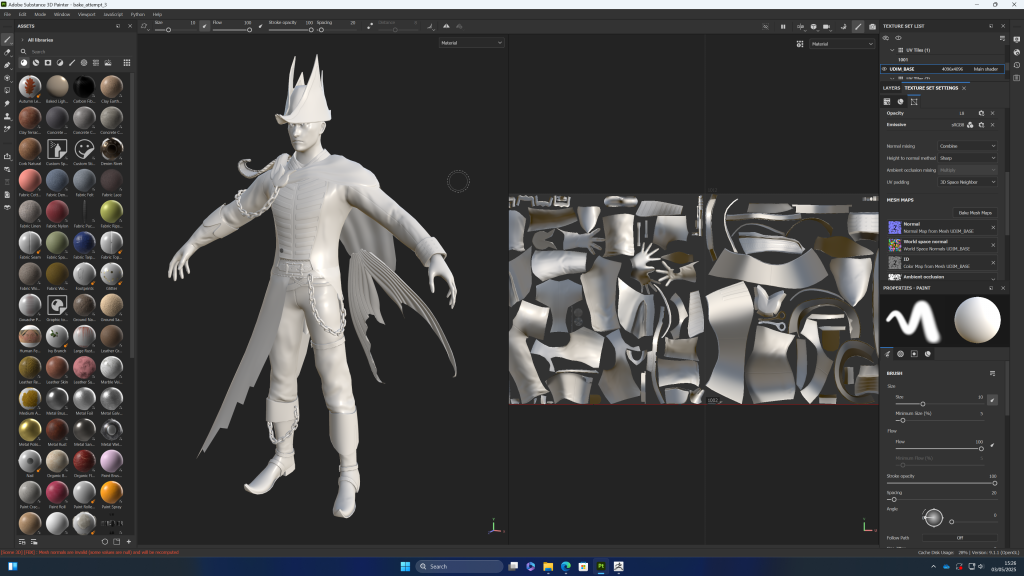
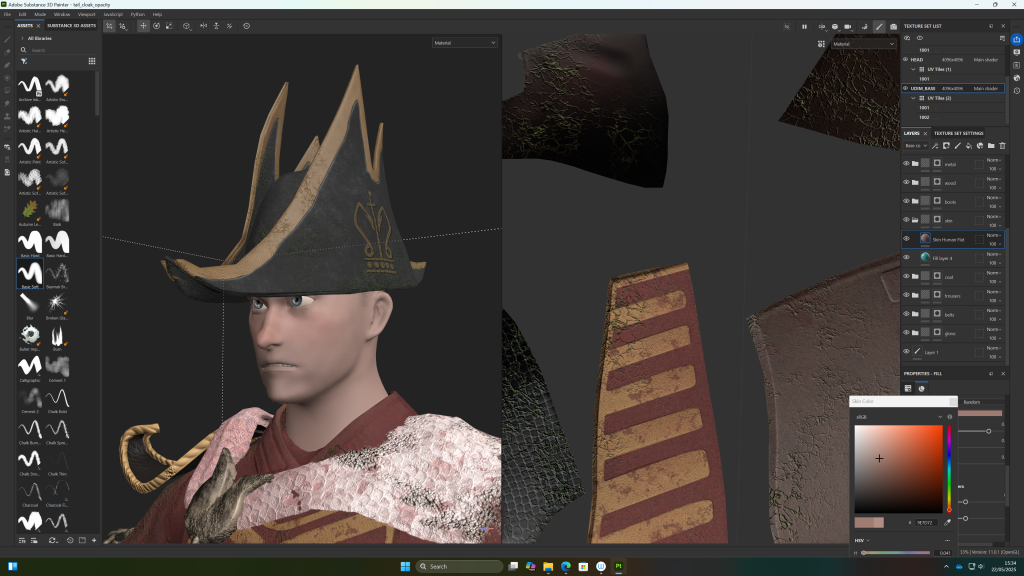
starting to add textures in substance painter
decided to organise all the separate materials into folders first
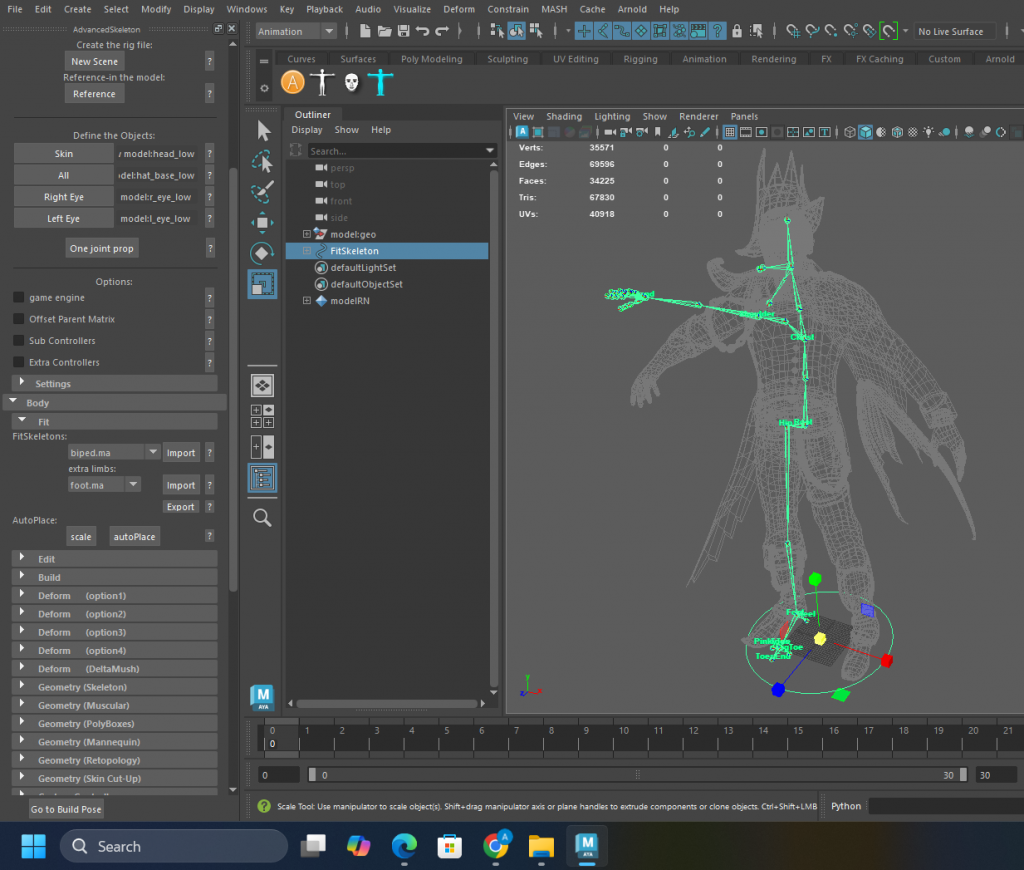
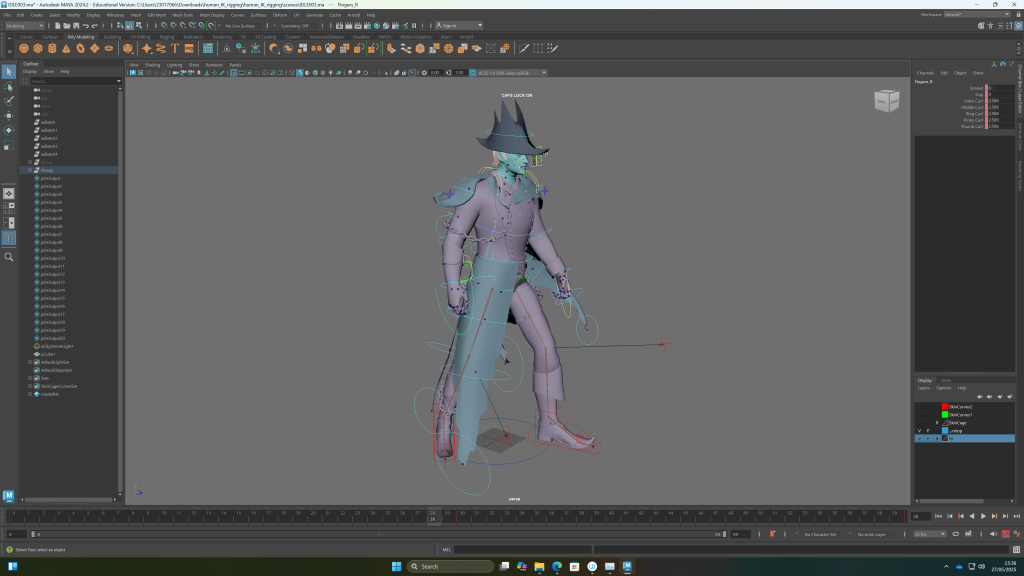
set my project before starting the human IK rig
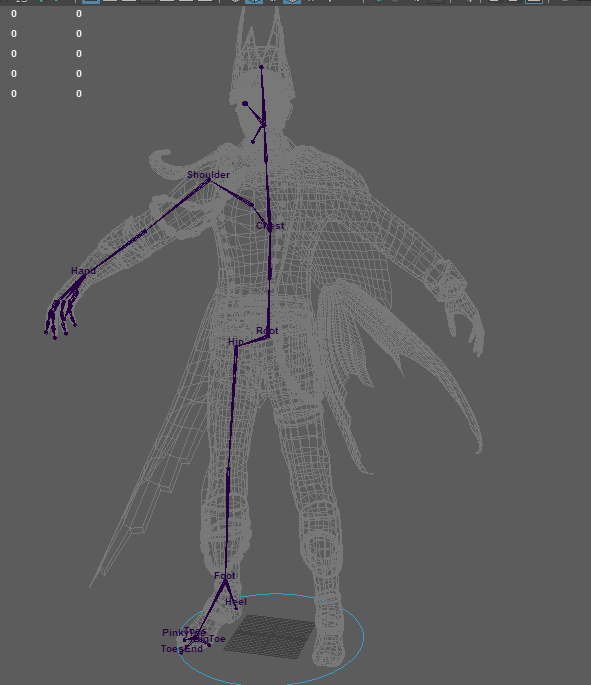
decided i want to use advanced skeleton for my rig as it seems like there is much more control and ways of fixing it if something goes wrong
making the rig:
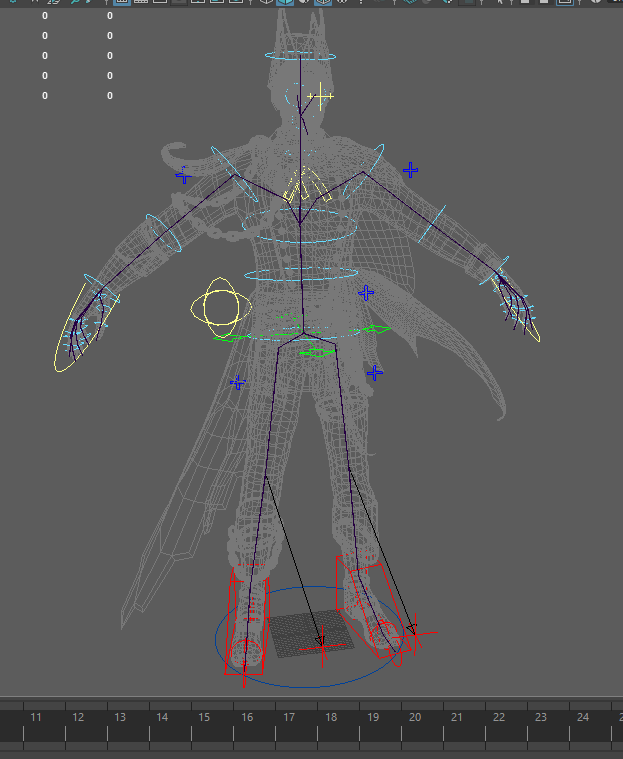
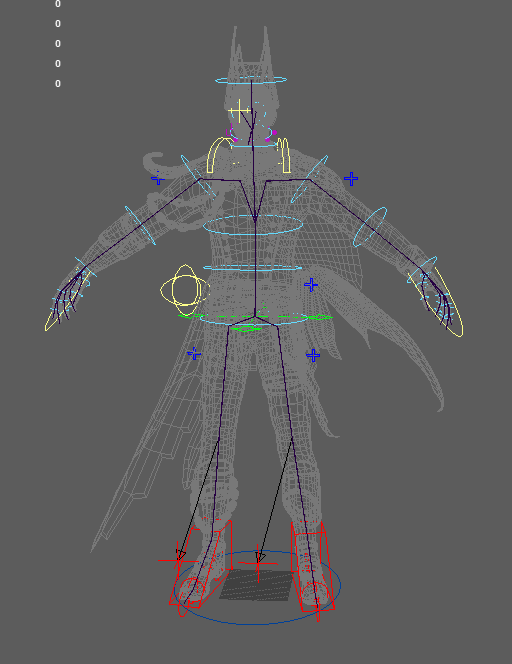

tried rebuilding the rig with the joints for the other objects but the ik setup was no longer working and i was getting errors so i went back to my previous save
tried again with the tail and it worked this time, rebuilding the advanced skeleton preserved the changes i made to the shape of the controls and it preserved the weights
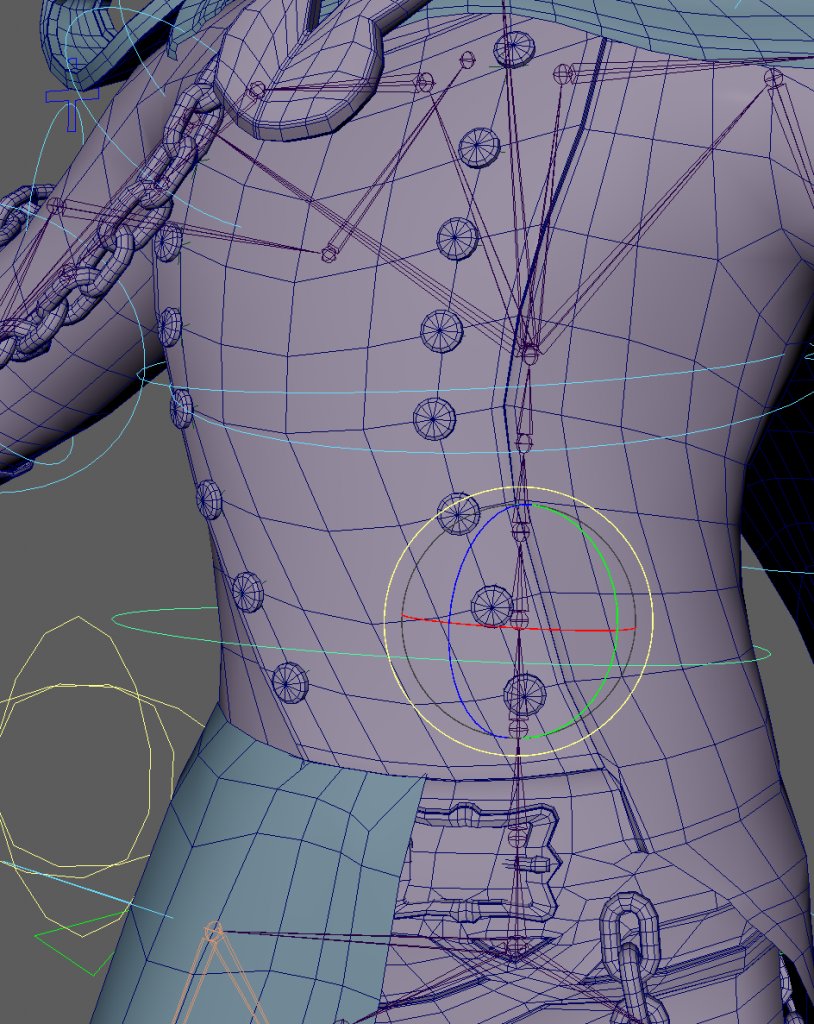
issues with weight painting causing the buttons to float off the mesh and weight paints distorted the shape.
i used UV pin constraints for the vertices the buttons were on and parented the buttons to the locator
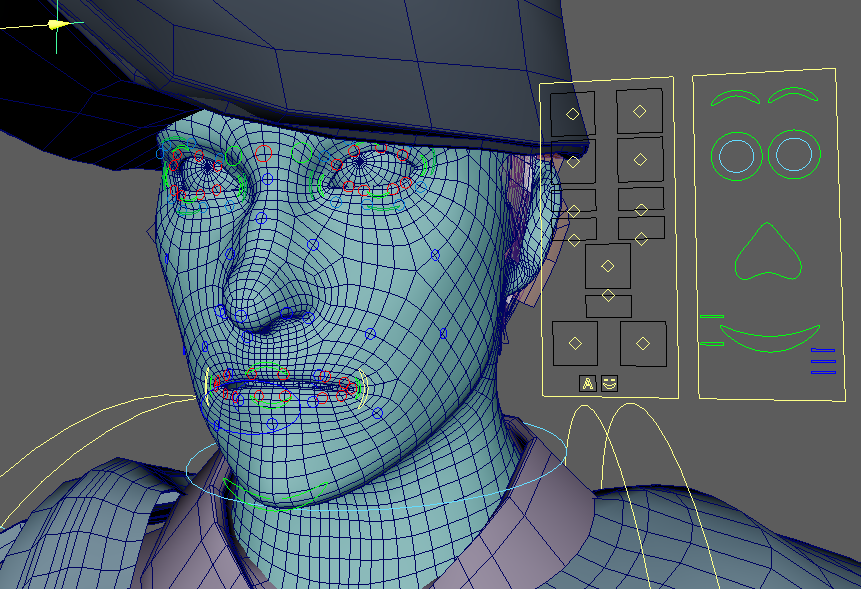
used advanced skeleton to rig the face. there were some issues with the mouth and teeth but i will keep it to subtle movements so it wont be noticeable in final animations. for the most part it looks good enough.
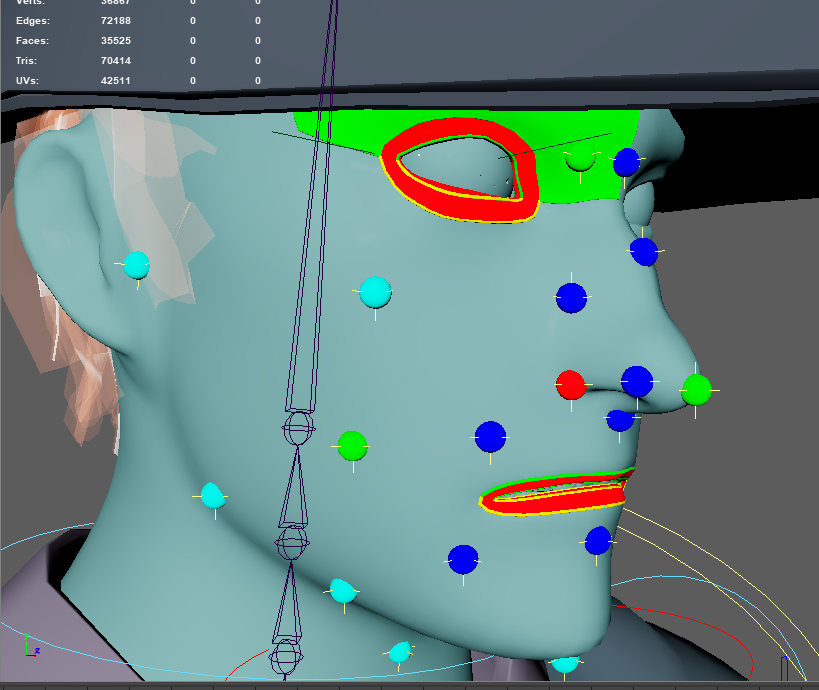
had a problem where the joints disappeared after I added the face rig
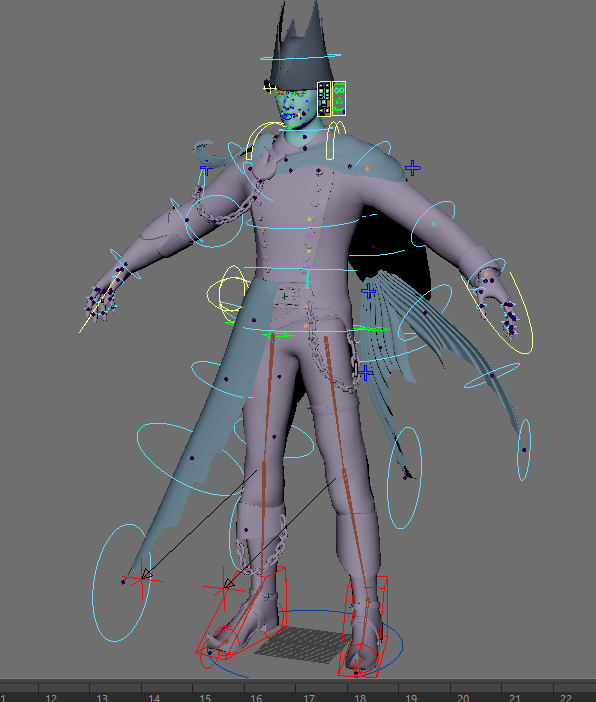
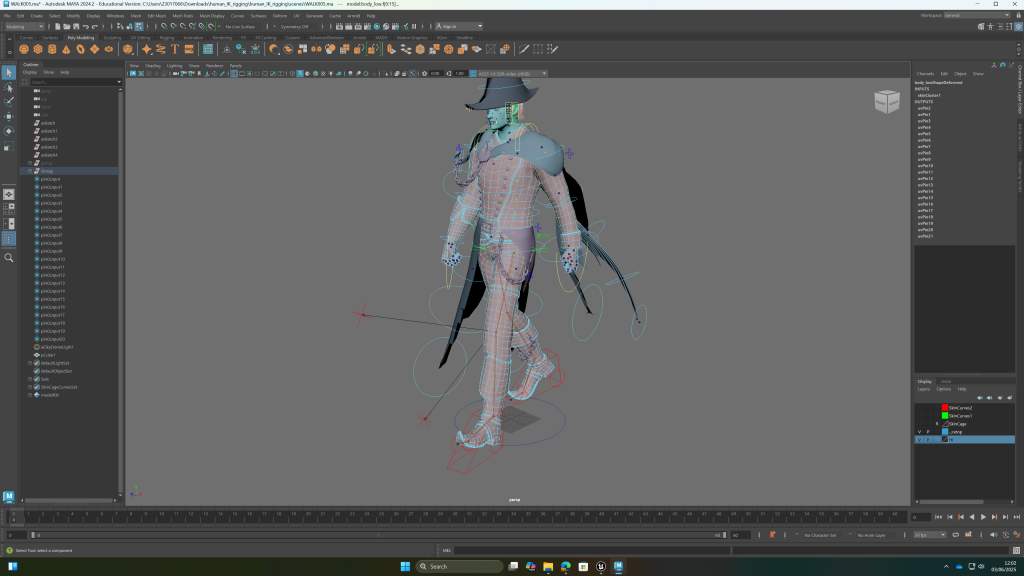
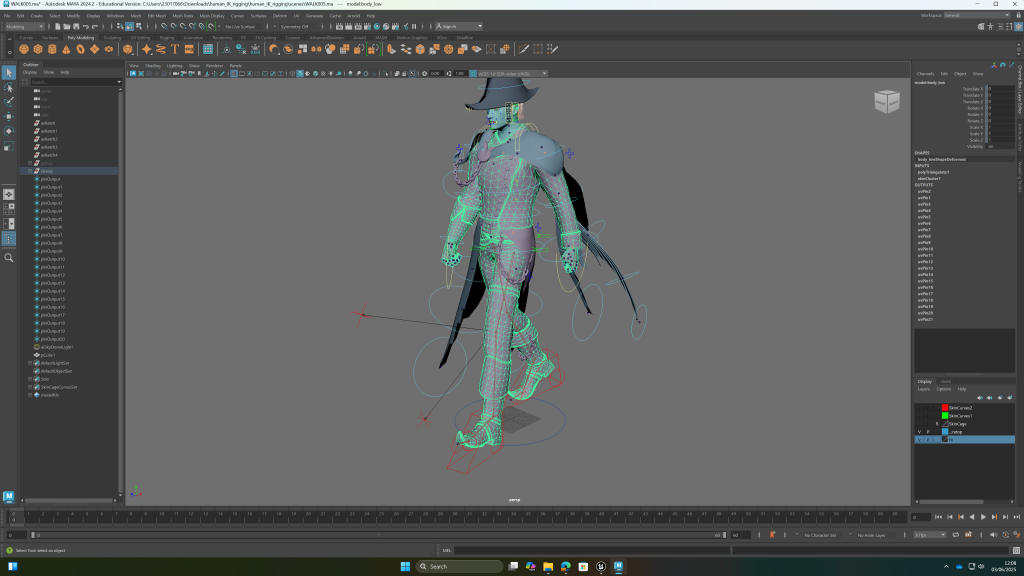
rig is mostly done, all that’s left is to make sure the weight painting on the cloth matches the vertices they’re meant to be linked to and also just making the weight painting more refined as there are some errors
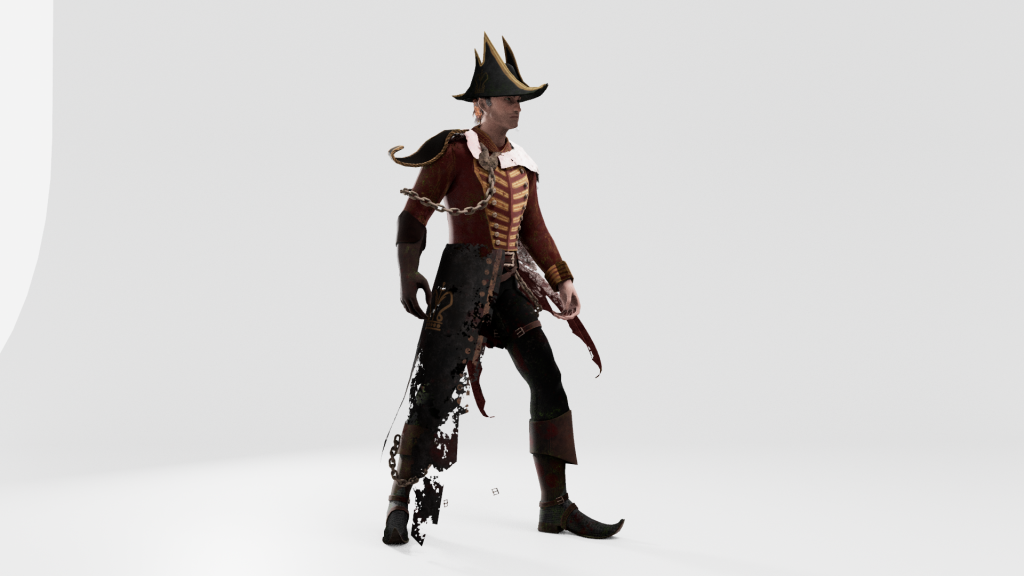
for the cloth i did copy skin weights and this worked well enough. there are still some parts where it splits apart so i well texture it with rips in it so it looks like it could separate.
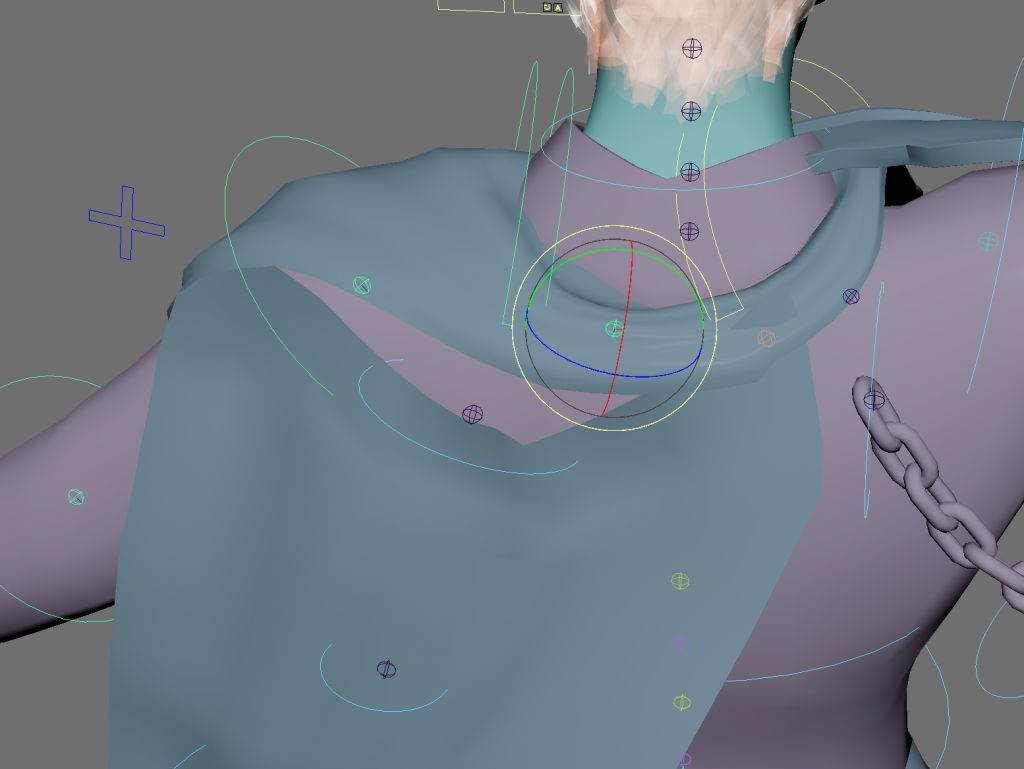
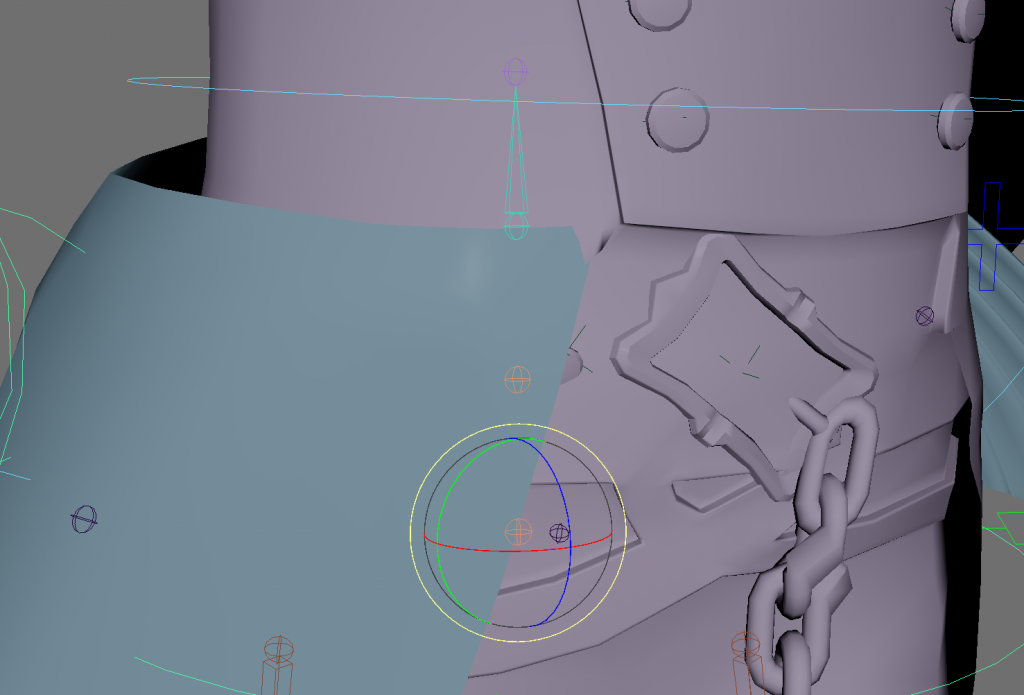
because i used a uv pin constraint for the buckle it tilts when the character turns
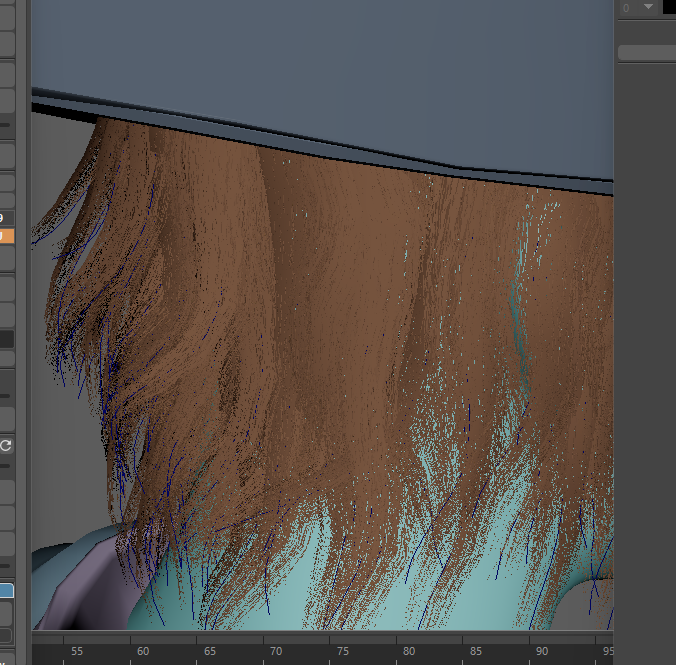
continued textures
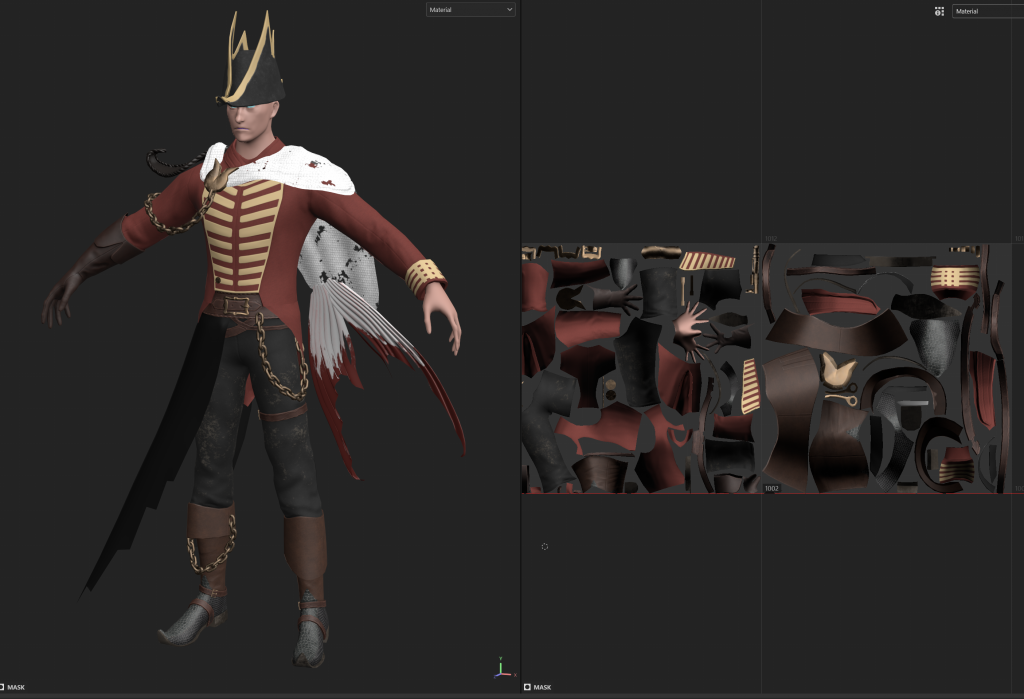
textures aren’t looking as realistic as i would like yet
rendered in substance painter and used Photoshop to get some presentable wireframes of the character
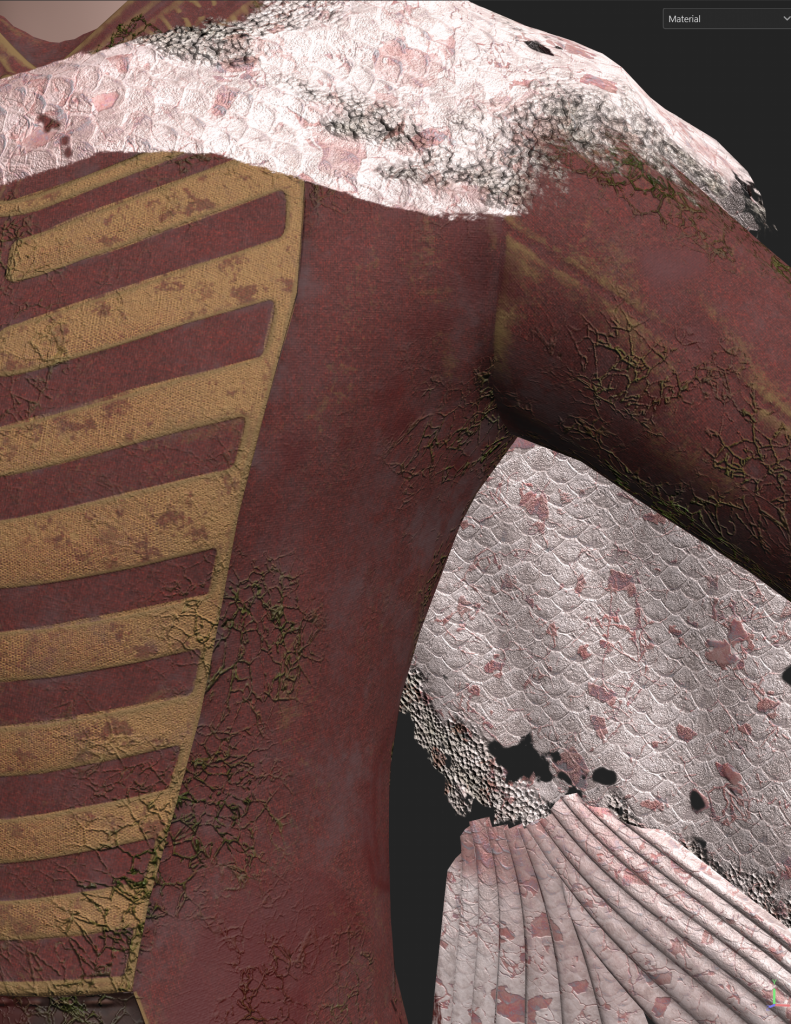
tried a different texture to try and make the scales more realistic
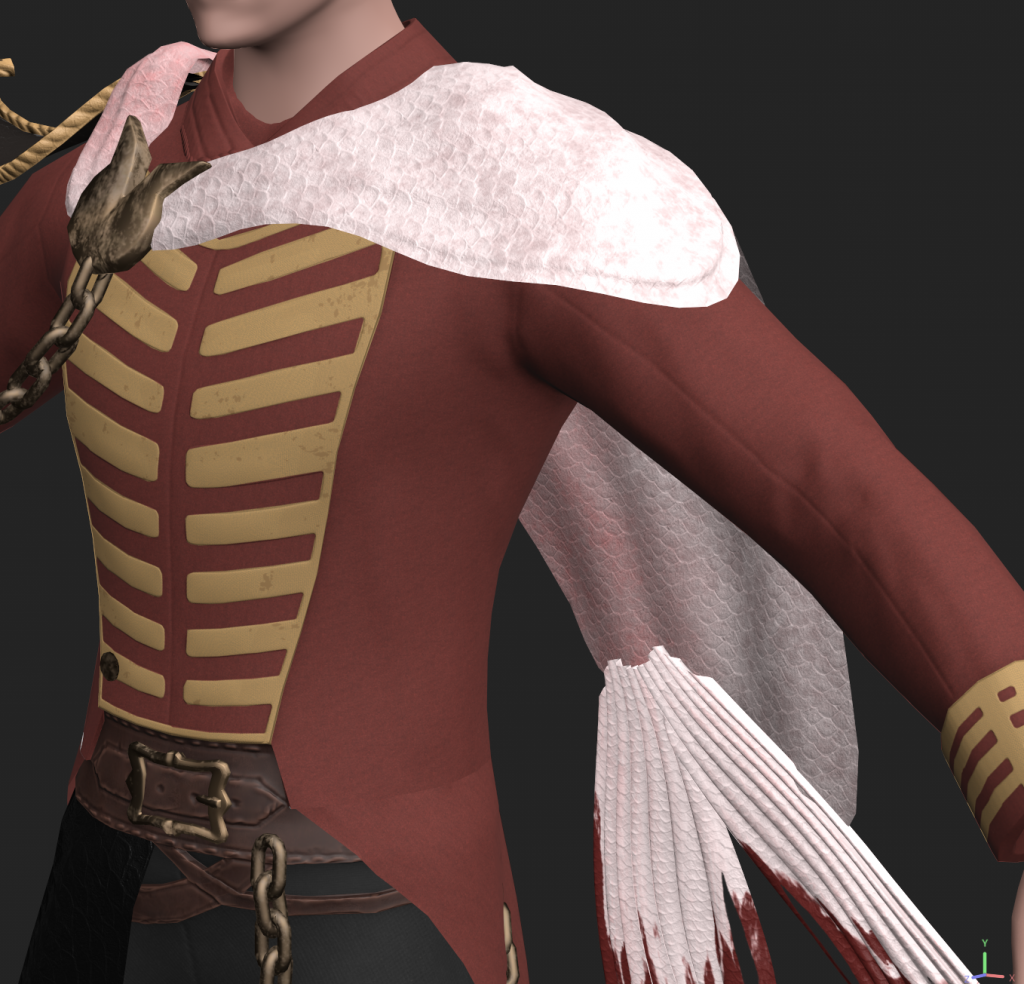


textures are looking more realistic after applying feedback of adding more damage to the clothing and more realistic scales.
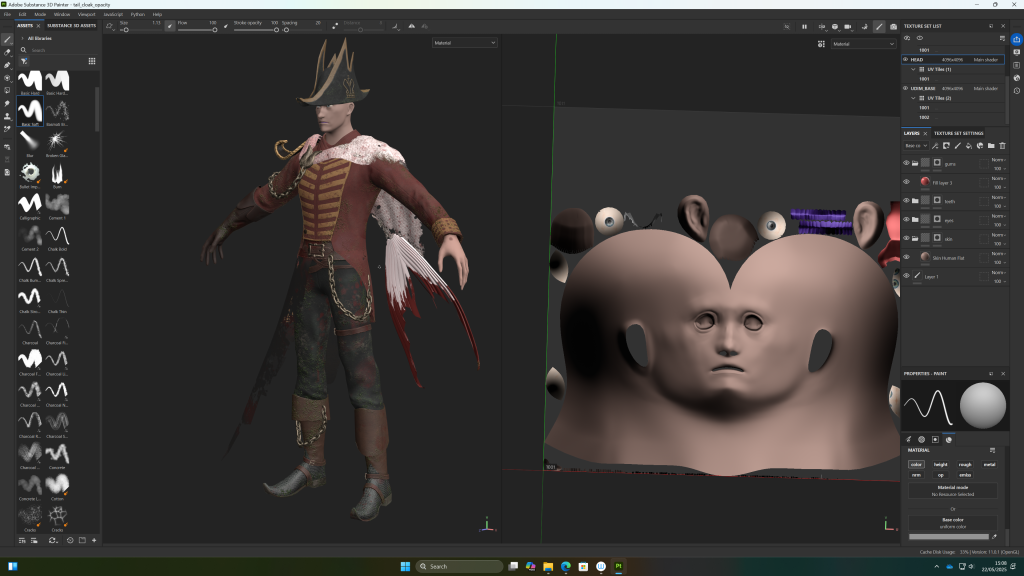
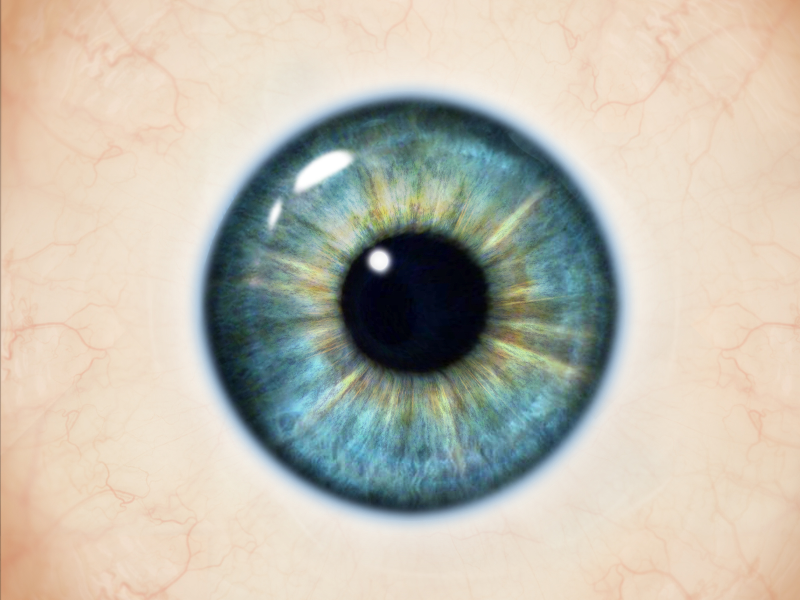
starting to texture the face. used an eye texture i found online and adjusted it to fit the character
animating the idle pose, i realised once i started that i forgot to save it as an ASCII file so hopefully changing the file format after starting wont cause problems. this was a simple animation however i found it difficult to loop nicely. even when i removed the duplicate last frame it seemed to pause in the final pose before looping back into the movement. also the follow throughs i added to the shoulder and forarm seemed to cancel eachother out when viewing the animation at a 3/4 view, making it look slightly stiff
working on the walk cycle, I had a lot of issues with Maya crashing whenever i saved the project. iterative saving helped mitigate this
walk:
idle:
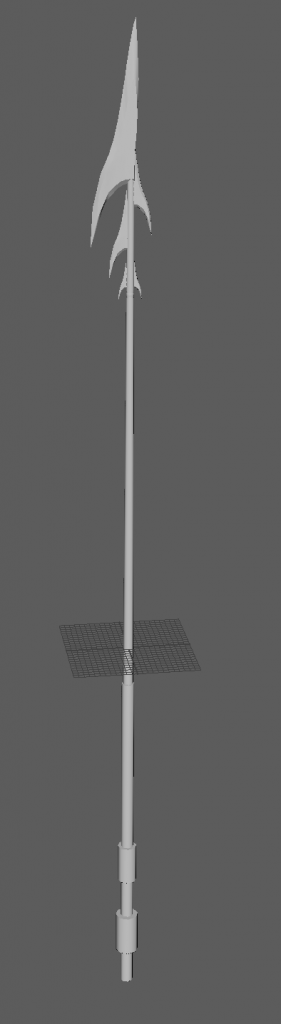
spear prop
select -r FKHead_M ;
select -tgl FKNeck_M ;
select -tgl FKScapula_L ;
select -tgl FKShoulder_L ;
select -tgl FKElbow_L ;
select -tgl FKWrist_L ;
select -tgl Fingers_L ;
select -tgl FKScapula_R ;
select -tgl FKShoulder_R ;
select -tgl FKElbow_R ;
select -tgl FKWrist_R ;
select -tgl Fingers_R ;
select -tgl FKChest_M ;
select -tgl FKSpine1_M ;
select -tgl FKRoot_M ;
select -tgl FKflagjoint2_R ;
select -tgl FKflagjoint1_R ;
select -tgl FKflagjoint3_R ;
select -tgl FKflagjoint4_R ;
select -tgl PoleLeg_R ;
select -tgl PoleLeg_L ;
select -tgl IKLeg_L ;
select -tgl IKLeg_R ;
select -tgl RootX_M ;
select -tgl HipSwinger_M ;
// Undo: select -tgl HipSwinger_M
select -tgl FKtailjoint1_L ;
select -tgl FKtailjoint2_L ;
select -tgl FKtailjoint3_L ;
select -tgl FKailjoint6_L ;
select -tgl FKtailjoint7_L ;
select -tgl FKtailjoint4_L ;
^saving script so restoring select all button is faster after maya freezes.
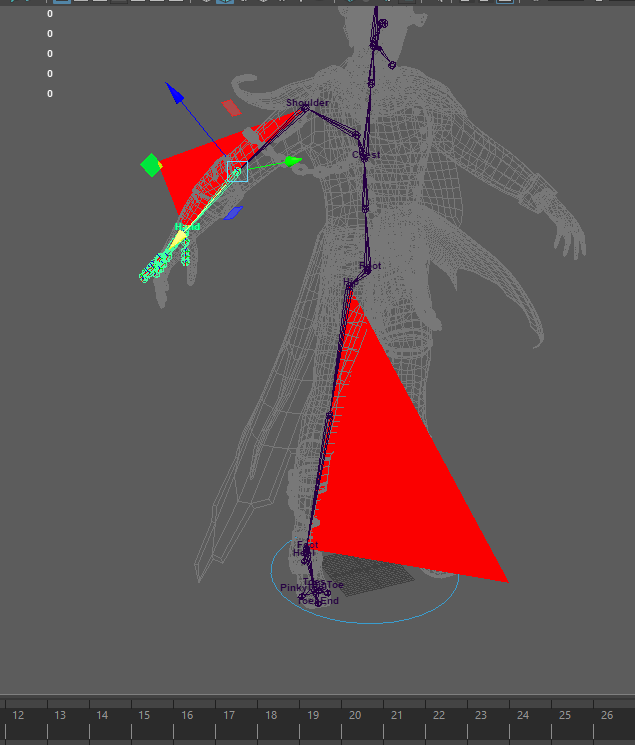
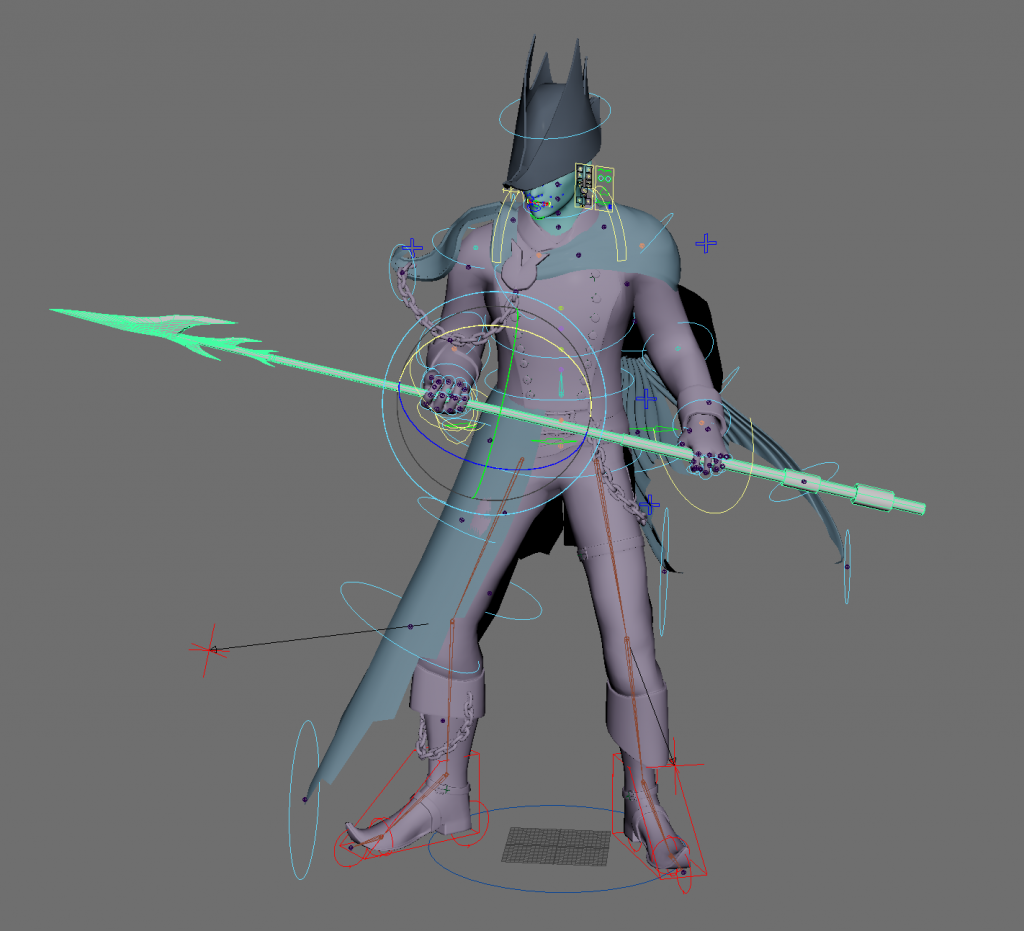
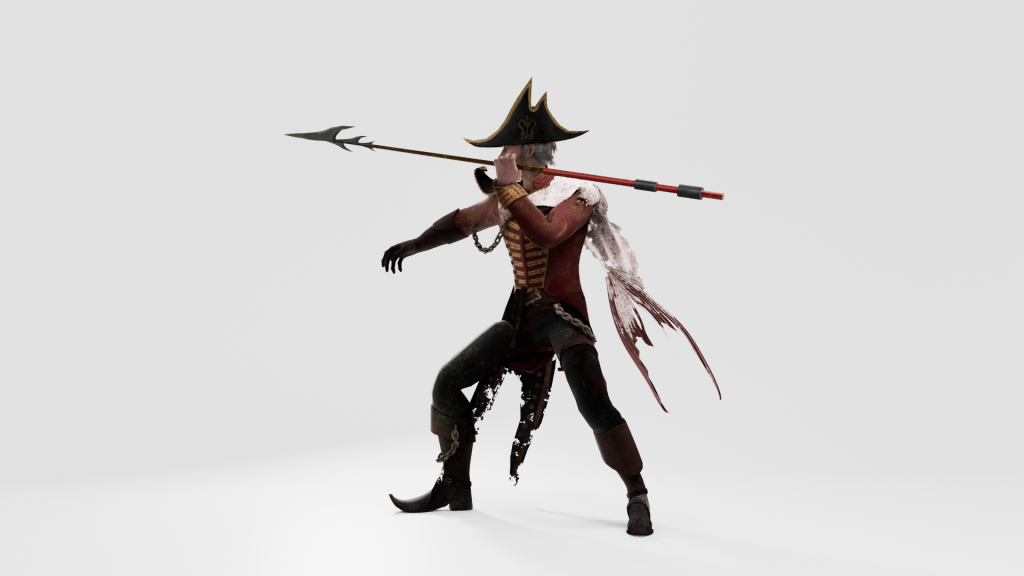
i had trouble getting the spear to follow the hands. did an attempt at the animation but realised i should make both arms IK and parent them to the spear
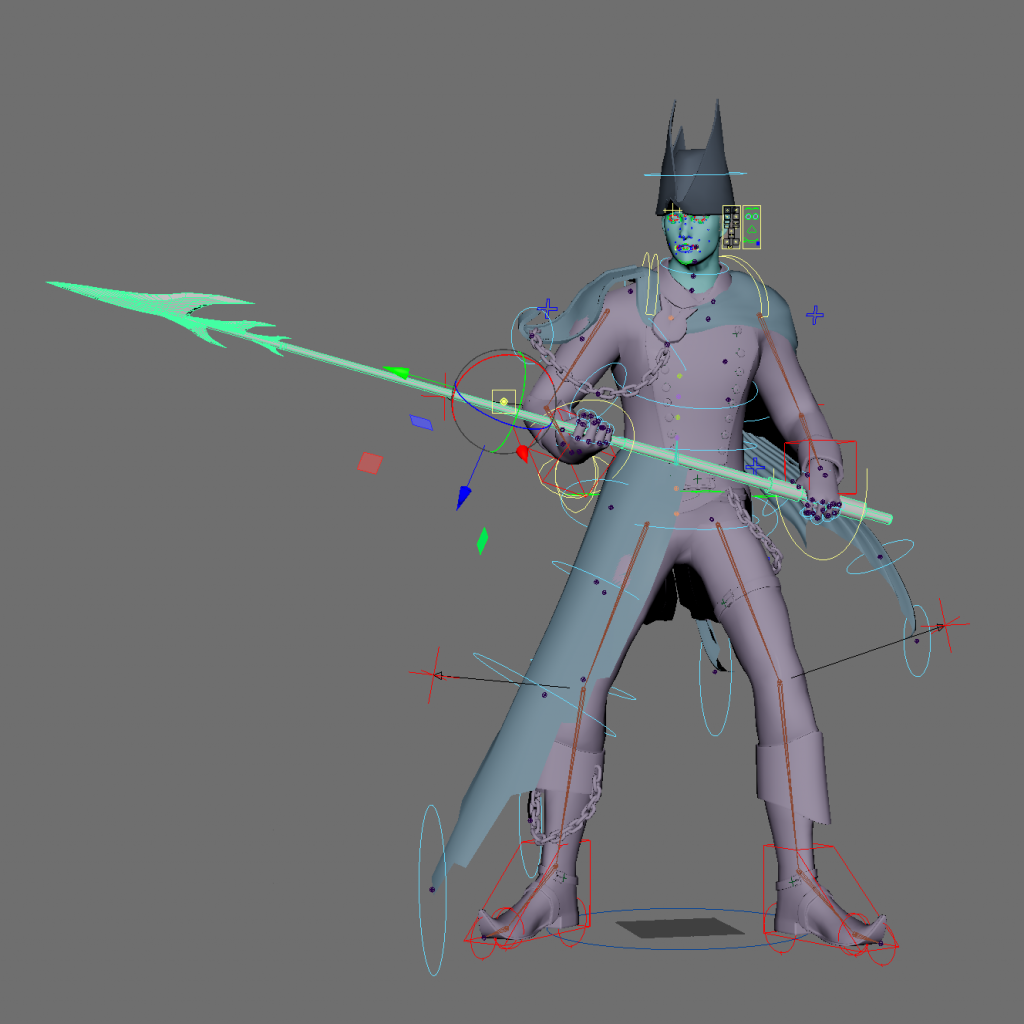
this attempt is an improvement, however it still looks unnatural and there are some issues with the mesh clipping through itself
spear throw animation:
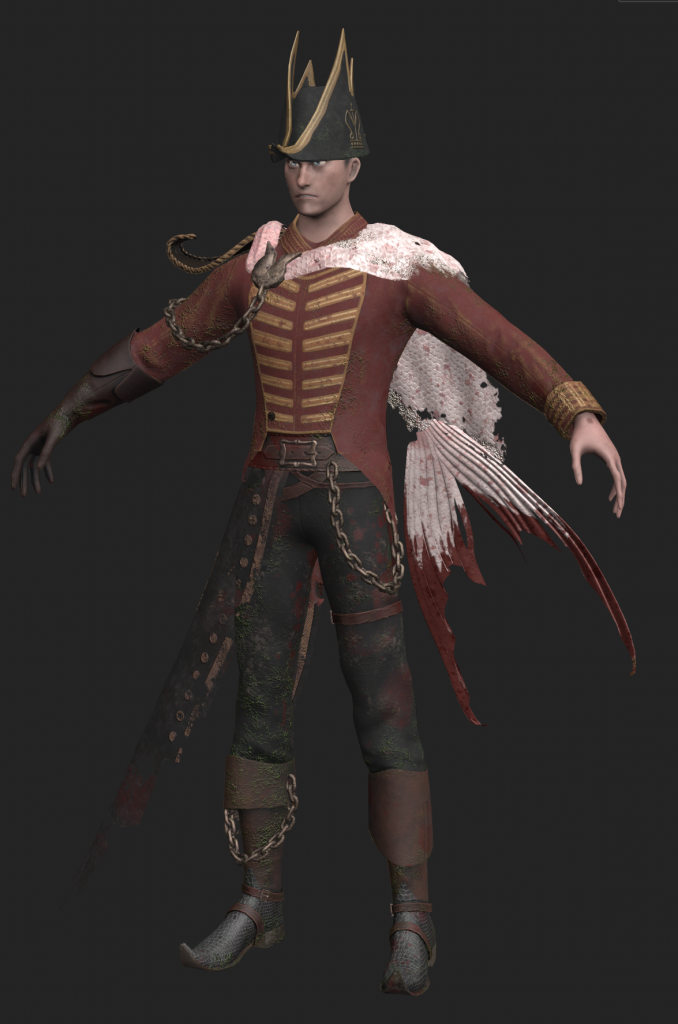
finished the textures, haven’t got into hand painting folds or smaller details but need to move on to rendering

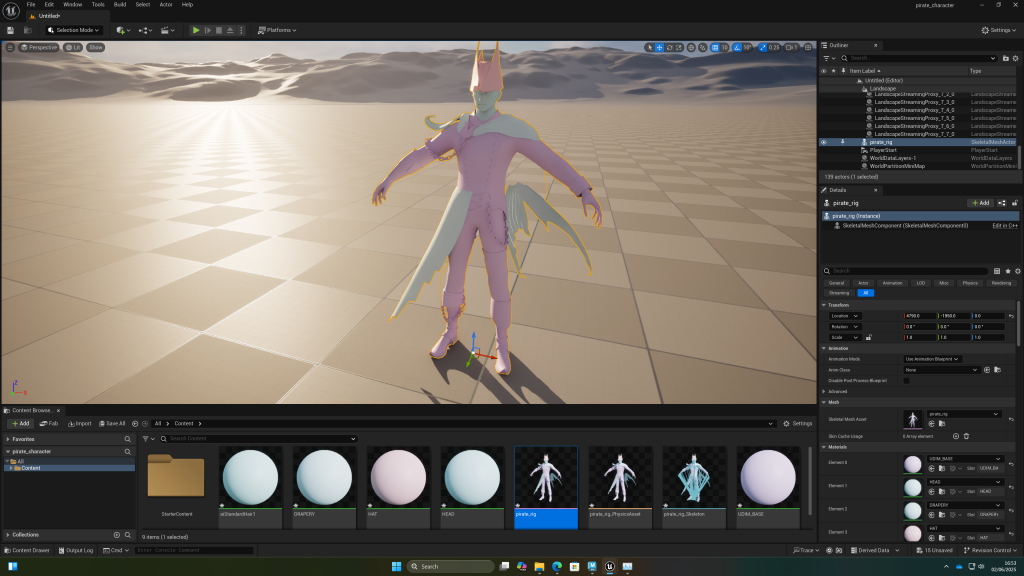
importing to ue5
because i used the advanced skeleton rig, exporting the skeleton and mesh the way instructed in the toolkit didn’t work. neither did advanced skeletons FBX export. this is because it kept including the cage in the export and advanced skeleton has multiple root joints. eventually i got it to work by selecting advanced skeleton fbx export, opening it in maya, and deleting all the stuff i didnt want, and then exporting it again. i got the idea from this video:
Exporting a Custom rig from Advanced Skeleton to UE5
my script for selecting the character skeleton:
select -r Root_M ;
select -r Root_M RootPart1_M RootPart2_M Spine1_M Spine1Part1_M Spine1Part2_M Chest_M Neck_M NeckPart1_M NeckPart2_M Head_M HeadEnd_M FaceJoint_M EyeJoint_R EyeJoint_L EyeLidJoints_M upperLidMain0_R upperLidMain1_R upperLidMain2_R upperLidMain3_R upperLidMain4_R upperLidMain5_R upperLidMain6_R upperLidMain7_R upperLidMain8_R upperLidMain9_R upperLidMain10_R upperLidMain11_R upperLidMain12_R upperLidMain13_R upperLidMain14_R upperLidMain15_R upperLidMain16_R upperLidMain17_R upperLidOuter0_R upperLidOuter1_R upperLidOuter2_R upperLidOuter3_R upperLidOuter4_R upperLidOuter5_R upperLidOuter6_R upperLidOuter7_R upperLidOuter8_R upperLidOuter9_R upperLidOuter10_R upperLidOuter11_R upperLidOuter12_R upperLidOuter13_R upperLidOuter14_R upperLidOuter15_R upperLidOuter16_R upperLidOuter17_R lowerLidMain1_R lowerLidMain2_R lowerLidMain3_R lowerLidMain4_R lowerLidMain5_R lowerLidMain6_R lowerLidMain7_R lowerLidMain8_R lowerLidMain9_R lowerLidMain10_R lowerLidMain11_R lowerLidMain12_R lowerLidMain13_R lowerLidMain14_R lowerLidOuter1_R lowerLidOuter2_R lowerLidOuter3_R lowerLidOuter4_R lowerLidOuter5_R lowerLidOuter6_R lowerLidOuter7_R lowerLidOuter8_R lowerLidOuter9_R lowerLidOuter10_R lowerLidOuter11_R lowerLidOuter12_R lowerLidOuter13_R lowerLidOuter14_R upperLidMain0_L upperLidMain1_L upperLidMain2_L upperLidMain3_L upperLidMain4_L upperLidMain5_L upperLidMain6_L upperLidMain7_L upperLidMain8_L upperLidMain9_L upperLidMain10_L upperLidMain11_L upperLidMain12_L upperLidMain13_L upperLidMain14_L upperLidMain15_L upperLidMain16_L upperLidOuter0_L upperLidOuter1_L upperLidOuter2_L upperLidOuter3_L upperLidOuter4_L upperLidOuter5_L upperLidOuter6_L upperLidOuter7_L upperLidOuter8_L upperLidOuter9_L upperLidOuter10_L upperLidOuter11_L upperLidOuter12_L upperLidOuter13_L upperLidOuter14_L upperLidOuter15_L upperLidOuter16_L lowerLidMain1_L lowerLidMain2_L lowerLidMain3_L lowerLidMain4_L lowerLidMain5_L lowerLidMain6_L lowerLidMain7_L lowerLidMain8_L lowerLidMain9_L lowerLidMain10_L lowerLidMain11_L lowerLidMain12_L lowerLidMain13_L lowerLidMain14_L lowerLidMain15_L lowerLidOuter1_L lowerLidOuter2_L lowerLidOuter3_L lowerLidOuter4_L lowerLidOuter5_L lowerLidOuter6_L lowerLidOuter7_L lowerLidOuter8_L lowerLidOuter9_L lowerLidOuter10_L lowerLidOuter11_L lowerLidOuter12_L lowerLidOuter13_L lowerLidOuter14_L lowerLidOuter15_L LipJoints_M upperLipJoint0_M upperLipJoint1_R upperLipJoint2_R upperLipJoint3_R upperLipJoint4_R upperLipJoint5_R upperLipJoint6_R upperLipJoint7_R upperLipJoint8_R upperLipJoint9_R upperLipJoint10_R upperLipJoint11_R upperLipJoint12_R cornerLipJoint_R lowerLipJoint0_M lowerLipJoint1_R lowerLipJoint2_R lowerLipJoint3_R lowerLipJoint4_R lowerLipJoint5_R lowerLipJoint6_R upperLipJoint1_L upperLipJoint2_L upperLipJoint3_L upperLipJoint4_L upperLipJoint5_L upperLipJoint6_L upperLipJoint7_L upperLipJoint8_L upperLipJoint9_L upperLipJoint10_L upperLipJoint11_L upperLipJoint12_L cornerLipJoint_L lowerLipJoint1_L lowerLipJoint2_L lowerLipJoint3_L lowerLipJoint4_L lowerLipJoint5_L lowerLipJoint6_L CheekBoneJoint_R CheekBoneJoint_L NoseSideJoint_R NoseSideJoint_L NoseBridgeJoint_M NoseCornerJoint_R NoseCornerJoint_L NoseUnderJoint_M FrownBulgeJoint_R FrownBulgeJoint_L SmileBulgeJoint_R SmileBulgeJoint_L CheekJoint_R CheekJoint_L ChinCreaseJoint_M NoseJoint_M NostrilJoint_R NostrilJoint_L EyeBrowInnerJoint_R EyeBrowInnerJoint_L EyeBrowOuterJoint_R EyeBrowOuterJoint_L EyeBrowCenterJoint_M NoseCreaseJoint_M lowerLidOuterJoint_R lowerLidOuterJoint_L JawJoint_M upperTeethJoint_M lowerTeethJoint_M Tongue0Joint_M Tongue1Joint_M Tongue2Joint_M Tongue3Joint_M Scapula_R Shoulder_R ShoulderPart1_R ShoulderPart2_R Elbow_R ElbowPart1_R ElbowPart2_R Wrist_R MiddleFinger1_R MiddleFinger2_R MiddleFinger3_R MiddleFinger4_R ThumbFinger1_R ThumbFinger2_R ThumbFinger3_R ThumbFinger4_R IndexFinger1_R IndexFinger2_R IndexFinger3_R IndexFinger4_R Cup_R PinkyFinger1_R PinkyFinger2_R PinkyFinger3_R PinkyFinger4_R RingFinger1_R RingFinger2_R RingFinger3_R RingFinger4_R tailjoint1_L tailjoint2_L tailjoint3_L tailjoint4_L tailjoint5_L ailjoint6_L tailjoint7_L tailjoint8_L chainjoint1_R chainjoint2_R chainjoint3_R chainjoint4_R chainjoint5_R Scapula_L Shoulder_L ShoulderPart1_L ShoulderPart2_L Elbow_L ElbowPart1_L ElbowPart2_L Wrist_L MiddleFinger1_L MiddleFinger2_L MiddleFinger3_L MiddleFinger4_L ThumbFinger1_L ThumbFinger2_L ThumbFinger3_L ThumbFinger4_L IndexFinger1_L IndexFinger2_L IndexFinger3_L IndexFinger4_L Cup_L PinkyFinger1_L PinkyFinger2_L PinkyFinger3_L PinkyFinger4_L RingFinger1_L RingFinger2_L RingFinger3_L RingFinger4_L flagjoint1_R flagjoint2_R flagjoint3_R flagjoint4_R flagjoint5_R flagjoint6_R flagjoint7_R Hip_R HipPart1_R HipPart2_R Knee_R Ankle_R Toes_R ToesEnd_R Hip_L HipPart1_L HipPart2_L Knee_L Ankle_L Toes_L ToesEnd_L ;
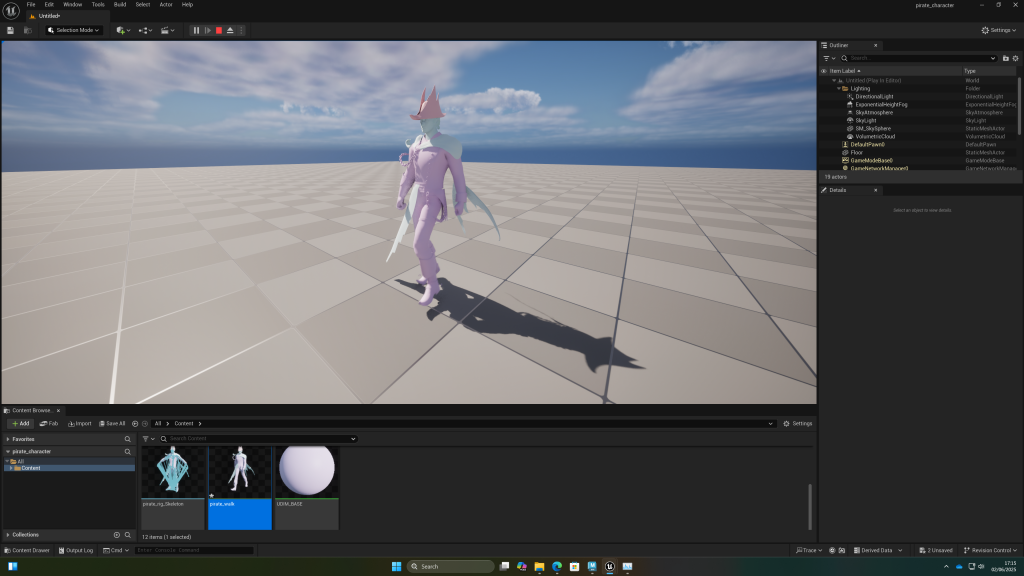
after importing the walk animation, some of the mesh moves as expected, but the buttons don’t follow the mesh which makes sense as i parented them to the locators instead of weight painting them. however, other parts don’t move either, like the shoulder pad which is weighted to the bones that are in the scene.
i went back to check and it looks like when i skinned the extra objects, instead of skinning them to the deformation joints (which the base mesh is using) i skinned them to the wrong joints, like FK joints. this was a lack of foresight and explains why its not moving the way i animated it, even though it worked in Maya.
Its too late to go back and unskin everything and weight paint it again and redo all my animations, so i will bake the geometry of the animations instead of the bones and do it that way. its annoying but i’m glad i know to be aware of this mistake for next time.
39 mins into this video it explains how to import character animations with a Maya rig that doesn’t work in unreal
not sure how textures will be applied with this workflow
the buckle had a face with over 5 sides so had to trianglate it
pasting my script for selecting geo here:
select -r model:r_hat_low ;
select -tgl model:crown_low ;
select -tgl model:l_hat_low ;
select -tgl model:hat_base_low ;
select -tgl model:r_eye_low ;
select -tgl model:l_eye_low ;
select -tgl model:head_low ;
select -tgl model:top_teeth_low ;
select -tgl model:lower_teeth_low ;
select -tgl model:toungue_low ;
select -tgl model:body_low ;
select -tgl model:cloak_1_low ;
select -tgl model:broach_low ;
select -tgl model:shoulder_low ;
select -tgl model:chain_1_low ;
select -tgl model:hair_low ;
select -tgl model:cloak_2_low ;
select -tgl model:tail_low ;
select -tgl model:coat_low ;
select -tgl model:chain_2_low ;
select -tgl model:buckle_1_low ;
select -tgl model:buckle_latch_1_low ;
select -tgl model:buckle_latch_2_low ;
select -tgl model:buckle_2_low ;
select -tgl model:pSphere16 ;
select -tgl model:pSphere3 ;
select -tgl model:pSphere4 ;
select -tgl model:pSphere14 ;
select -tgl model:pSphere12 ;
select -tgl model:button_low ;
select -tgl model:pSphere15 ;
select -tgl model:pSphere11 ;
select -tgl model:pSphere5 ;
select -tgl model:pSphere6 ;
select -tgl model:pSphere13 ;
select -tgl model:pSphere7 ;
select -tgl model:pSphere8 ;
select -tgl model:pSphere17 ;
select -tgl model:pSphere10 ;
select -tgl model:pSphere9 ;
select -tgl model:chain_3_low ;
select -tgl model:buckle_latch_4_low ;
select -tgl model:buckle_4_low ;
select -tgl model:buckle_latch_3_low ;
select -tgl model:buckle_3_low ;
select -tgl model:flag_low ;
got a version that worked, can only apply one texture to it. unchecking flatten track when importing made it so each object had a material slot. this should work if i set up my materials in unreal
followed this tutorial to set up the udim material in ue5
issue when applying materials. i think this is due to non planar faces.
checking in maya this does seem to be the problem, as almost all the faces of the base mesh are non planar.
decided to try and triangulate my mesh
but when i imported the animation it appeared blurry and jittering compared to the one with non planar faces

importing to UE5 doesn’t seem possible at a high enough standard because of this. i think i will just have to apply the materials and render it in Maya
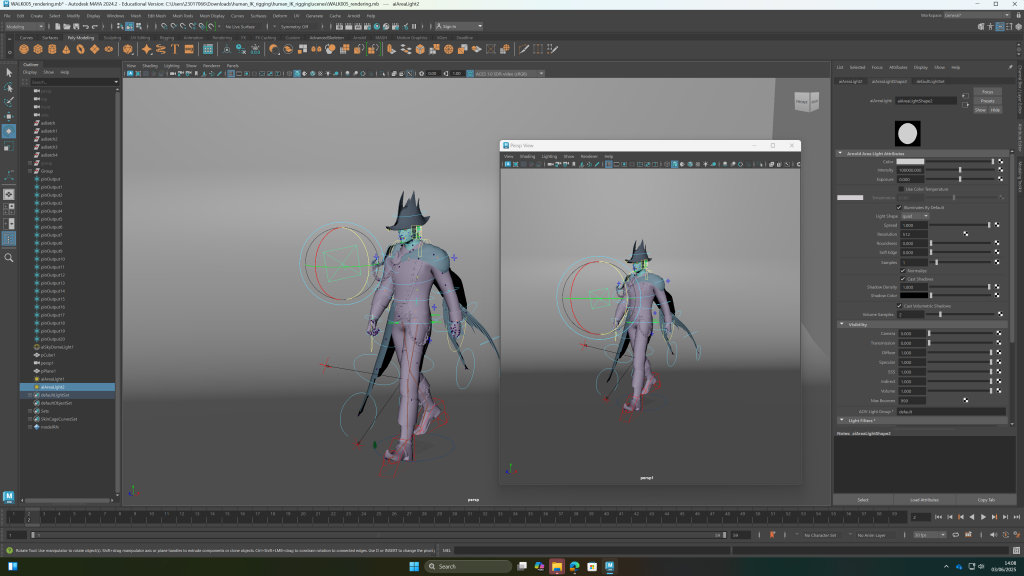
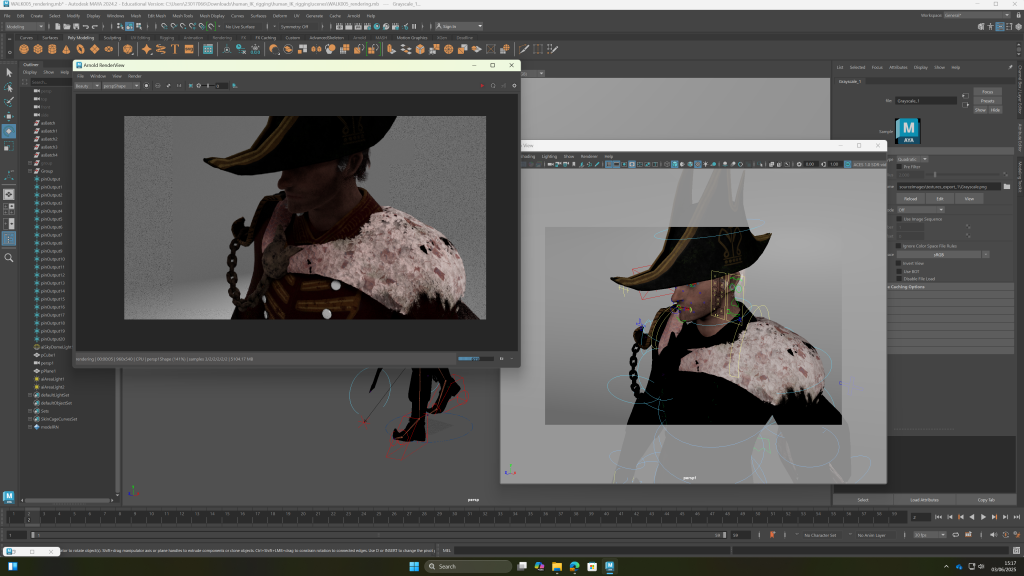
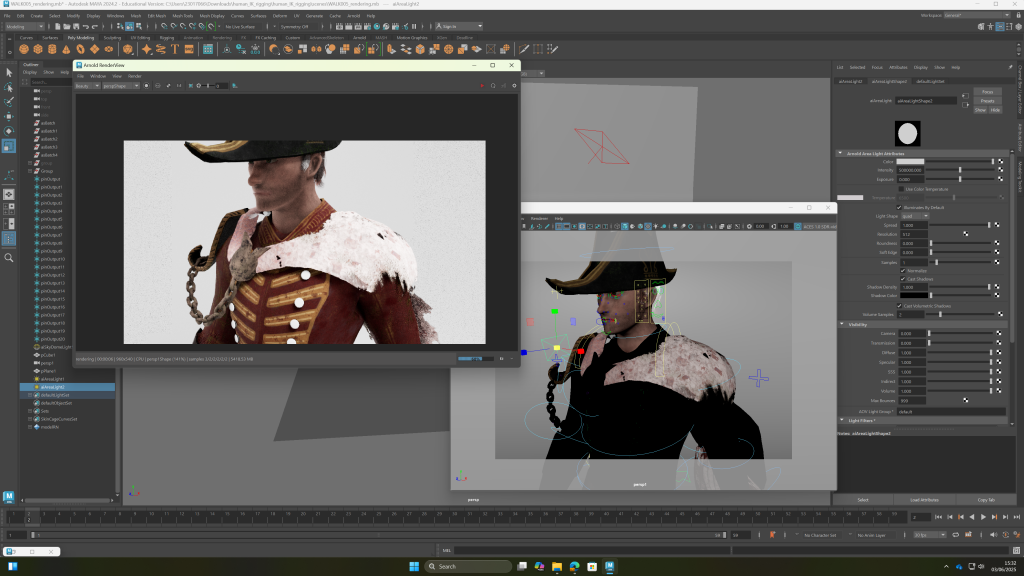
setting up fill light, rim light, key light in maya
UDIM textures not being applied as expected
had to change UV tiling mode to UDIM mari and generate preview.
textures keep dissapering from my texture folder and removing themselves from the model
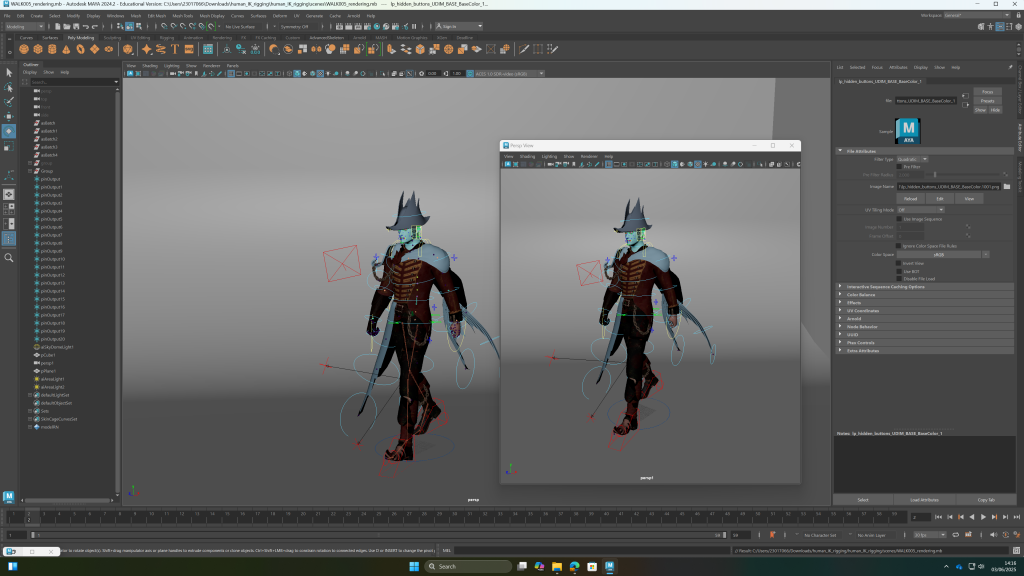
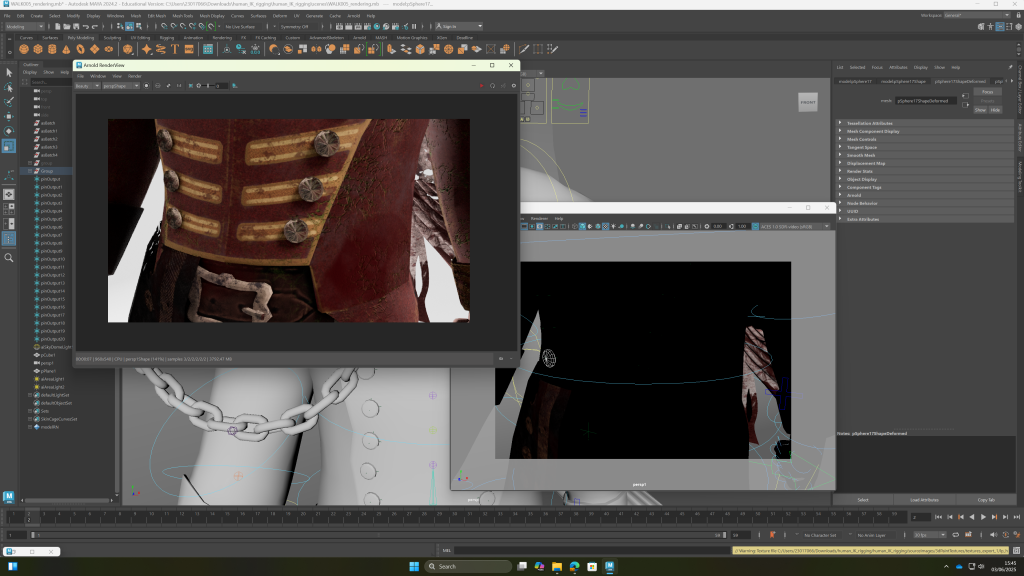
textures applied but i will need to change the lighting and settings to make it look good as everything looks a lot darker than in substance painter
the darkness of the textures in the render viewport might be due to the non planar faces
changing lighting helped it. the buttons aren’t connected to the texture. when i try i get this error: // Warning: line 1: Cannot add the following items to the set since the set has restrictions on membership: pSphere16
i realised its because the uvs are in the wrong place. i will copy attributes from the one that is UV’d correctly and hopefully i can then apply the texture
i transferred the attributes. also realised why it was black in substance painter- because the UV was inverted (showing as red not blue in uv editor). however it looks fine in maya
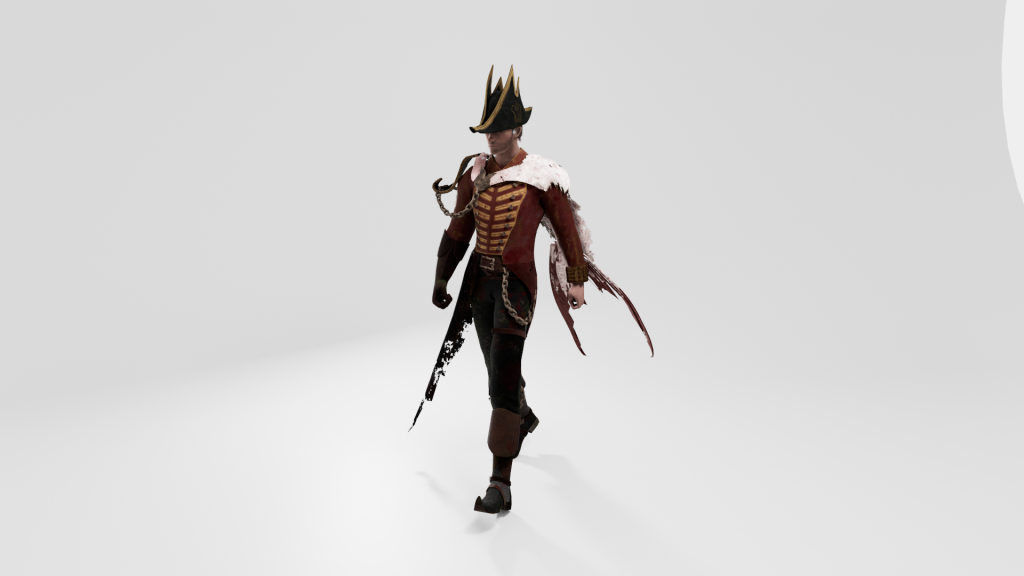
one of the animation frames rendered:
textures wouldn’t transfer over to other animation maya files even though they were set in same project. solution was to go back to walk cycle animation, select and export all materials in hypershade, go to hypershader of other animation, import them, then reassign all the objects of the character to the textures i just imported. this was much faster than i would have been to rebuild all the materials
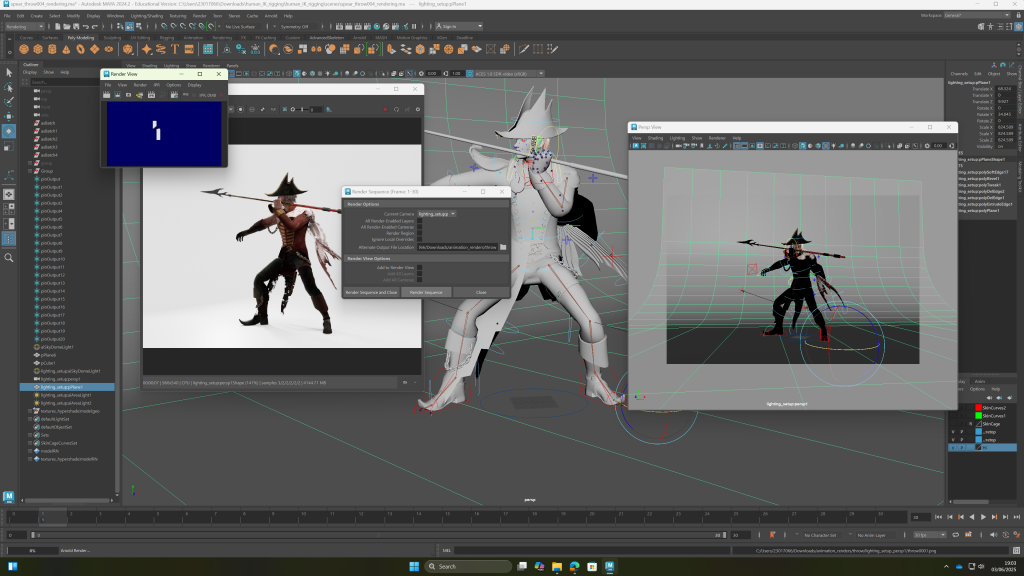
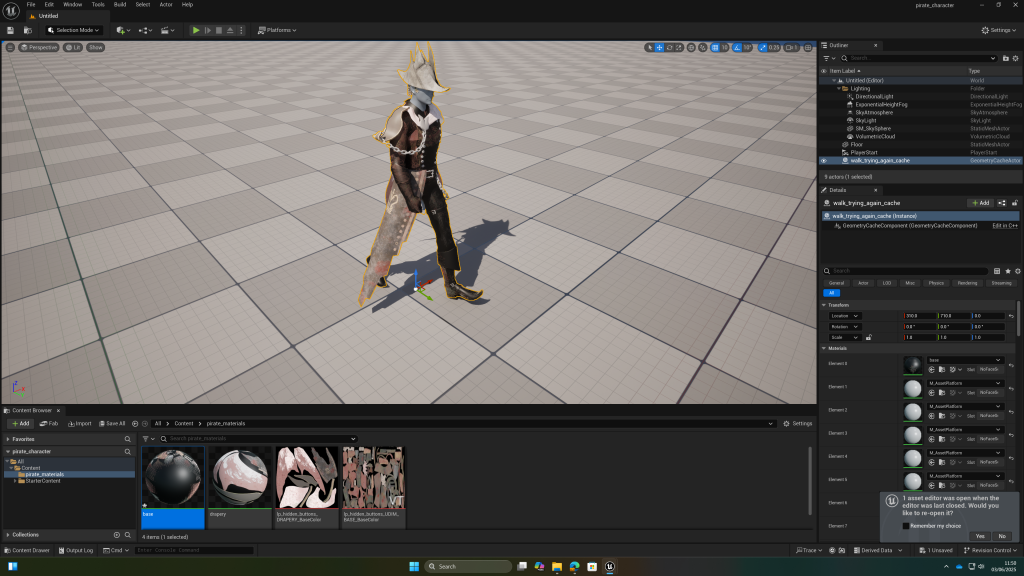
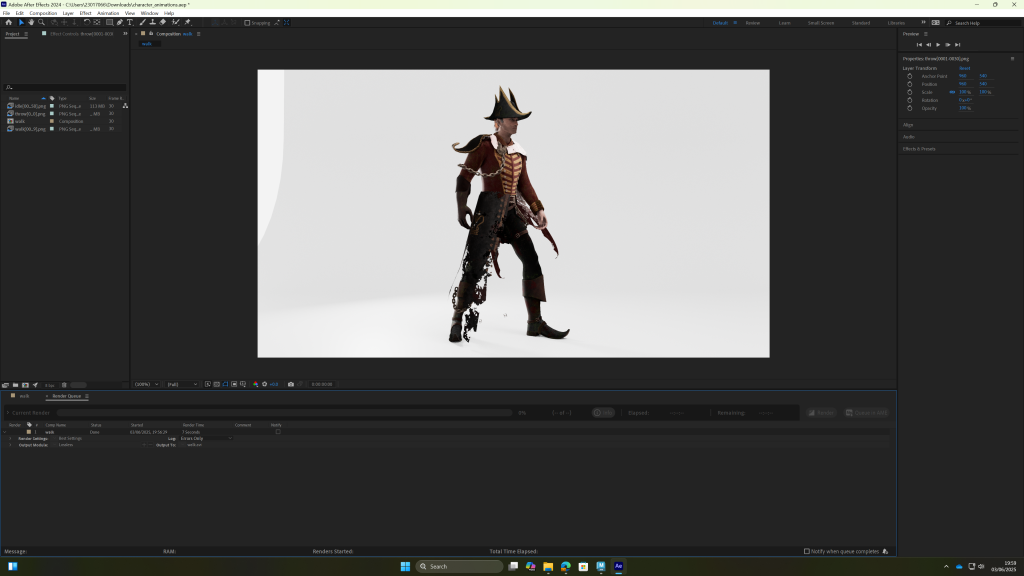
rendered the avi file in after effects. realised at this point the walkcycle still has a placeholder cube and the idle pose has buckles from the model that transferred over with the textures for some reason. there’s no time to render it again. also for the spear throw animation i lost a save where i had animated the cape and flag to follow the characters movement
animations video:
Leave a Reply